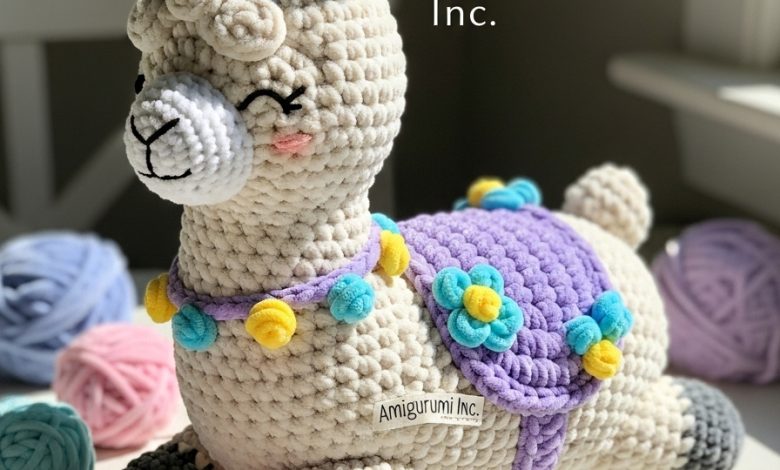
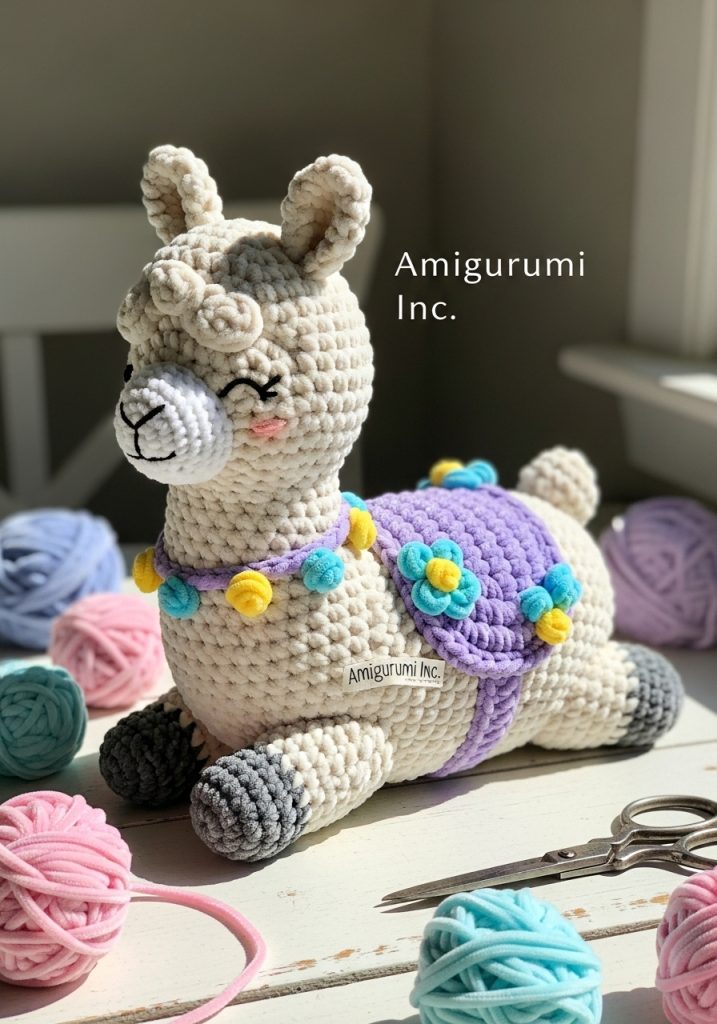
Craft Lulubell, a 14cm velvet llama full of charm. This step-by-step crochet project teaches chenille yarn mastery for the softest results imaginable.
My dearest maker, invite tranquility into your hands today. We are working with the cloud-like texture of velvet yarn to bring Lulubell to life. She is not just a toy; she is a tactile experience, a gentle friend who demands we slow down and feel every stitch. Let us begin this journey of softness.
About This Creation & Angle
Velvet yarn, while incredibly plush, has a reputation for being elusive. It hides its stitches, asking the artisan to trust their fingers more than their eyes. This project is designed specifically to help you conquer chenille yarn. The shapes are organic and forgiving, allowing the texture to shine without demanding complex stitch definition. Lulubell is the perfect introduction to “blind” crocheting, resulting in a premium, store-quality plush that feels as expensive as it looks.
Project Snapshot:
📊 Difficulty: Intermediate (Due to yarn texture)
⏰ Est. Time: 4-5 Hours
📏 Size: Approx. 14cm tall
“Velvet yarn forgives uneven tension but demands you feel for the loops. Trust your hands.” — Patricia
Materials & Tools Needed
🧶 Yarn: Super Bulky (Weight 6) Chenille/Velvet yarn. Colors needed: Cream (Main), Charcoal (Hooves), Lavender (Saddle), Pale Yellow & Baby Blue (Flowers), White (Muzzle).
🪡 Hook: 4.5mm (We use a smaller hook to prevent “worming,” where loops escape).
✨ Other Materials: 12mm Safety Eyes, Black embroidery thread (facial features), Polyester fiberfill, Stitch markers, Yarn needle with a large eye.
Abbreviations & Stitches Used
ch: chain
sl st: slip stitch
sc: single crochet
inc: increase (2 sc in one st)
dec: decrease (sc 2 together—invisible decrease recommended)
st(s): stitch(es)
BLO: back loop only
The Complete Lulubell Pattern
Component 1: The Head (Cream Velvet)
We begin at the nose and work backward to the back of the head.
Round 1: 6 sc in a magic ring (6)
Round 2: inc in every st (12)
Round 3: (sc 1, inc) x 6 (18)
Round 4: (sc 2, inc) x 6 (24)
Round 5: (sc 3, inc) x 6 (30)
Rounds 6–12: sc in each st around (30) Place safety eyes between Round 9 and 10, approx 5 sts apart.
Round 13: (sc 3, dec) x 6 (24)
Round 14: (sc 2, dec) x 6 (18) Start stuffing firmly.
Round 15: (sc 1, dec) x 6 (12)
Round 16: dec x 6 (6)
Fasten off and weave in the tail.
Component 2: The Muzzle (White Velvet)
This piece adds the necessary dimension to the face.
Round 1: Chain 5. Start in 2nd ch from hook. inc, sc 2, 3 sc in last ch. Turn to other side of chain, sc 3 (10)
Round 2: inc x 2, sc 2, inc x 3, sc 2, inc (16)
Rounds 3–4: sc in each st around (16)
Fasten off, leaving a long tail for sewing. Embroider a ‘Y’ shape nose and mouth with black thread before sewing to the head.
Component 3: The Ears (Make 2 – Cream)
Tall and expressive.
Round 1: 4 sc in magic ring (4)
Round 2: (sc 1, inc) x 2 (6)
Round 3: (sc 2, inc) x 2 (8)
Rounds 4–7: sc in each st around (8)
Round 8: (sc 2, dec) x 2 (6)
Flatten the ear and sc across the bottom to close. Do not stuff. Pinch the bottom slightly when sewing to the head for a curved shape.
Component 4: The Neck & Body (Cream)
Worked in an L-shape. We start at the neck base and work down, then extend for the back.
Round 1: 18 ch, join to first ch to form a ring (18)
Rounds 2–8: sc in each st around (18) This forms the neck.
Round 9: (sc 2, inc) x 6 (24)
Round 10: (sc 3, inc) x 6 (30)
Rounds 11–22: sc in each st around (30) The body elongates here.
Round 23: (sc 3, dec) x 6 (24)
Round 24: (sc 2, dec) x 6 (18) Stuff firmly, ensuring the neck is very stiff to support the head.
Round 25: (sc 1, dec) x 6 (12)
Round 26: dec x 6 (6)
Close hole and fasten off.
Component 5: The Legs (Make 4)
Start with Charcoal for hooves.
Round 1: 6 sc in magic ring (Charcoal) (6)
Round 2: inc in every st (12)
Round 3: sc in each st around (12)
Change to Cream yarn.
Rounds 4–7: sc in each st around (12)
Stuff lightly. Fasten off, leaving a tail.
Component 6: The Tail (Cream)
Round 1: 5 sc in magic ring (5)
Round 2: sc in each st around (5)
Fasten off. Do not stuff.
Component 7: The Saddle (Lavender)
Row 1: Ch 11. Sc in 2nd ch from hook and across. Turn (10)
Rows 2–6: Ch 1, sc across. Turn (10)
Border: Sc evenly around the entire rectangle, placing 3 sc in each corner to keep them flat. Join with sl st.
Component 8: The Flowers (Make 1 Blue, 1 Yellow)
In a magic ring: (Ch 2, dc 2, ch 2, sl st into ring) x 5.
Tighten ring to form a 5-petal flower.
Assembly & Final Touches
- Face: Sew the muzzle onto the lower half of the head. Attach ears at the crown, spaced 4 rounds apart. Embroider a small pink cheek or blush line near the eye.
- Body: Sew the head securely to the neck opening. This is the most crucial join; go around twice to prevent wobbling.
- Stance: Pin the four legs to the underside of the body. The front legs should be under the chest, and the back legs slightly further apart for stability. Sew firmly.
- Accessories: Sew the flowers onto the saddle first, then stitch the saddle onto the llama’s back using the Lavender yarn.
Tips & FAQs
Q: My velvet yarn is “worming” (loops popping out). Why? A: This happens if your tension is too loose. Drop down a hook size. The fabric should be stiff, not draped.
Q: I can’t see my stitches! A: This is normal! Use your fingers to feel the “V” of the next stitch. Place a stitch marker in the first stitch of every round so you don’t get lost.
A Final Word
You have tamed the challenging nature of velvet and created something truly comforting. Lulubell is ready to sit on a shelf or be gifted to someone who needs a hug. Remember, the slight imperfections in handmade velvet items are merely proof of their humanity.