There is something profoundly touching about a creature so small dreaming of a sky so vast. Today, we are not merely looping yarn; we are crafting a companion for the dreamers. This little fox, with his oversized head and hopeful gaze, reminds us that courage often comes in the smallest packages. Whether you are crafting him for a nursery shelf or as a desk-side muse, let every stitch be a wish for adventure.
About The Chibi Fox (Aviator Edition)
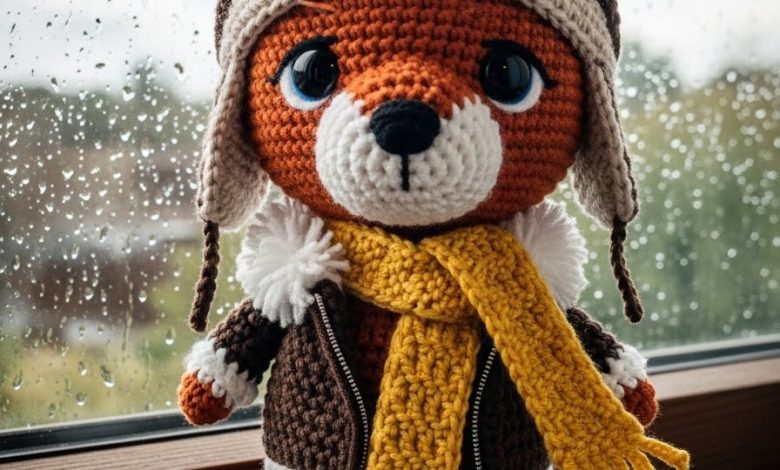
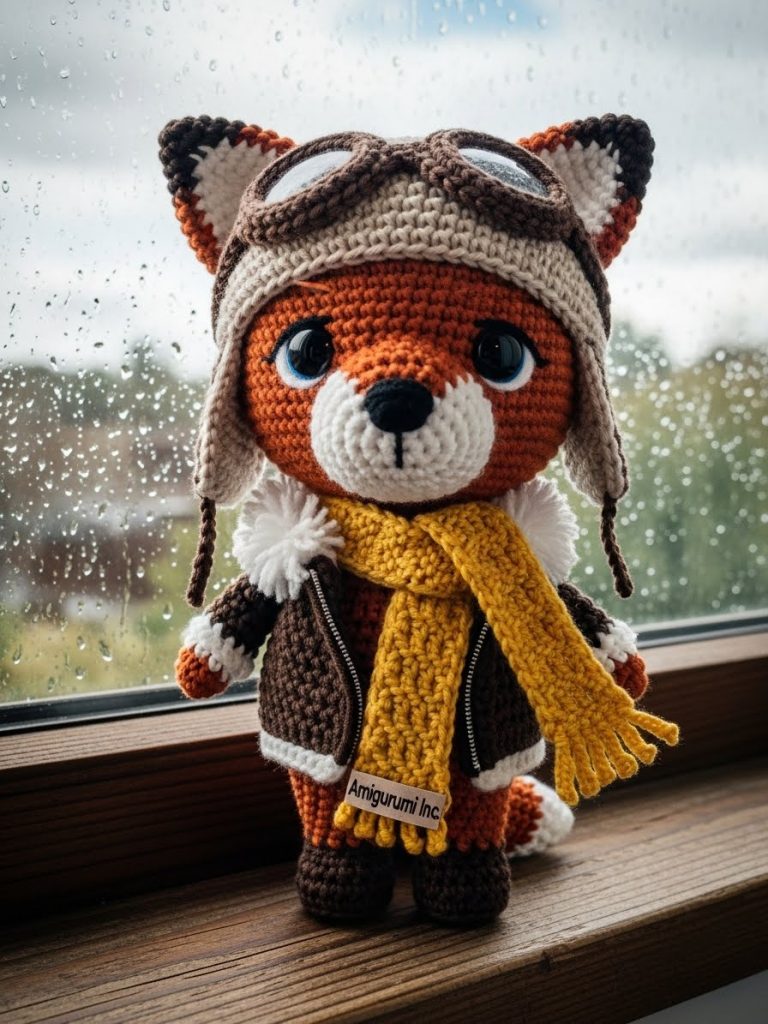
This is not your ordinary forest dweller. Our “Sky-Bound Dreamer” captures the essence of early aviation spirit, softened by the undeniable cuteness of chibi proportions. His massive, round head and tiny body create that classic “toddler” look that tugs at the heartstrings. He wears a removable, textured bomber jacket, a snug flight cap, and crocheted goggles—all handcrafted from yarn. The defining feature is his muzzle: a separate, fluffy white patch that gives his face depth and personality.
Project Snapshot:
📊 Difficulty: Intermediate
⏰ Est. Time: 6-8 Hours
📏 Size: 20cm (Standing)
“The beauty of amigurumi lies in the details—the tilt of the ear, the snugness of the jacket. Take your time.” — Patricia Poltera
Materials & Tools Needed
🧶 Yarn: Matte Cotton (DK/Light Worsted) in Fox Orange, Dark Brown (Jacket), Beige (Cap), Grey (Goggles), Mustard Yellow (Scarf).
🧶 Special Yarn: White Fluffy/Eyelash yarn for the muzzle patch and jacket collar.
🪡 Hook: 2.5mm or 2.75mm (keep stitches tight!)
✨ Other Materials: 12mm Safety Eyes, Polyester stuffing, Yarn needle, Stitch markers.
Abbreviations & Stitches Used
ch: chain
sl st: slip stitch
sc: single crochet
hdc: half double crochet
inc: increase (2 sc in one st)
dec: decrease (invisible decrease preferred)
BLO: back loop only
The Complete Chibi Fox Pattern
The Architect’s Head (Fox Orange)
We begin with the focal point. Stuff firmly as you go.
🧶 R1: 6 sc in Magic Ring (6)
🧶 R2: Inc in every st (12)
🧶 R3: (1 sc, inc) x 6 (18)
🧶 R4: (2 sc, inc) x 6 (24)
🧶 R5: (3 sc, inc) x 6 (30)
🧶 R6: (4 sc, inc) x 6 (36)
🧶 R7: (5 sc, inc) x 6 (42)
🧶 R8: (6 sc, inc) x 6 (48)
🧶 R9: (7 sc, inc) x 6 (54)
🧶 R10-20: Sc in each st around (54) Place safety eyes between R16 and R17, about 10 stitches apart.
🧶 R21: (7 sc, dec) x 6 (48)
🧶 R22: (6 sc, dec) x 6 (42)
🧶 R23: (5 sc, dec) x 6 (36)
🧶 R24: (4 sc, dec) x 6 (30)
🧶 R25: (3 sc, dec) x 6 (24)
🧶 R26: (2 sc, dec) x 6 (18)
➡️ Fasten off, leaving a long tail for sewing.
The Fluffy Muzzle Patch (White Fluffy Yarn)
This critical piece is worked flat and sewn onto the face.
🧶 R1: Ch 7, turn.
🧶 R2: Sc in 2nd ch from hook, sc in next 4, 3 sc in last ch. Turn to work other side of ch. Sc 4, 2 sc in last st. (14)
🧶 R3: Inc, sc 4, inc x 3, sc 4, inc x 2. (20)
🧶 R4: Sc around to smooth the shape.
➡️ Fasten off. Sew this patch onto the lower center of the face, encompassing the eye area slightly. Attach the nose button in the center of this patch.
The Stubby Body (Fox Orange)
🧶 R1: 6 sc in Magic Ring (6)
🧶 R2: Inc in every st (12)
🧶 R3: (1 sc, inc) x 6 (18)
🧶 R4: (2 sc, inc) x 6 (24)
🧶 R5: (3 sc, inc) x 6 (30)
🧶 R6-10: Sc in each st around (30)
🧶 R11: (3 sc, dec) x 6 (24)
🧶 R12: (2 sc, dec) x 6 (18)
➡️ Fasten off. Stuff firmly.
The Aviator Jacket (Dark Brown)
Worked flat in rows to create a removable garment.
🧶 R1: Ch 25 (fits around the neck/shoulders).
🧶 R2: Sc in each ch across (24). Ch 1, turn.
🧶 R3: (2 sc, inc) across (32).
🧶 R4: (Armholes) Sc 5, ch 4 (skip 6 sts), sc 10, ch 4 (skip 6 sts), sc 5.
🧶 R5: Sc across, working into the chains (28).
🧶 R6-10: Sc in each st across.
➡️ Collar: Join Fluffy White yarn at the neck edge. Sc across for the shearling look.
The Flight Cap (Beige)
🧶 R1-7: Follow Head pattern R1-R7 (42).
🧶 R8-12: Sc in each st around (42).
➡️ Ear Flaps: Locate sides. Join yarn, sc 6 rows back and forth on 8 stitches. Decrease to a point. Repeat on other side.
The Goggles (Grey & Light Blue)
🧶 Lenses (Make 2): With Blue, 6 sc in MR. Change to Grey. (Inc) x 6 (12). Fasten off.
🧶 Strap: Ch 40 (or length to fit around cap), sc back down. Sew lenses to the center of the strap.
Assembly & Final Touches
- Face First: Sew the Fluffy Muzzle Patch securely. It should sit just below the eyes. Embroider a tiny mouth if desired.
- Body Building: Sew the heavy head to the body. Support the neck with extra stuffing to prevent wobbling.
- Dressing: Put the jacket on the fox. Place the flight cap on the head (you may sew it down for stability or leave it removable). Position the goggles on the forehead of the cap.
- The Scarf: Wrap the yellow chain/strip comfortably around the neck.
Tips & FAQs
Q: My head is wobbling!
A: The Chibi head is heavy. Use a wooden dowel or a rolled-up piece of felt inside the neck for support.
Q: Can I brush the muzzle?
A: Yes! If using acrylic or wool, use a pet slicker brush to make the white patch even fluffier.
A Final Word
There you have it—a tiny pilot ready for the shelf or a child’s embrace. I hope the rhythm of these stitches brought you peace today. Until our next creation, keep your hook moving and your heart warm.
Yours in creativity,
Patricia