
From the Desk of Patricia
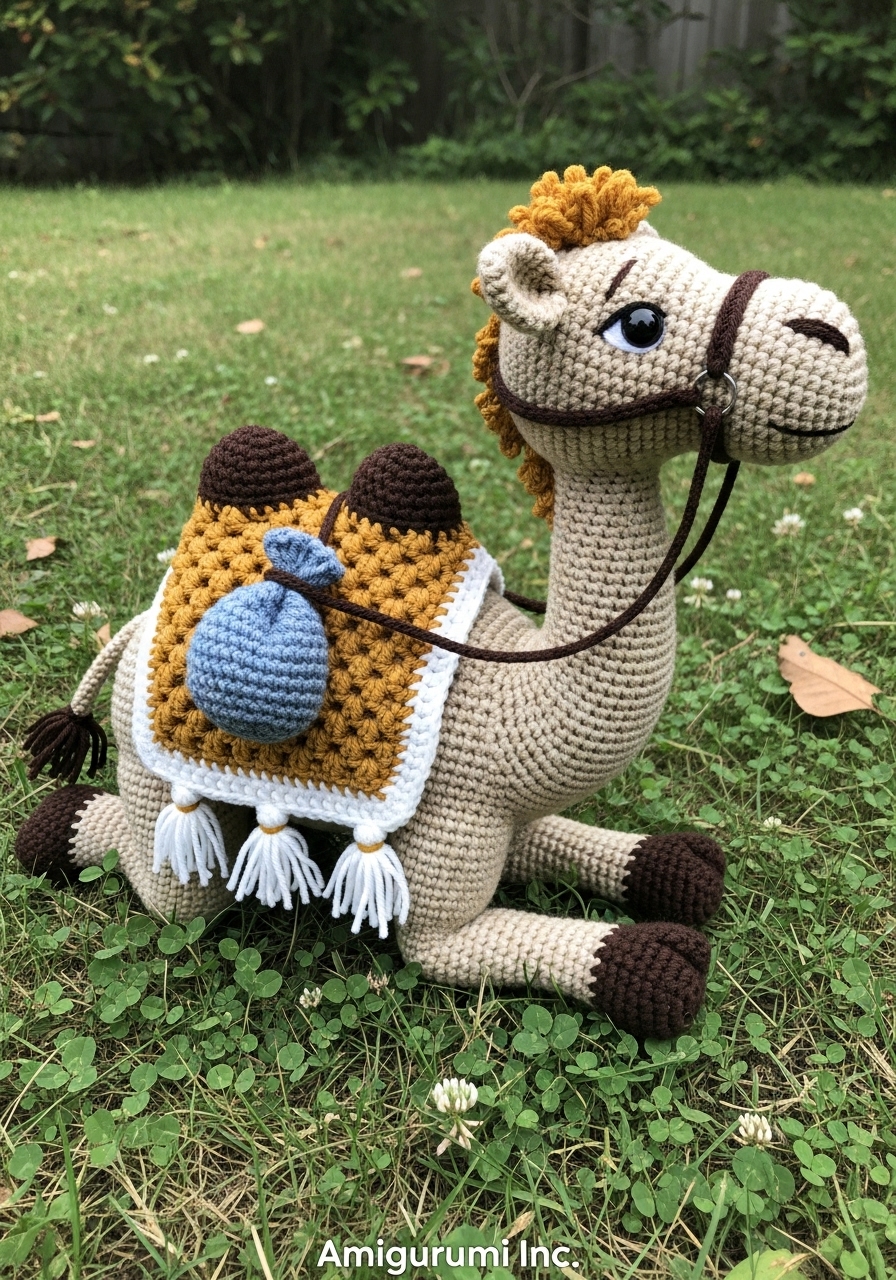
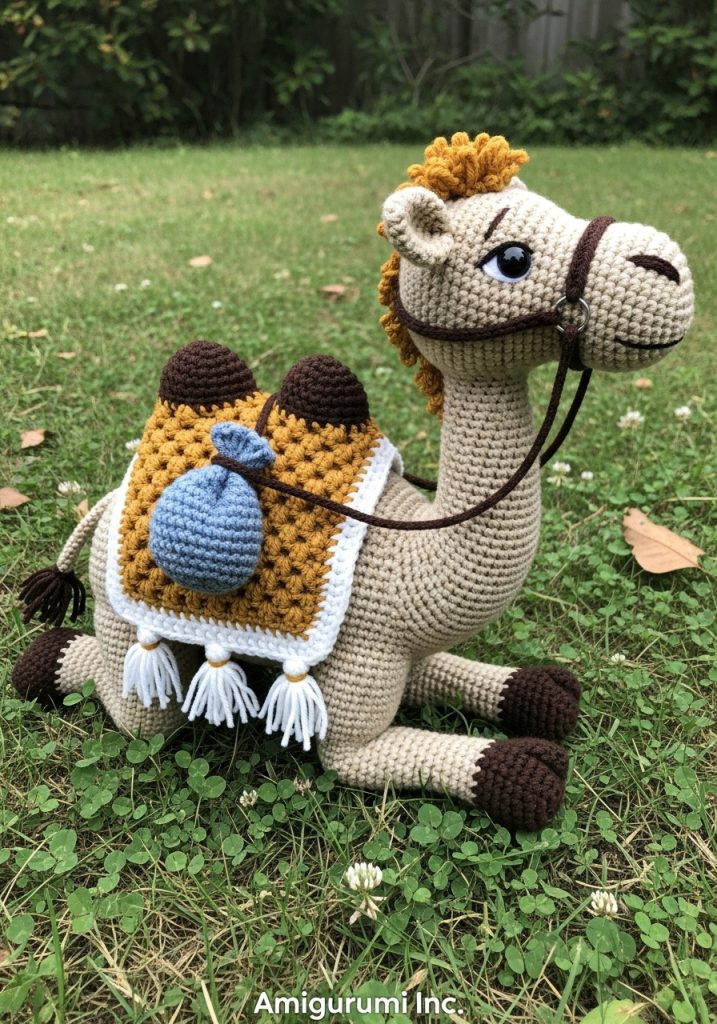
My dear creator, today we honor the patience of the desert traveler. There is a quiet majesty in a camel at rest, and capturing that specific, heavy posture requires us to move beyond simple tubes and spheres. Caspar is not just a toy; he is a keeper of stories, designed to sit faithfully under a tree or upon a mantle, bringing warmth to the winter chill.
About This Creation: Sculpting the Kneeling Pose
Many amigurumi rely on standing legs, which are straightforward but often unstable. Caspar is different. We are using Strategic Joint Shaping to permanently lock him into a kneeling position. This creates a lower center of gravity and a “heavy,” realistic flop that feels incredibly satisfying to hold. We are also contrasting the smooth, tight stitches of the camel’s coat with the rich, bumpy texture of the ceremonial saddle to create tactile interest.
Project Snapshot
📊 Difficulty: Intermediate (Requires precise counting for leg shaping)
⏰ Est. Time: 12–15 Hours
📏 Size: Approx. 20cm Tall x 22cm Long
“The magic is in the knee. If we shape the joint correctly, the story tells itself.” — Patricia
Materials & Tools Needed
🧶 Yarn A (Camel Body): Worsted Weight (4) in Sand or Camel Beige (approx. 180g)
🧶 Yarn B (Saddle): Worsted Weight (4) in Mustard Gold
🧶 Yarn C (Hooves/Bridle): Worsted Weight (4) in Dark Coffee Brown
🧶 Yarn D (Sack): Worsted Weight (4) in Muted Blue
🧶 Yarn E (Trim): Worsted Weight (4) in Cream/White
🪡 Hook: 3.5mm (E-4) for a tight gauge
✨ Other Materials: 12mm Safety Eyes, Polyester Fiberfill, Yarn Needle, Stitch Markers, Cardboard (for flat hoof bottoms)
Abbreviations & Stitches Used
ch: chain
sl st: slip stitch
sc: single crochet
inc: increase (2 sc in one st)
dec: decrease (sc 2 together)
hdc: half double crochet
Bobble: (Yarn over, insert hook, pull up loop, yarn over, pull through 2 loops) x 4 times in same stitch, yarn over and pull through all loops.
The Complete Caspar Project
Component 1: The Head Make 1 in Yarn A. Stuff firmly as you go.
R1: 6 sc in magic ring (6)
R2: inc in each st around (12)
R3: (sc 1, inc) x 6 (18)
R4–R6: sc in each st around (18) — This forms the muzzle
R7: (sc 2, inc) x 6 (24)
R8: (sc 3, inc) x 6 (30)
R9: (sc 4, inc) x 6 (36) — Forehead expansion
R10–R15: sc in each st around (36)
R16: (sc 4, dec) x 6 (30)
R17: (sc 3, dec) x 6 (24) — Insert safety eyes between R8 and R9, about 14 stitches apart
R18: (sc 2, dec) x 6 (18)
R19: (sc 1, dec) x 6 (12)
R20: dec around (6). Fasten off, leave tail to close.
Component 2: The Neck Make 1 in Yarn A. This must be stuffed very firmly to support the head.
R1: Chain 18, join to form a circle.
R2–R15: sc in each st around (18) — Work in a spiral
R16: (sc 5, inc) x 3 (21)
R17–R20: sc in each st around (21)
R21: (sc 6, inc) x 3 (24)
R22: sc in each st around (24). Fasten off, leaving a very long tail for sewing.
Component 3: The Body Make 1 in Yarn A. The “bean” shape.
R1: 6 sc in magic ring (6)
R2: inc in each st around (12)
R3: (sc 1, inc) x 6 (18)
R4: (sc 2, inc) x 6 (24)
R5: (sc 3, inc) x 6 (30)
R6: (sc 4, inc) x 6 (36)
R7: (sc 5, inc) x 6 (42)
R8: (sc 6, inc) x 6 (48)
R9–R25: sc in each st around (48) — Elongated body section
R26: (sc 6, dec) x 6 (42)
R27: (sc 5, dec) x 6 (36)
R28: (sc 4, dec) x 6 (30)
R29: (sc 3, dec) x 6 (24)
R30: (sc 2, dec) x 6 (18)
R31: (sc 1, dec) x 6 (12)
R32: dec around (6). Fasten off and close.
Component 4: The Hump Make 1 in Yarn A.
R1: 6 sc in magic ring (6)
R2: inc in each st around (12)
R3: (sc 1, inc) x 6 (18)
R4: (sc 2, inc) x 6 (24)
R5–R8: sc in each st around (24)
R9: (sc 3, inc) x 6 (30)
R10–R12: sc in each st around (30). Fasten off. Stuff lightly; sew to the center of the back.
Component 5: The Kneeling Front Legs (x2) Make 2. Start with Yarn C (Dark Brown).
R1: 6 sc in magic ring (6)
R2: inc in each st around (12) — Insert cardboard circle here for flat hoof
R3: In Back Loops Only, sc around (12)
R4: Change to Yarn A, sc around (12)
R5–R10: sc in each st around (12) — Lower leg
R11 (The Elbow): 4 hdc, 8 sc (12) — The hdc creates the outer bend
R12: 4 hdc, 8 sc (12)
R13: sc in each st around (12)
R14: Flatten the opening and sc through both layers to close (6 sc). — This flat top will be sewn to the side of the body.
Component 6: The Folded Back Legs (x2) Make 2. Start with Yarn A (Thigh).
R1: 6 sc in magic ring (6)
R2: inc in each st around (12)
R3: (sc 1, inc) x 6 (18)
R4: (sc 2, inc) x 6 (24)
R5–R7: sc in each st around (24) — The thigh bulk
R8: (sc 2, dec) x 6 (18)
R9: (sc 1, dec) x 6 (12)
R10–R15: sc in each st around (12) — The lower leg extending forward
R16: Change to Yarn C, sc around (12)
R17: sc around (12)
R18: dec around (6). Fasten off and close.
Component 7: The Ceremonial Saddle Blanket Make 1 in Yarn B (Mustard).
Row 1: Ch 21, turn.
Row 2: sc in 2nd ch from hook and each ch across (20). Ch 1, turn.
Row 3: sc in each st across (20). Ch 1, turn.
Row 4: (sc 3, Bobble st) repeat across (5 bobbles). Ch 1, turn.
Row 5–15: sc in each st across (20). Ch 1, turn.
Row 16: (sc 3, Bobble st) repeat across. Ch 1, turn.
Row 17–18: sc in each st across. Fasten off.
Artisan’s Note: Use Yarn E (Cream) to surface crochet or embroider two horizontal lines across the rows for detail.
Component 8: Accessories
The Bridle: In Yarn C, ch 30 (measure around muzzle), sl st to join. Ch 20 (measure to go behind ears), sl st to opposite side of the loop.
The Blue Sack: In Yarn D. R1: 6 sc in MR. R2: inc around (12). R3-R6: sc around. R7: (sc 2, dec) x 3 (9). Stuff. R8: dec around until closed.
Tassels: Cut 3 strands of Yarn A (or E), 10cm long. Fold in half, loop through edge of Saddle Blanket, pull ends through loop. Trim to 2cm. Repeat for 4 corners.
Assembly & Final Touches
- Body & Hump: Sew the Hump to the center of the Body first.
- Legs:
- Sew Front Legs to the front-side of the body. Angle them so the “hoof” points backward/under.
- Sew Back Legs to the rear-side. The Thigh (bulbous part) goes high, the hoof points forward.
- Head & Neck: Sew Head to the narrower end of the Neck. Sew the wider base of the Neck to the front of the Body.
- Dressing: Place the Saddle Blanket over the hump. Tack it down with a few stitches so it doesn’t slide. Sew the Blue Sack to the rear flank.
- Face: Embroider a “Y” shape on the muzzle for the nose/mouth using Dark Brown yarn. Place the Bridle on the head.
Tips & FAQs
Q: My camel’s neck keeps flopping. A: This is the most common sorrow! You must stuff the neck until it feels as hard as an apple. I often insert a rolled-up piece of felt inside the neck for a “spine.”
Q: Can I brush the yarn? A: Yes! Using a pet slicker brush on the body (Yarn A) creates a lovely fuzzy “camel hair” texture. Do not brush the saddle.
A Final Word
You have built a creature of endurance and grace. When you place Caspar upon your shelf, know that his stillness is a testament to your skill. May he bring a quiet, golden warmth to your home this season.
Yours in creation, Patricia