
My fellow artisan, welcome to the workbench. We are about to breathe life into a legend—a creature of soft fur and gentle spirit. This pattern is designed to guide your hands through every stitch, ensuring your little guardian looks as soulful as the one in your memories. Let patience be your needle and joy be your thread.
About This Creation & Angle
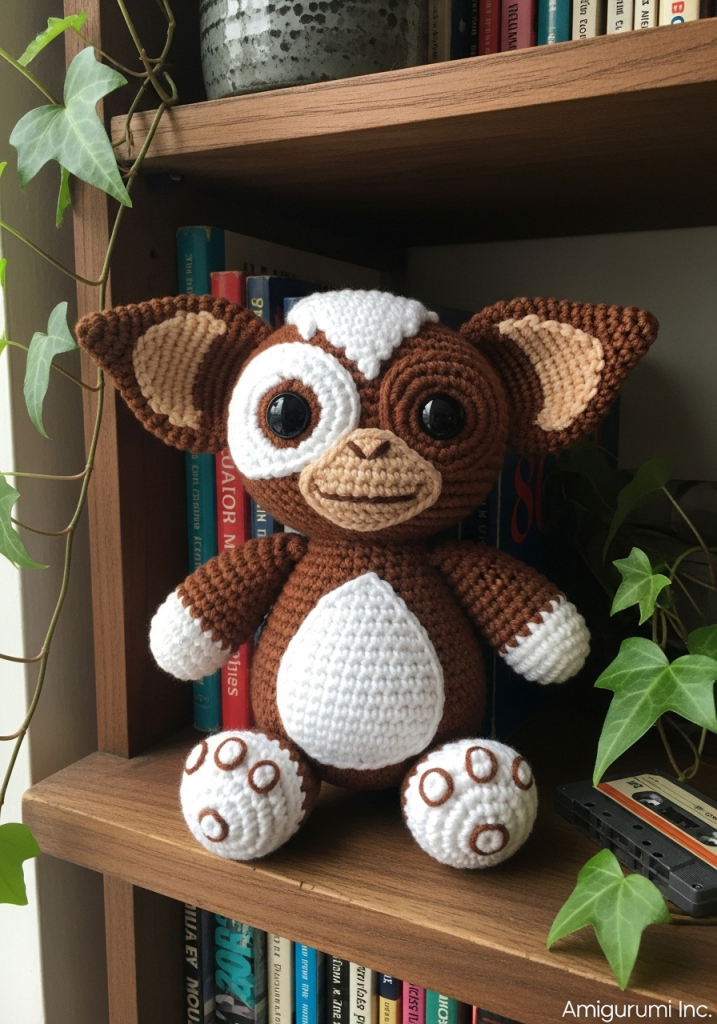
There is a profound comfort in the icons of our past. This project is not merely a toy; it is a stitched memory, a “Gentle Guardian” for your shelf or a loved one’s embrace. By combining the textured warmth of classic yarn with the exaggerated features of the “Baby Schema”—low, wide-set eyes and oversized ears—we tap into a universal affection. This piece stands out in the marketplace or on social feeds because it balances pop-culture recognition with the timeless aesthetic of an heirloom doll.
Project Snapshot:
📊 Difficulty: Intermediate (Requires color changing)
⏰ Est. Time: 6 – 8 Hours
📏 Size: Approx. 16cm – 20cm (6-8 inches) tall
“We do not just craft loops; we craft character. The soul of this little one lies in the placement of the eyes and the span of the ears.” — Patricia
Materials & Tools Needed
🧶 Yarn: Worsted Weight (Category 4) in Warm Brown (approx. 70g) and Bright White (approx. 40g). A small amount of Beige for the muzzle.
🪡 Hook: 2.75mm or 3.0mm (to ensure tight stitches and no gaps)
✨ Other Materials: 16mm Safety Eyes (Black), Polyester Fiberfill, Tapestry Needle, Stitch Markers, Sewing Pins.
Abbreviations & Stitches Used
ch: chain
sl st: slip stitch
sc: single crochet
inc: increase (2 sc in one stitch)
dec: decrease (sc 2 together)
BLO: back loop only
The Complete Gentle Guardian Pattern
The Head (Start with Brown)
Work in continuous spiral.
R1: 6 sc in Magic Ring (6)
R2: inc in each st (12)
R3: 🧶 (1 sc, inc) x 6 (18)
R4: (2 sc, inc) x 6 (24)
R5: (3 sc, inc) x 6 (30)
R6: 🧶 (4 sc, inc) x 6 (36)
R7: (5 sc, inc) x 6 (42)
R8: (6 sc, inc) x 6 (48)
R9 – R15: sc in each st around (48) Note: For the white eye patch, switch to White yarn for 10 stitches on rounds 10-14, centered on the front face.
R16: (6 sc, dec) x 6 (42)
R17: 🧶 (5 sc, dec) x 6 (36)
R18: (4 sc, dec) x 6 (30)
R19: (3 sc, dec) x 6 (24)
Begin stuffing the head firmly. Insert safety eyes between R13 and R14, spaced about 7 stitches apart.
R20: (2 sc, dec) x 6 (18)
R21: dec around (9)
Fasten off, weave in end.
The Muzzle (Beige)
R1: Ch 6.
R2: sc in 2nd ch from hook, sc in next 3, 3 sc in last ch. Rotate to work on other side. sc in next 3, 2 sc in last st (12)
R3: 🧶 inc, 3 sc, inc x 3, 3 sc, inc x 2 (18)
R4: sc around (18)
Fasten off, leaving a long tail for sewing. Embroider a small nose and mouth before attaching.
The Ears (Make 2 – Brown & Beige)
The ears are the signature. We want them wide and expressive.
R1: Ch 2, 4 sc in 2nd ch from hook. Turn. (4)
R2: ch 1, inc in first, 2 sc, inc in last. Turn. (6)
R3: ch 1, inc, 4 sc, inc. Turn. (8)
R4: 🧶 ch 1, inc, 6 sc, inc. Turn. (10)
R5 – R7: ch 1, sc across (10)
R8: ch 1, dec, 6 sc, dec. Turn. (8)
Edging: sc evenly around the entire triangle shape to smooth the edges. Fasten off with a long tail.
The Body (Begin with White)
R1: 6 sc in Magic Ring (6)
R2: inc in each st (12)
R3: (1 sc, inc) x 6 (18)
R4: 🧶 (2 sc, inc) x 6 (24)
R5: (3 sc, inc) x 6 (30)
R6 – R9: sc around (30)
R10: Change to Brown sc around (30)
R11: (3 sc, dec) x 6 (24)
R12 – R13: sc around (24)
R14: 🧶 (2 sc, dec) x 6 (18)
R15: sc around (18)
Fasten off, leave tail. Stuff firmly.
The Arms (Make 2 – Start White, switch to Brown)
R1: 5 sc in MR (White) (5)
R2: inc around (10)
R3: sc around (10)
R4: Change to Brown sc around (10)
R5 – R7: sc around (10)
R8: 🧶 (3 sc, dec) x 2 (8)
Fasten off, leave tail.
The Feet (Make 2 – White)
R1: 6 sc in MR (6)
R2: inc around (12)
R3: (1 sc, inc) x 6 (18)
R4 – R5: sc around (18)
R6: (1 sc, dec) x 6 (12)
R7: dec around (6)
Fasten off, close hole. Embroider 3 small brown “toes” on each foot.
Assembly & Final Touches
- ➡️ Face Alignment: Pin the muzzle between the eyes, slightly lower than center. Sew in place.
- ➡️ Ear span: Sew the ears on R7-R10 of the head. Curve them slightly forward so they “cup” the face.
- ➡️ Body: Sew the head to the body.
- ➡️ Limbs: Attach arms at the neck seam. Sew feet to the bottom front of the body so the Mogwai sits stably.
Tips & FAQs
Q: Can I brush the yarn? A: Absolutely. Using a pet slicker brush on the brown yarn after stitching creates a fantastic “furry” texture that adds realism.
Q: My ears are floppy. A: Ensure your stitches are tight. You can also starch them or sew a doubled strand of yarn along the back edge for stability.
A Final Word
You have done it. You have taken a simple strand of fiber and spun it into a character with heart. Look at those eyes; you created that gaze. May this little guardian bring a smile to all who see him. Until we meet again at the drafting table.