Creativity is a language we speak not with words, but with our hands. Today, we are channeling that artistic spirit into our beloved Chibi Fox. We are transforming him into a “Tiny Impressionist,” a little painter ready to capture the beauty of the world, one stitch at a time.
This project is especially dear to my heart because it celebrates the messy, colorful joy of making. The little paint splatters on his smock are not mistakes; they are badges of honor! I hope this little artist brings a splash of color to your workspace and reminds you that every stitch is a stroke of genius.
Let us pick up our hooks and paint with yarn!
Warmly, Patricia
About The Chibi Fox (Tiny Impressionist Edition)
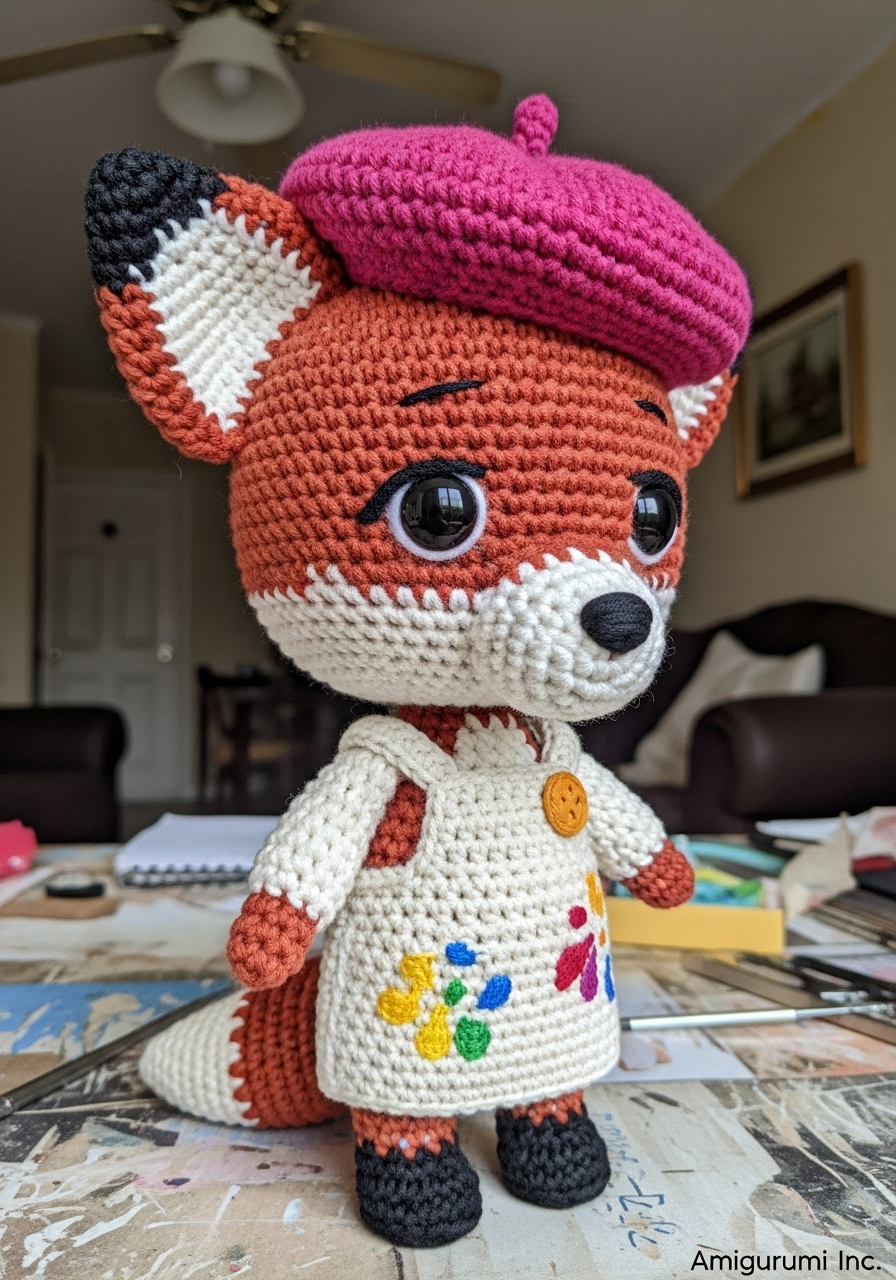
This variation takes our classic, big-headed Chibi Fox and dresses him for the studio. The star of the show is the texture contrast. We have the smooth, matte cotton of his orange fur, the cloud-like softness of his white muzzle, and the structured, defined stitches of his artist’s smock. The beret adds a touch of sophistication, while the tiny paintbrush makes him ready for action. It is a design that balances cuteness with a dash of bohemian flair.
Project Snapshot:
📊 Difficulty: Intermediate ⏰ Est. Time: 6-8 Hours 📏 Size: 20cm (Standing)
“Art is not what you see, but what you make others see. Let this little fox show the world your talent.”
Materials & Tools Needed
🧶 Yarn: Matte Cotton (DK or Sport weight) in Fox Orange, Cream (for Smock), Raspberry or Teal (for Beret), and Dark Brown (for paintbrush handle). 🧶 Feature Yarn: White Fluffy/Eyelash Yarn (for the muzzle patch). 🧶 Scraps: Blue, Yellow, Green, and Red yarn (for embroidering paint splatters). 🪡 Hook: 2.5mm (for body/clothes) and 3.0mm (for fluffy muzzle). ✨ Other Materials: 16mm Safety Eyes, Polyester stuffing, Tapestry needle, Stitch markers.

Abbreviations & Stitches Used
ch: chain sl st: slip stitch sc: single crochet hdc: half double crochet inc: increase (2 sc in one st) dec: decrease (sc 2 together) BLO: back loop only
The Complete Chibi Fox Pattern
The Chibi Head (Fox Orange) Work in continuous spirals.
🧶 R1: 6 sc in magic ring (6)
🧶 R2: inc in each st (12)
🧶 R3: (sc 1, inc) x 6 (18)
🧶 R4: (sc 2, inc) x 6 (24)
🧶 R5: (sc 3, inc) x 6 (30)
🧶 R6: (sc 4, inc) x 6 (36)
🧶 R7: (sc 5, inc) x 6 (42)
🧶 R8: (sc 6, inc) x 6 (48)
🧶 R9: (sc 7, inc) x 6 (54)
🧶 R10-R18: sc in each st around (54)
🧶 R19: (sc 7, dec) x 6 (48)
🧶 R20: (sc 6, dec) x 6 (42)
Insert safety eyes between R14 and R15, about 9 stitches apart.
🧶 R21: (sc 5, dec) x 6 (36)
🧶 R22: (sc 4, dec) x 6 (30)
🧶 R23: (sc 3, dec) x 6 (24)
🧶 R24: (sc 2, dec) x 6 (18)
Stuff the head firmly until round.
The Fluffy Muzzle Patch (White Fluffy Yarn) This is worked flat and sewn on. Use a slightly larger hook if the yarn is thick.
🧶 R1: ch 5, turn.
🧶 R2: sc in 2nd ch from hook, sc 2, 3 sc in last ch. Turn to work on the other side of ch: sc 2, 2 sc in last st. (10)
🧶 R3: inc, sc 2, inc x 3, sc 2, inc x 2. (16)
🧶 R4: (sc 1, inc), sc 2, (sc 1, inc) x 3, sc 2, (sc 1, inc) x 2. (22)
Fasten off, leaving a long tail for sewing.
The Artist’s Smock (Cream Cotton) Worked in rows to create a removable garment.
🧶 R1: ch 25 (measure against the fox’s body), turn.
🧶 R2: sc in 2nd ch from hook and each across (24).
🧶 R3: (sc 3, inc) across (30).
🧶 R4 (Armholes): sc 4, ch 4 (skip 6 sts), sc 10, ch 4 (skip 6 sts), sc 4 (26).
🧶 R5-R8: sc in each st around (26).
🧶 R9: (sc 12, inc) x 2 (28).
Fasten off. Use scrap yarn to embroider random “V” stitches in Blue, Yellow, and Red to look like paint splatters.
The Slouchy Beret (Raspberry or Teal)
🧶 R1: 6 sc in magic ring (6)
🧶 R2: inc in each st (12)
🧶 R3: (sc 1, inc) x 6 (18)
🧶 R4: (sc 2, inc) x 6 (24)
🧶 R5: (sc 3, inc) x 6 (30)
🧶 R6: (sc 4, inc) x 6 (36)
🧶 R7: (sc 5, inc) x 6 (42)
🧶 R8-R9: sc in each st around (42)
🧶 R10: (sc 5, dec) x 6 (36)
Fasten off. Sew a tiny “stalk” (ch 3) to the very center top.
The Tiny Paintbrush
🧶 Handle (Brown): Ch 4, sl st back down.
🧶 Bristles (Beige): Attach to the top of the handle, ch 2, puff stitch, fasten off.
Artisan’s Notes: The key to the “impressionist” look is imperfection. Don’t worry if the paint splatter embroidery is messy—that is the point! When placing the beret, tilt it to the side; it gives him so much more personality.
Assembly & Final Touches
➡️ Pin the Fluffy Muzzle Patch to the lower center of the face, just below the eyes. Sew in place securely.
➡️ Attach the small black nose button in the center of the fluffy patch.
➡️ Put the Smock on the body. You may need to add a tiny button to the back to close it.
➡️ Sew the Beret onto the head (or keep it removable if you prefer).
➡️ Stitch the Tiny Paintbrush to one of his hands so he is ready to create!
Tips & FAQs
Q: Can I use acrylic yarn for the smock? A: You can, but cotton gives that crisp, defined stitch definition that looks more like a real canvas smock.
Q: My fluffy yarn is hard to see! A: Feel for the stitches with your fingers rather than relying on your eyes. It gets easier with practice.
A Final Word
I hope this pattern brings out your inner artist. There is nothing quite like the feeling of creating something that didn’t exist before. Share your Tiny Impressionist Foxes with the world—I cannot wait to see what colors you choose!
Happy Stitching!