
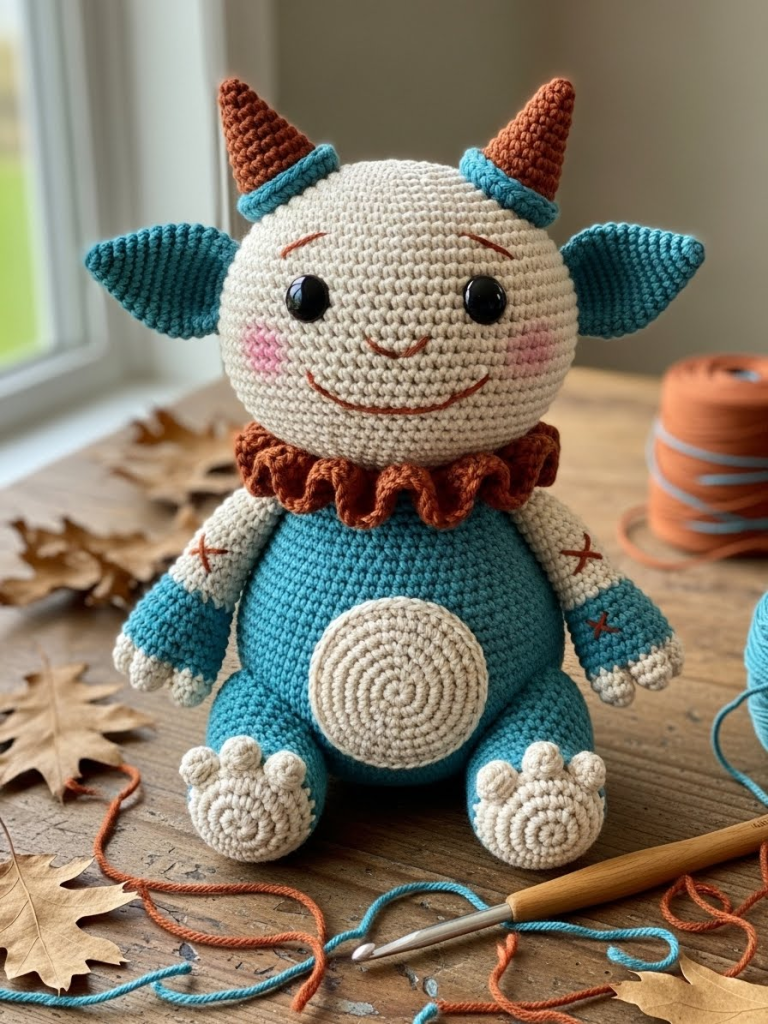
There is a particular magic in creating a creature that looks as though it just wandered in from the woods to sit by your tea cup. Olli is exactly that sort of friend. He is not merely a toy; he is a presence. I have designed him to be sturdy, soulful, and satisfying to hold. Let us pick up our hooks and bring this little guardian to life.
About This Creation: The Market Stall Charmer
We often struggle to find projects that strike the balance between “quick enough to finish” and “detailed enough to value high.” Olli solves this. His body shape is continuous, minimizing sewing, yet his accessories—the textured horns and cross-stitch embroidery—give him a premium, boutique finish. He is designed to sit heavily and happily on a shelf, making him irresistible to customers browsing craft fairs or Etsy shops.
Project Snapshot
📊 Difficulty: Intermediate (Color changes & shaping) ⏰ Est. Time: 4–5 Hours 📏 Size: Approx. 14cm (5.5 inches) tall
“The soul of the amigurumi lives in the placement of the eyes. Take your time there.” — Patricia
Materials & Tools Needed
🧶 Yarn: Worsted Weight (Category 4) in:
- Teal/Slate Blue (Body, Ears, Limbs)
- Cream/Oatmeal (Head, Tummy, Hands, Feet)
- Rust/Burnt Orange (Horns, Collar, Embroidery) 🪡 Hook: 2.5mm or 3.0mm (to keep stitches tight) ✨ Other Materials:
- 10mm Safety Eyes
- Fiberfill stuffing
- Yarn needle
- Pink blush (for cheeks)
Abbreviations & Stitches Used
- MR: Magic Ring
- ch: chain
- sc: single crochet
- inc: increase (2 sc in one st)
- dec: invisible decrease
- blo: back loop only
- flo: front loop only
The Complete Olli the Ogre Pattern
The Legs (Make 2)
We begin at the soles of the feet to build a sturdy foundation. Rnd 1: (In Cream) Start 6 sc in MR [6] Rnd 2: inc in all st [12] Rnd 3: (sc, inc) x 6 [18] Rnd 4: (Change to Teal) BLO sc in all st [18] Rnd 5–7: sc in all st [18] Fasten off the first leg. Do not fasten off the second leg. We will join them.
The Body
Continuing from the second leg to create the pear-shaped torso. Rnd 8: Ch 3, join to the first leg with a sc. Sc remaining 17 st around first leg, sc 3 along one side of ch, sc 18 around second leg, sc 3 along other side of ch. [42] Rnd 9: (sc 6, inc) x 6 [48] Rnd 10–16: sc in all st [48] Focus on stuffing the legs firmly here. Rnd 17: (sc 6, dec) x 6 [42] Rnd 18–19: sc in all st [42] Rnd 20: (sc 5, dec) x 6 [36] Rnd 21: sc in all st [36] Rnd 22: (sc 4, dec) x 6 [30] Rnd 23: sc in all st [30] Rnd 24: (sc 3, dec) x 6 [24] Rnd 25: (Change to Rust for Collar Base) FLO sc in all st [24] Rnd 26: (Change to Cream) BLO (working behind the ruffle) sc in all st [24] Stuff the body firmly, ensuring the belly is round.
The Head
Continuing directly from the neck in Cream. Rnd 27: (sc 3, inc) x 6 [30] Rnd 28: (sc 4, inc) x 6 [36] Rnd 29: (sc 5, inc) x 6 [42] Rnd 30: (sc 6, inc) x 6 [48] Rnd 31: (sc 7, inc) x 6 [54] Rnd 32–41: sc in all st (10 rounds) [54] Insert safety eyes between Rnd 36 and 37, roughly 11 stitches apart. Rnd 42: (sc 7, dec) x 6 [48] Rnd 43: (sc 6, dec) x 6 [42] Rnd 44: (sc 5, dec) x 6 [36] Rnd 45: (sc 4, dec) x 6 [30] Rnd 46: (sc 3, dec) x 6 [24] Stuff the head. Be generous—we want a large, moon-shaped face. Rnd 47: (sc 2, dec) x 6 [18] Rnd 48: (sc, dec) x 6 [12] Rnd 49: dec x 6 [6] Close hole and weave in end.
The Arms (Make 2)
Rnd 1: (In Cream) 6 sc in MR [6] Rnd 2: (sc, inc) x 3 [9] Rnd 3: (Change to Teal) sc in all st [9] Rnd 4–10: sc in all st [9] Stuff only the bottom half of the arm lightly. Flatten the top and sew closed.
The Ears (Make 2)
These are worked flat and then shaped. Row 1: (In Teal) Ch 7. Row 2: Sc in 2nd ch from hook, hdc, dc, dc, hdc, sc. Ch 1, turn. Row 3: Sc around the entire perimeter of the ear to give it structure. Pinch the bottom of the ear and sew it together to create a curve before attaching.
The Horns (Make 2)
Rnd 1: (In Rust) 4 sc in MR [4] Rnd 2: (sc, inc) x 2 [6] Rnd 3: sc in all st [6] Rnd 4: (sc 2, inc) x 2 [8] Rnd 5: sc in all st [8] Rnd 6: (sc 3, inc) x 2 [10] Fasten off, leaving a tail for sewing. Stuff firmly.
Horn Bases (Make 2)
Rnd 1: (In Teal) 6 sc in MR [6] Rnd 2: inc in all st [12] Rnd 3: sc in all st [12] Sew these to the head first, then sew the Rust Horns on top of them.
Belly Patch
Rnd 1: (In Cream) 6 sc in MR [6] Rnd 2: inc in all st [12] Rnd 3: (sc, inc) x 6 [18] Rnd 4: (sc 2, inc) x 6 [24] Fasten off. Sew to the center of the Teal body.
Assembly & Final Touches
- Limbs: Sew arms to the body at Rnd 24 (just below the collar).
- Ears: Attach ears at Rnd 36 of the head, aligned slightly behind the eyes.
- Horns: Attach the Teal bases to the top of the head, then the Rust horns atop them.
- The Collar: Join Rust yarn to the FLO loops of Rnd 25. (Ch 3, sl st in next st) around the entire neck to create a small ruffle.
- Embroidery: Using Rust yarn, stitch three small “X” marks on the outside of each Teal arm.
- Face: Stitch a simple brown line for the mouth. Apply a touch of blush to the cheeks.
Tips & FAQs
Q: My head is wobbling. How do I fix it? A: Because the head is large (the Echo of Youth style), you must stuff the neck area very firmly. You can also insert a small fabric roll or a crochet “neck tube” inside for support.
Q: Can I use velvet yarn? A: Absolutely. Velvet yarn enhances the “Embrace of Softness,” though Olli will turn out significantly larger—likely 20cm or more.
A Final Word
There you have it—Olli is ready to watch over your workspace or delight a customer at your next fair. I hope you found joy in the shaping of his horns and the quiet rhythm of his rounds. Remember, imperfection is where the character hides.
Yours in stitches, Patricia