There is something undeniably comforting about working with velvet yarn. It forgives our tension mistakes and rewards us with a texture that demands to be held. Today, we invite a quiet, magical friend into our studio—a spirit who speaks little but feels deeply. This project is a wonderful study in high-contrast appliqué work and achieving that perfect, huggable egg shape without overstuffing.
About This Creation & The Velvet Touch
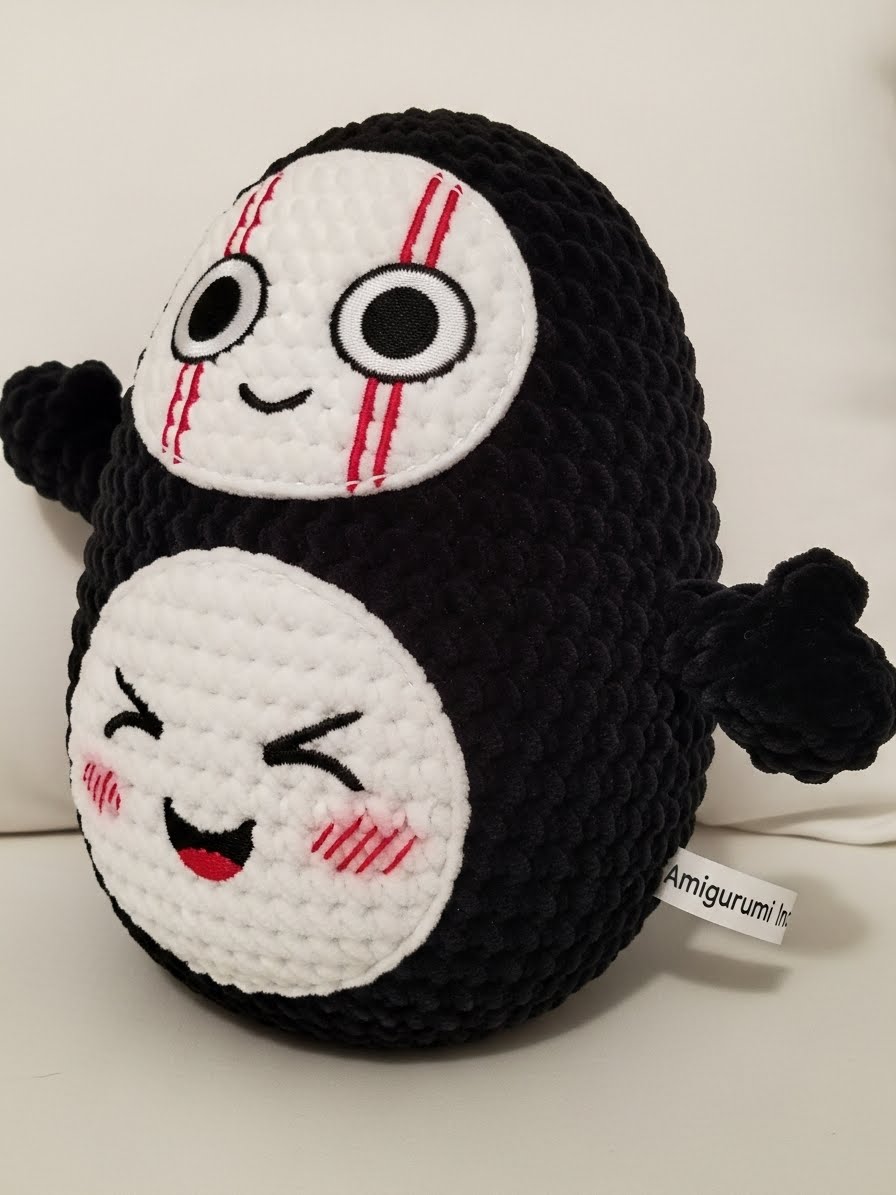
We are crafting “The Shy Spirit,” a character defined by his dual nature—a stoic mask above and a beaming, blushing soul below. Commercially, this project taps into the massive demand for “tactile stim” toys; the texture is just as important as the visual.
By using super bulky chenille yarn, we turn a simple shape into a premium plushie that looks store-bought but carries the heart of handmade. This is an excellent project for market prep, as it works up quickly despite its impressive size and finish.
Project Snapshot

📊 Difficulty: Beginner / Intermediate (due to black yarn visibility)
⏰ Est. Time: 2 – 3 Hours
📏 Size: Approx. 14cm – 16cm (depending on tension)
“The soul of the amigurumi is not in the stitch count, but in the placement of the eyes.” — Patricia Poltera
Materials & Tools Needed
🧶 Yarn: Super Bulky (Category 6) Chenille/Velvet yarn. ➡️ Main Color: Midnight Black (approx. 70g) ➡️ Accent Color: Cloud White (approx. 30g) ➡️ Detail Yarn: Scrap amounts of Red and Pink (fine weight) for embroidery.
🪡 Hook: 4.5mm or 5.0mm (to keep stitches tight with bulky yarn)
✨ Other Materials: ➡️ Fiberfill stuffing (high loft) ➡️ 10mm or 12mm Black Safety Eyes (one pair) ➡️ Yarn needle (large eye for chenille, sharp needle for embroidery) ➡️ Stitch markers (essential for working with black yarn) ➡️ Blush makeup (optional, for the cheeks)
Abbreviations & Stitches Used
ch: chain
sl st: slip stitch
sc: single crochet
inc: increase (2 sc in one stitch)
dec: decrease (invisible decrease preferred)
MR: Magic Ring (or ch 2, work into first ch if velvet snaps)
BLO: Back Loop Only
The Complete Shy Spirit Pattern
I. The Main Vessel (Body)
Worked in continuous rounds using Midnight Black. We build a stable base and work upward to form a soft egg shape.
Round 1: Create a MR, work 8 sc into ring. (8)
Round 2: Inc in every st around. (16)
Round 3: 🧶 1 sc, inc 🧶 Repeat around. (24)
Round 4: 🧶 2 sc, inc 🧶 Repeat around. (32)
Round 5: 🧶 3 sc, inc 🧶 Repeat around. (40)
Round 6: 🧶 4 sc, inc 🧶 Repeat around. (48)
Round 7 – 18: Sc in each st around. (48) Place a marker here. This section creates the “belly” height.
Round 19: 🧶 4 sc, dec 🧶 Repeat around. (40)
Round 20 – 21: Sc in each st around. (40)
Round 22: 🧶 3 sc, dec 🧶 Repeat around. (32)
Round 23 – 24: Sc in each st around. (32)
Round 25: 🧶 2 sc, dec 🧶 Repeat around. (24)
Artisan’s Note: Begin stuffing here. Be generous at the bottom for stability, but keep the top slightly softer to maintain the oval shape.
Round 26: 🧶 1 sc, dec 🧶 Repeat around. (16)
Round 27: Dec around. (8)
Round 28: Fasten off, weave tail through front loops to close the top.
II. The Spirit Mask (Face)
Worked in Cloud White. We create an oval to fit the upper face.
Round 1: Ch 6. Start in 2nd ch from hook. Inc, 3 sc, 4 sc in last ch. Turn to work other side of chain. 3 sc, inc. (14)
Round 2: Inc x2, 3 sc, inc x4, 3 sc, inc x2. (22)
Round 3: (1 sc, inc) x2, 3 sc, (1 sc, inc) x4, 3 sc, (1 sc, inc) x2. (30)
Round 4: Sc around loosely to smooth the edge. (30)
Fasten off, leaving a long tail for sewing.
Artisan’s Note: Before sewing, insert the safety eyes between Round 2 and 3, spaced about 4 stitches apart. Do not snap the backs on until you are sure of the placement.
III. The Happy Soul (Belly Patch)
Worked in Cloud White. A perfect circle.
Round 1: MR, 6 sc. (6)
Round 2: Inc in every st. (12)
Round 3: 🧶 1 sc, inc 🧶 Repeat around. (18)
Round 4: 🧶 2 sc, inc 🧶 Repeat around. (24)
Fasten off, leaving a tail for sewing.
IV. The Shadow Limbs (Arms)
Make 2. Worked in Midnight Black.
Round 1: MR, 6 sc. (6)
Round 2: 🧶 1 sc, inc 🧶 Repeat around. (9)
Round 3 – 5: Sc around. (9)
Round 6: Fold flat and sc across the opening to close. (4)
Fasten off, leaving tail for assembly.
Assembly & Final Touches
1. The Mask: Position the oval mask on the upper half of the body. Sew in place using the white tail. Embroider two vertical red lines passing through the eyes (classic spirit marking) and a tiny horizontal mouth.
2. The Soul: Position the round belly patch directly below the mask. Embroider two happy eyes (inverted ‘U’ shape) and a small red smile.
3. The Arms: Attach the arms on either side of the body, placed right at the seam where the mask meets the belly patch. They should stick out slightly.
4. The Blush: Use real makeup blush or pink yarn to add rosy cheeks to the belly patch. This adds the “charm” factor.
Tips & FAQs
Q: My black yarn is hard to see. A: Use a bright light source or a light pad on your lap. Feeling the stitches often works better than seeing them with velvet yarn.
Q: The mask looks wonky. A: Ovals can be tricky. Block the piece with steam (hover your iron, do not touch) to flatten it before sewing.
A Final Word
You have birthed a creature of quiet comfort. He sits perfectly on a desk, offering a silent cheer whenever you glance his way. This is the beauty of our craft—turning simple loops into characters with souls.