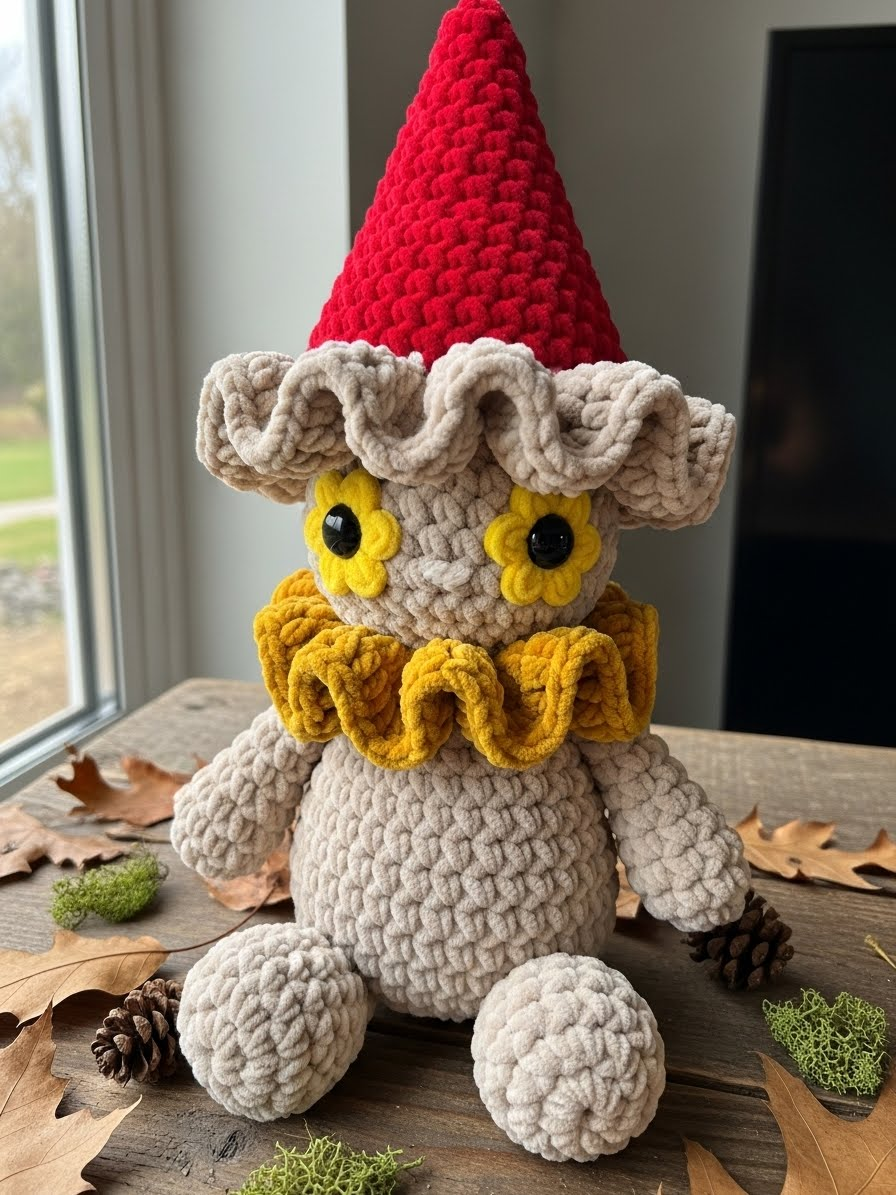
There is a quiet magic in the forest floor, where life blooms in soft, rounded shapes under the canopy. Today, we bring that gentleness into our hands. Sprout is not merely a toy; he is a study in texture and comfort, designed to help you conquer the sometimes intimiditating nature of chenille yarn. Let us pick up our hooks and craft a friend who feels like a warm hug.
About This Creation & The Chenille Challenge
We often shy away from velvet or chenille yarns because the stitches can be elusive, hiding in the plush pile. However, the result—a fabric that absorbs light and offers unmatched softness—is worth the patience. Sprout is designed specifically to be a “Chenille First” project. His shapes are simple and forgiving, allowing you to focus on tension and “feeling” for your stitches rather than squinting at them. By using a slightly larger hook than usual for amigurumi, we ensure the velvet doesn’t snag, creating a professional, dense finish that looks store-bought yet feels unmistakably handmade.
Project Snapshot:
📊 Difficulty: Intermediate (Due to yarn texture)
⏰ Est. Time: 4–6 Hours
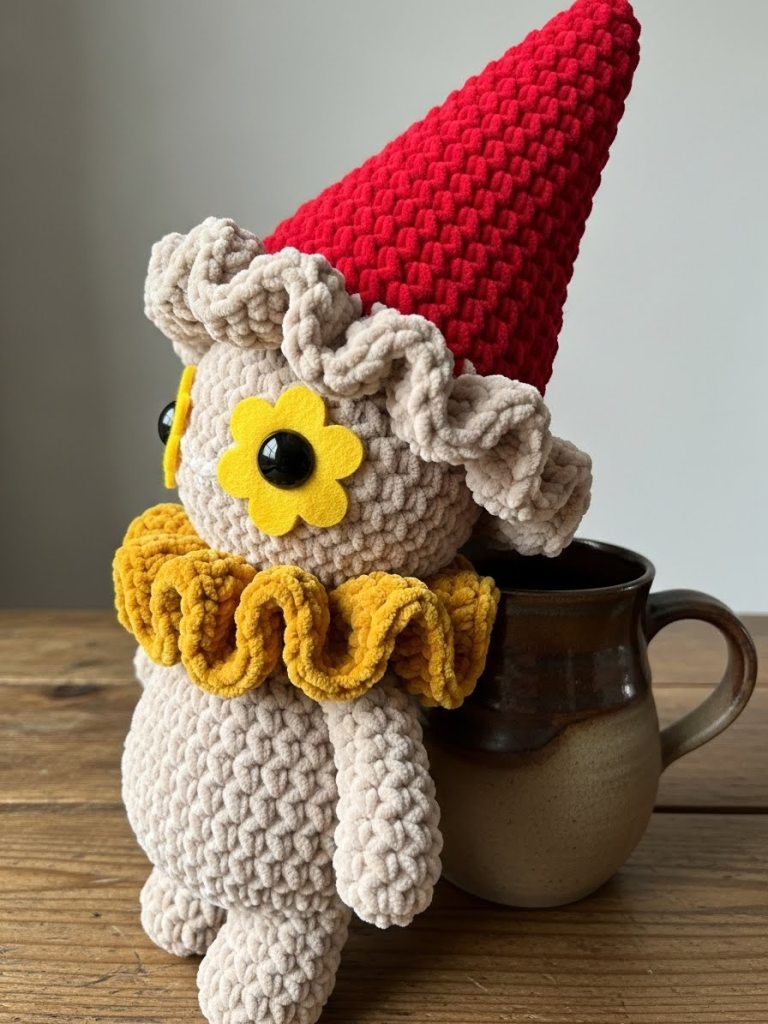
📏 Size: Approx. 16cm (6.5 inches) tall
“Texture is the language of comfort; let your hands read what your eyes cannot see.” — Patricia
Materials & Tools Needed
🧶 Yarn: Super Bulky (Category 6) Chenille/Velvet yarn. ➡️ Beige/Oatmeal (approx. 70g) ➡️ Deep Red/Burgundy (approx. 40g) ➡️ Mustard Yellow (approx. 10g)
🪡 Hook: 4.5mm or 5.0mm (adjust to ensure no gaps)
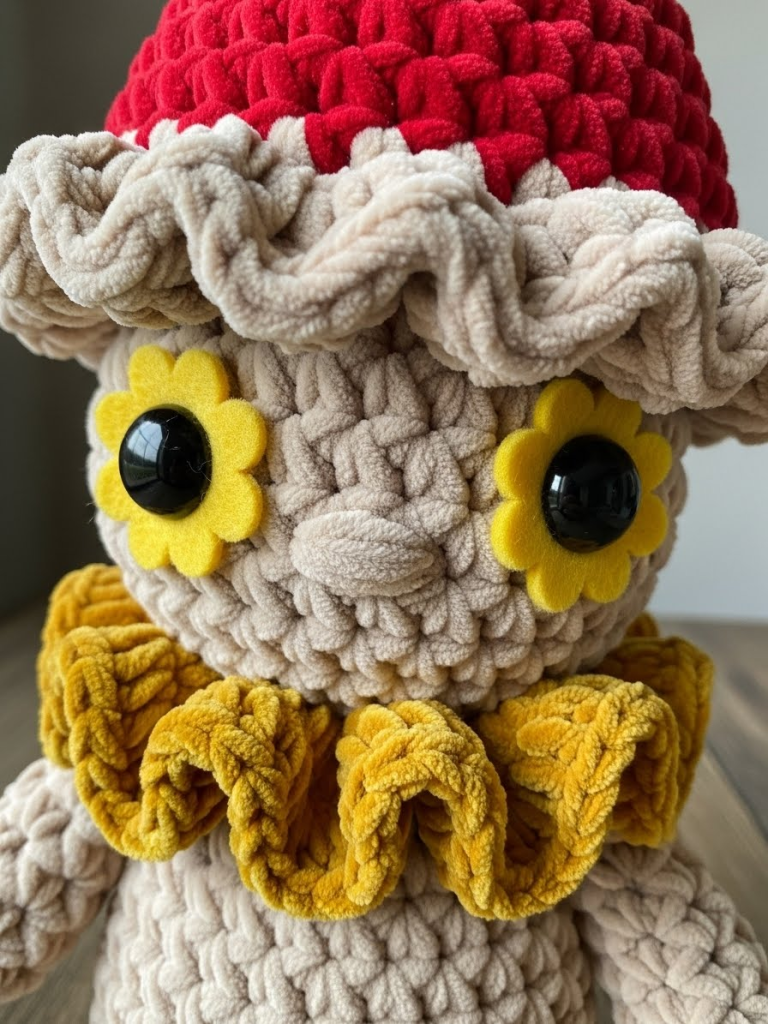
✨ Other Materials: ➡️ 12mm or 14mm Black Safety Eyes ➡️ Small scrap of Yellow Felt (for flower eye backing) ➡️ Polyester fiberfill (stuffing) ➡️ Yarn needle (large eye for chenille) ➡️ Stitch markers (essential for chenille) ➡️ Fabric glue (optional, to secure felt)
Abbreviations & Stitches Used
ch: chain
sl st: slip stitch
sc: single crochet
inc: increase (2 sc in one stitch)
dec: decrease (invisible decrease preferred, or sc2tog)
BLO: back loop only
FLO: front loop only
( … ) x 6: repeat instructions in parentheses 6 times
The Complete Sprout Pattern
Component 1: The Legs (Make 2)
Use Beige Yarn.
Rnd 1: 6 sc in a magic ring (6)
Rnd 2: (inc) x 6 (12)
Rnd 3: (sc, inc) x 6 (18)
Rnd 4–5: sc in each st around (18) — 2 rounds
Fasten off the first leg. Do not fasten off the second leg. We will join them to begin the body.
Component 2: The Body
Continue with Beige Yarn.
Rnd 6: With the second leg on your hook, ch 2. Join to the first leg with a sc. sc 17 around first leg, sc in each of the 2 ch stitches (one side), sc 18 around second leg, sc in each of the 2 ch stitches (other side). (40)
Rnd 7: sc in each st around (40)
Rnd 8: (9 sc, inc) x 4 (44)
Rnd 9–14: sc in each st around (44) — 6 rounds
Rnd 15: (9 sc, dec) x 4 (40)
Rnd 16: (8 sc, dec) x 4 (36)
Rnd 17: sc in each st around (36)
Rnd 18: (4 sc, dec) x 6 (30)
Rnd 19: (3 sc, dec) x 6 (24)
Rnd 20: (2 sc, dec) x 6 (18)
Stuff the legs and body firmly here. Chenille stretches, so pack it well.
Rnd 21: (4 sc, dec) x 3 (15)
Rnd 22: sc in each st around (15)
Fasten off, leaving a long tail for sewing. The neck opening remains open.
Component 3: The Head
Use Beige Yarn. Work from top down.
Rnd 1: 6 sc in a magic ring (6)
Rnd 2: (inc) x 6 (12)
Rnd 3: (sc, inc) x 6 (18)
Rnd 4: (2 sc, inc) x 6 (24)
Rnd 5: (3 sc, inc) x 6 (30)
Rnd 6: (4 sc, inc) x 6 (36)
Rnd 7: (5 sc, inc) x 6 (42)
Rnd 8–15: sc in each st around (42) — 8 rounds
Pause here to prepare eyes. Cut two small flower shapes from yellow felt. Poke a hole in the center of each. Insert the safety eyes through the felt, then insert eyes between Rounds 11 and 12, about 7 stitches apart. Secure washers.
Rnd 16: (5 sc, dec) x 6 (36)
Rnd 17: (4 sc, dec) x 6 (30)
Rnd 18: (3 sc, dec) x 6 (24)
Start stuffing the head firmly.
Rnd 19: (2 sc, dec) x 6 (18)
Rnd 20: (sc, dec) x 6 (12)
Rnd 21: (dec) x 6 (6)
Fasten off and weave in end. We will sew the body neck to the bottom of the head (approx Round 19/20).
Component 4: The Mushroom Cap
Start with Red Yarn.
Rnd 1: 6 sc in a magic ring (6)
Rnd 2: (inc) x 6 (12)
Rnd 3: (sc, inc) x 6 (18)
Rnd 4: (2 sc, inc) x 6 (24)
Rnd 5: (3 sc, inc) x 6 (30)
Rnd 6: (4 sc, inc) x 6 (36)
Rnd 7: (5 sc, inc) x 6 (42)
Rnd 8: (6 sc, inc) x 6 (48)
Rnd 9: (7 sc, inc) x 6 (54)
Rnd 10–14: sc in each st around (54) — 5 rounds
Change to Beige Yarn for the gills/brim.
Rnd 15 (BLO): Work this entire round in Back Loops Only. (sc, dec) around. (36)
Rnd 16: Work in both loops. 3 dc in every stitch around. This creates the heavy ruffle.
Fasten off and weave in ends. Stuff the cap lightly before sewing to head.
Component 5: The Arms (Make 2)
Use Beige Yarn.
Rnd 1: 6 sc in a magic ring (6)
Rnd 2: (inc) x 6 (12)
Rnd 3–6: sc in each st around (12) — 4 rounds
Rnd 7: (dec) x 6 (6)
Flatten the top and sc across to close. Leave tail for sewing.
Component 6: The Mustard Ruff
Use Mustard Yarn.
Row 1: Chain 18 (ensure this fits loosely around the neck), sl st to first ch to form a ring.
Rnd 2: Ch 2 (counts as st), 3 dc in each chain stitch around. Sl st to join.
Rnd 3: Ch 1, (sc, ch 2, sc) in each stitch around to create a crinkled edge.
Fasten off and weave in ends.
Assembly & Final Touches
- 🧶 Attach Head: Pin the Body opening to the underside of the Head. Sew firmly using the yarn tail. Since chenille is slippery, go around twice.
- 🧶 Attach Arms: Sew arms to the sides of the body, just below the neck decrease, slightly angled forward.
- 🧶 Secure Cap: Place the stuffed cap onto the head. You can sew it down permanently or leave it removable. If sewing, stitch through the BLO round (Rnd 15) of the cap into the head.
- 🧶 The Ruff: Place the mustard ruff around the neck. Tack it down with a dab of glue or a single stitch at the back if you wish it to stay fixed.
Tips & FAQs
Q: My chenille yarn is “worming” (loops pulling out). How do I fix this?
A: This happens if your hook is too small or tension too loose. Try tightening your tension slightly or switching to a hook 0.5mm smaller.
Q: Can I brush the yarn?
A: No, brushing chenille/velvet yarn can cause it to shed and lose its structural integrity. It is best left as is.
A Final Word
Sprout is now complete—a silent, soft observer of your creative space. I hope this project has demystified the art of working with plush yarns for you. Remember, imperfections in handmade goods are simply the signature of the artist.
Yours in stitches,
Patricia