My dearest creators, welcome back to the quiet joy of our atelier. Today, we are working with textures that comfort the soul as much as the hands. There is something profoundly healing about working with plush chenille; it forgives tension errors and finishes with a professional, store-bought softness that feels magical.
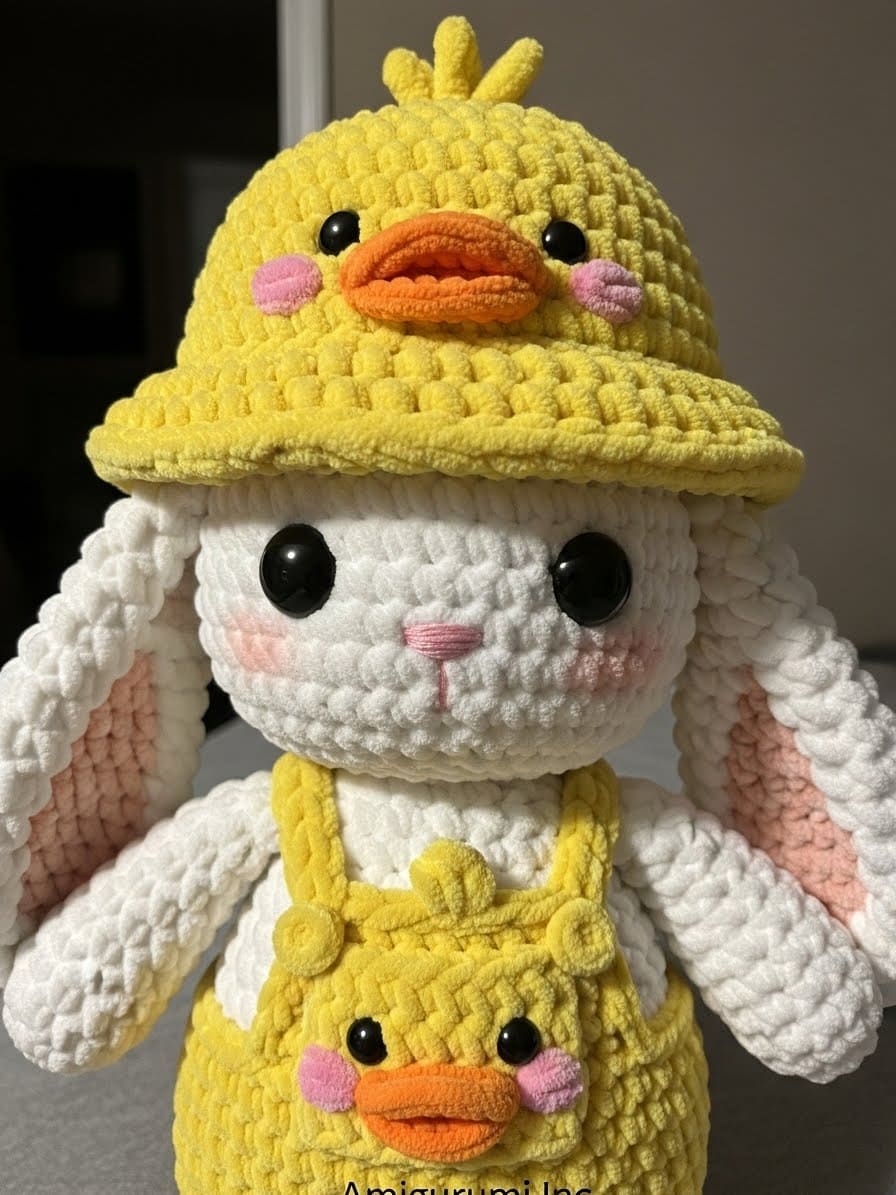
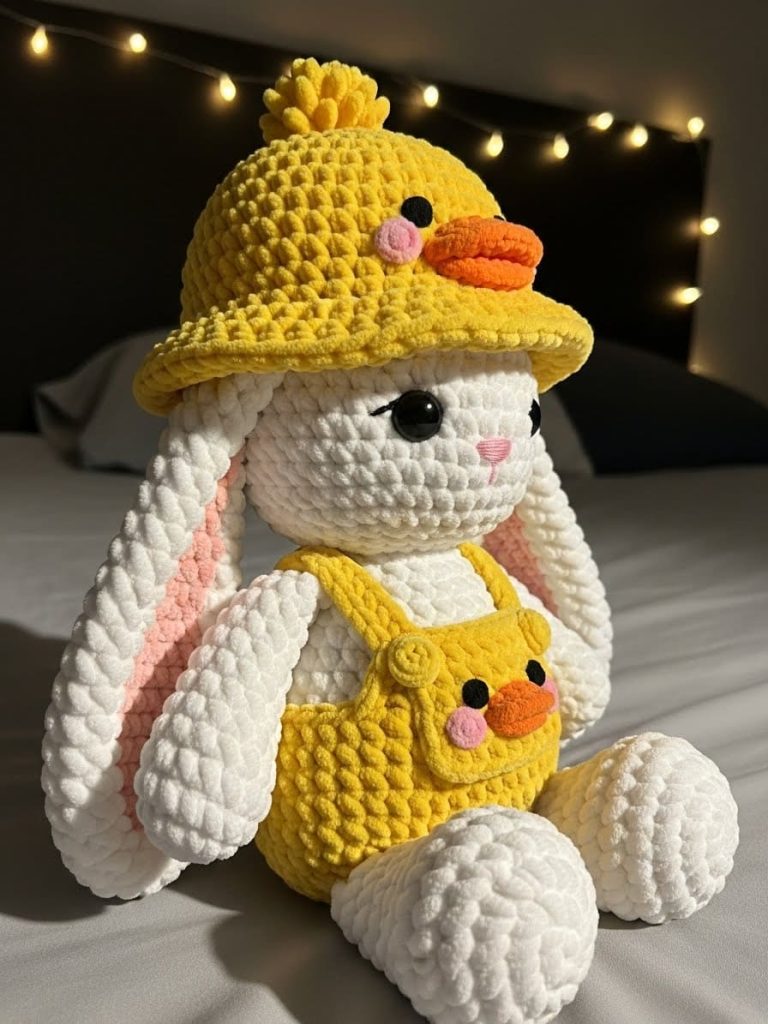
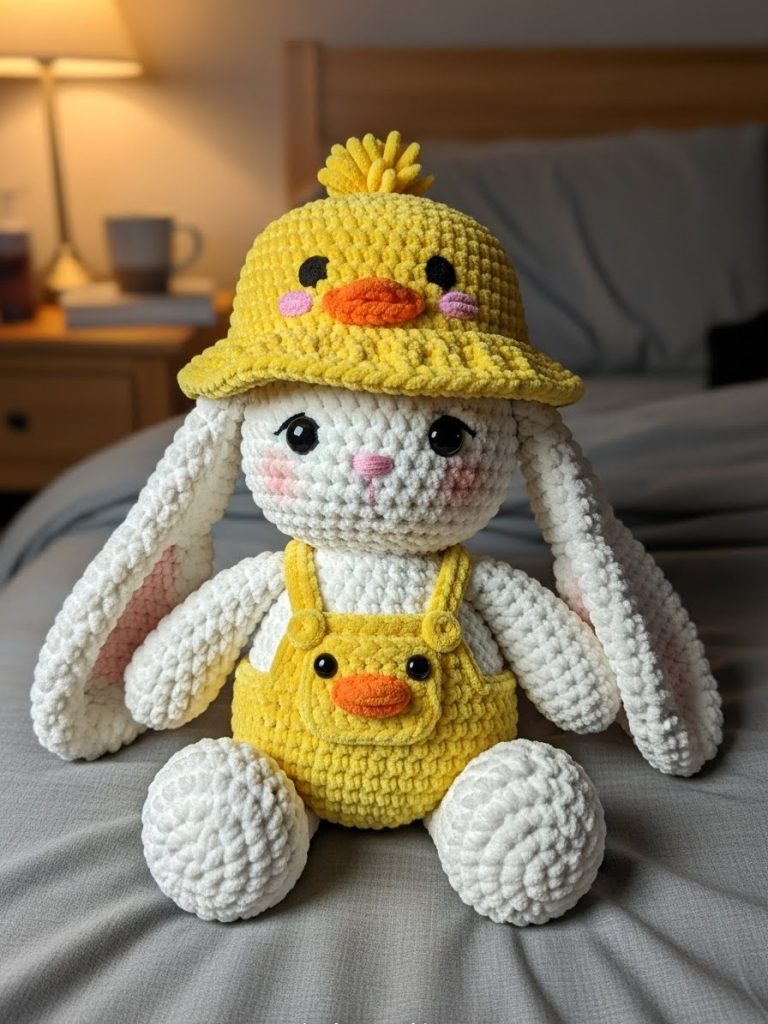
We are crafting Puddles, a shy little bunny who believes he is a duckling. This project is designed to help you master the art of “dressing” your amigurumi, creating removable accessories that add play value and personality to your work.
About This Creation & Angle
Puddles represents the perfect fusion of the “Farmhouse Nursery” trend and the eternal popularity of Easter animals. By combining a classic white bunny base with bright, sunny yellow accessories, we create high contrast that appeals to infants and collectors alike.
This project focuses on the “Chunky Chenille” technique. Unlike cotton, chenille requires a tactile understanding of your stitches, as they can be hard to see. We will focus on feeling for the “V” and keeping our tension tight to prevent the stuffing from peeking through.
Project Snapshot:
📊 Difficulty: Intermediate (Due to chenille yarn handling)
⏰ Est. Time: 4–6 Hours
📏 Size: Approx. 25cm (10 inches) tall
“We do not just make toys; we craft companions for the quiet moments.”
Materials & Tools Needed
🧶 Yarn: Super Bulky (Size 6) Chenille Yarn. ➡️ Main Color: Milky White (approx. 100g) ➡️ Accent Color A: Buttercup Yellow (approx. 50g for hat/overalls) ➡️ Accent Color B: Tangerine Orange (small amount for beaks) ➡️ Accent Color C: Soft Pink (scrap for embroidery)
🪡 Hook: 5.0mm (or 4.5mm if you crochet loosely)
✨ Other Materials: ➡️ 14mm Black Safety Eyes (2 pairs: one for Bunny, one smaller pair 10mm for Overalls if desired, or felt) ➡️ Poly-fil stuffing ➡️ Yarn needle with a large eye ➡️ Stitch markers
Abbreviations & Stitches Used
ch: chain
sl st: slip stitch
sc: single crochet
inc: increase (2 sc in one st)
dec: decrease (invisible decrease preferred)
BLO: back loop only
FLO: front loop only
The Complete Puddles the Duck-Bunny Pattern
The Head (In White)
R1: Start 6 sc in a magic ring (6)
R2: inc in every st (12)
R3: (sc 1, inc) x 6 (18)
R4: (sc 2, inc) x 6 (24)
R5: (sc 3, inc) x 6 (30)
R6: (sc 4, inc) x 6 (36)
R7: (sc 5, inc) x 6 (42)
R8: (sc 6, inc) x 6 (48)
R9–R17: sc in each st around (48) [9 rounds for a chubby face]
R18: (sc 6, dec) x 6 (42)
R19: (sc 5, dec) x 6 (36)
Artisan’s Note: Insert safety eyes between R13 and R14, spaced 8 stitches apart. Embroider a small pink “Y” shape for the nose centered between the eyes.
R20: (sc 4, dec) x 6 (30)
R21: (sc 3, dec) x 6 (24)
R22: (sc 2, dec) x 6 (18)
Stuff the head firmly, shaping it to be round and full.
R23: (sc 1, dec) x 6 (12)
R24: dec x 6 (6)
Fasten off and weave in end.
The Ears (Make 2 in White)
R1: Start 6 sc in a magic ring (6)
R2: inc in every st (12)
R3: (sc 1, inc) x 6 (18)
R4–R8: sc in each st around (18)
R9: (sc 7, dec) x 2 (16)
R10–R12: sc in each st around (16)
R13: (sc 6, dec) x 2 (14)
R14–R16: sc in each st around (14)
R17: (sc 5, dec) x 2 (12)
R18–R20: sc in each st around (12)
R21: (sc 4, dec) x 2 (10)
R22: sc in each st around (10)
Do not stuff ears. Flatten the opening and sc across both sides to close. Fasten off, leaving a long tail for sewing.
The Body (In White)
R1: Start 6 sc in a magic ring (6)
R2: inc in every st (12)
R3: (sc 1, inc) x 6 (18)
R4: (sc 2, inc) x 6 (24)
R5: (sc 3, inc) x 6 (30)
R6: (sc 4, inc) x 6 (36)
R7: (sc 5, inc) x 6 (42)
R8–R12: sc in each st around (42)
R13: (sc 5, dec) x 6 (36)
R14–R15: sc in each st around (36)
R16: (sc 4, dec) x 6 (30)
R17–R18: sc in each st around (30)
R19: (sc 3, dec) x 6 (24)
R20: sc in each st around (24)
R21: (sc 2, dec) x 6 (18)
Stuff body firmly, focusing on the belly area.
Fasten off, leaving a long tail to sew to the head.
Arms (Make 2 in White)
R1: Start 6 sc in a magic ring (6)
R2: (sc 1, inc) x 3 (9)
R3–R9: sc in each st around (9)
Lightly stuff the bottom half only.
R10: Fold opening flat and sc across to close (4 sc). Fasten off with tail.
Legs (Make 2 in White)
R1: Start 6 sc in a magic ring (6)
R2: inc in every st (12)
R3: (sc 3, inc) x 3 (15)
R4–R7: sc in each st around (15)
R8: (sc 3, dec) x 3 (12)
Stuff firmly.
R9: dec x 6 (6)
Fasten off, leave tail.
The Duck Bucket Hat (In Yellow)
R1: Start 6 sc in a magic ring (6)
R2: inc in every st (12)
R3: (sc 1, inc) x 6 (18)
R4: (sc 2, inc) x 6 (24)
R5: (sc 3, inc) x 6 (30)
R6: (sc 4, inc) x 6 (36)
R7: (sc 5, inc) x 6 (42)
R8: (sc 6, inc) x 6 (48)
R9: (sc 15, inc) x 3 (51) [Slight increase for ease over head]
R10–R15: sc in each st around (51)
R16: (The Brim) FLO, (sc 2, inc) all around until end.
R17: sc in each st around. Fasten off and weave in ends.
Hat Details: ➡️ Beak: In Orange, ch 4. sc in 2nd ch from hook, hdc in next, sc in last. Sew to front of hat. ➡️ Tuft: In Yellow, ch 5, sl st back down. Make 3 of these strands attached to the top center. ➡️ Eyes/Cheeks: Glue on small felt circles or embroider.
The Duck Overalls (In Yellow)
R1: Ch 43 (measure against your stuffed body to ensure fit), join to first ch to form a circle.
R2–R6: sc in each st around (42)
R7: Divide for legs. Sc 21, skip remaining stitches and join to first sc of this round.
R8–R10: Work on these 21 stitches for the first leg. sc around.
R11: Fasten off.
Repeat R8-R11 for the second leg using the skipped stitches.
The Bib (Front Flap)
Attach yellow yarn to the front center of the waist.
R1: sc 12 across. Ch 1, turn.
R2–R5: sc across (12).
Fasten off.
Straps (Make 2)
Ch 18 (measure over shoulder to back waist). sc in 2nd ch from hook and across. Sew from top corners of bib to back of pants.
Overalls Face: ➡️ Embroider or sew an Orange beak on the bib. Add pink cheeks.
Assembly & Final Touches
- Head to Body: Pin the head to the body. Using the yarn tail, whip stitch securely. Check that the head doesn’t wobble; add more stuffing to the neck if needed.
- Ears: Sew the ears low on the sides of the head, roughly at R15. They should flop downwards.
- Limbs: Sew arms at the neck seam line. Sew legs to the bottom of the body, spaced slightly apart so Puddles can sit.
- Dressing: Pull the overalls up over the legs. Place the bucket hat on the head (you may need to squish the ears slightly).
Tips & FAQs
Q: My chenille yarn is “worming” (loops coming loose). Patricia’s Pro-Tip: This happens if your tension is too loose. Drop down a hook size. Also, try to “yarn under” instead of “yarn over” for tighter stitches.
Q: Can I wash this? A: Yes, but gently. Place Puddles in a pillowcase and wash on a cold, delicate cycle. Air dry only—heat will melt the synthetic fibers.
A Final Word
There is a unique pride in seeing a pile of yarn transform into a character with a name and a soul. Puddles is more than just decor; he is a tactile comfort, a soft friend for a rainy day. I cannot wait to see your version of him. Perhaps your Puddles will wear blue? Or green? The canvas is yours.
Until we meet again, may your stitches be even and your coffee warm.