My fellow artisan, there is a special kind of magic in crafting a hero. Today, we are not just making a doll; we are stitching a companion ready for any quest. Whether he stands guard on a gaming shelf or becomes a cherished friend for a little one, this Forest Hero brings a spirit of courage to your workspace.
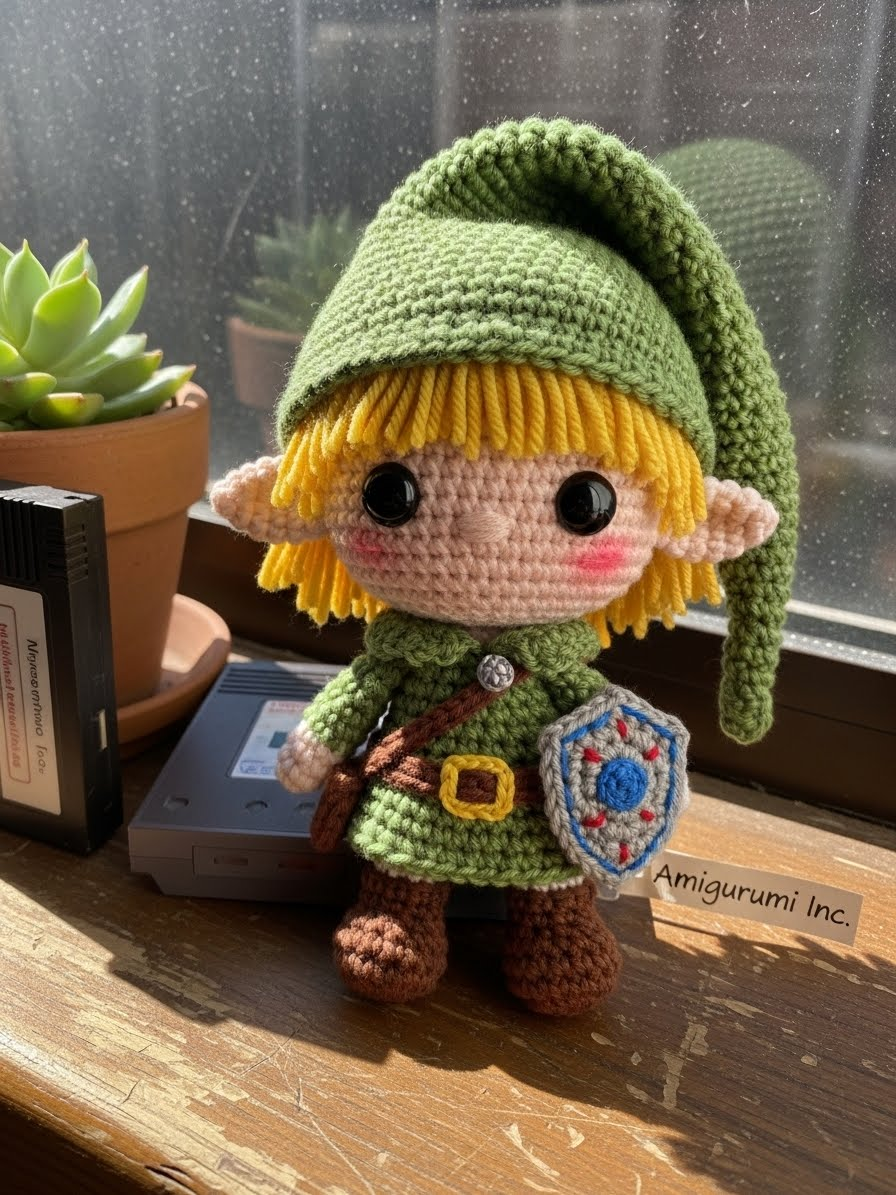
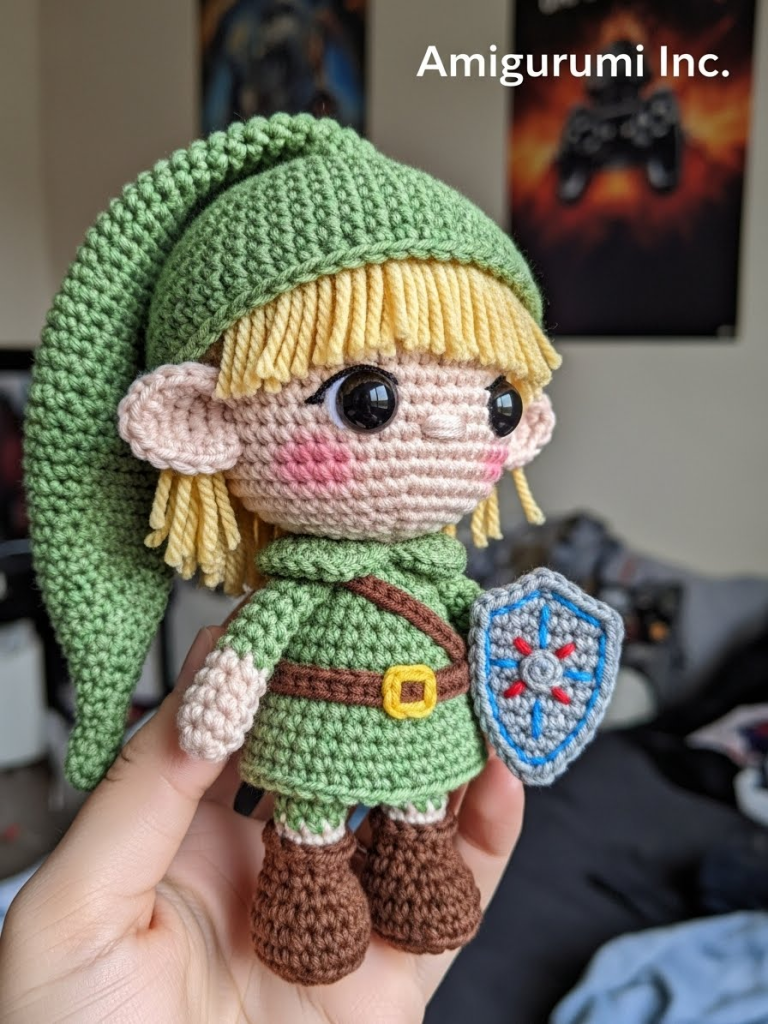
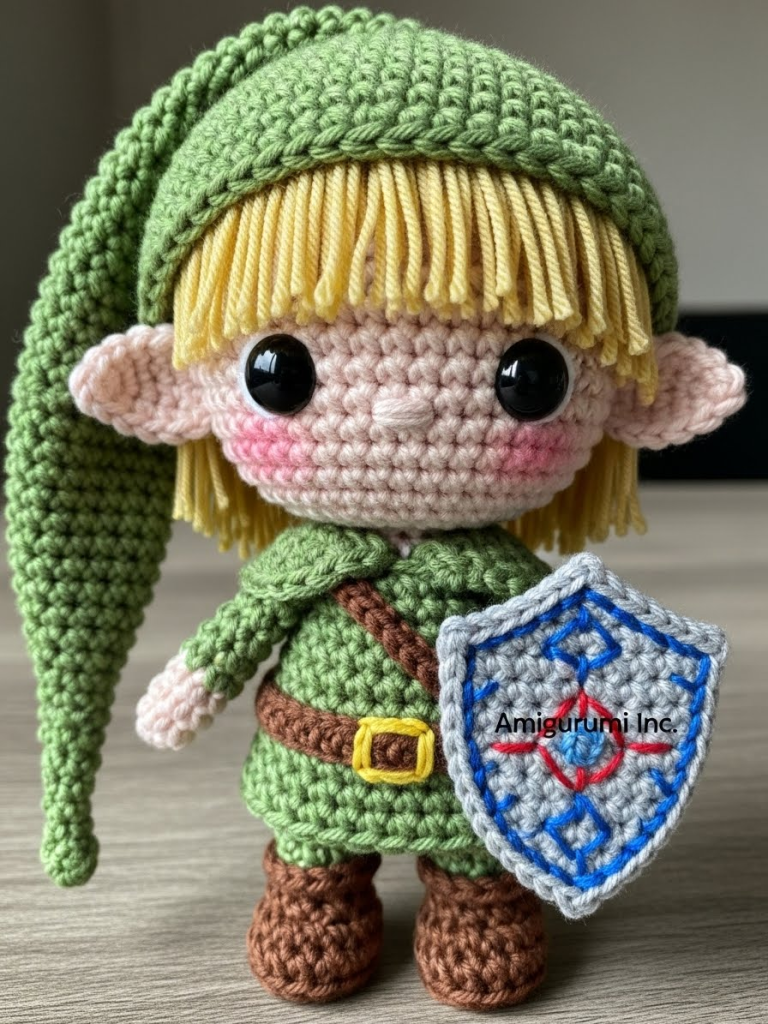
About This Creation & The “Toon” Aesthetic This project leans heavily into the “Toon” style—characterized by the oversized head and expressive, wide-set eyes. It captures the innocence of the character before the weight of destiny falls upon his shoulders. We are using a tight stitch to ensure the stuffing doesn’t peek through the dark green tunic, giving it a professional, seamless finish. The real joy here lies in the accessories; the shield and hat are what transform a simple boy into a warrior.
Project Snapshot: 📊 Difficulty: Intermediate (Color changes & assembly required) ⏰ Est. Time: 6–8 Hours 📏 Size: Approx. 14cm (5.5 inches) tall “Courage need not be large to be powerful.”
Materials & Tools Needed 🧶 Yarn: DK or Sport Weight Cotton. Colors: Forest Green, Cream/Skin Tone, Chocolate Brown, Golden Yellow, Grey, Royal Blue, and a scrap of Red. 🪡 Hook: 2.5mm or 2.75mm (to keep stitches tight) ✨ Other Materials: Fiberfill stuffing, 10mm safety eyes, yarn needle, stitch markers, embroidery thread (black for mouth/eyebrows), blush or pink pastel.
Abbreviations & Stitches Used ch: chain sl st: slip stitch sc: single crochet inc: increase (2 sc in one st) dec: decrease (sc 2 together) BLO: back loop only FLO: front loop only
The Complete Forest Hero Pattern
Component 1: The Head (Work in continuous spirals using Skin Tone yarn) R1: Start 6 sc in a magic ring. (6) R2: inc in each st around. (12) R3: (sc 1, inc) x 6. (18) R4: (sc 2, inc) x 6. (24) R5: (sc 3, inc) x 6. (30) R6: (sc 4, inc) x 6. (36) R7: (sc 5, inc) x 6. (42) R8–R16: sc in each st around. (42) [9 rounds of height] Artisan’s Note: Insert safety eyes between R13 and R14, approx. 9 stitches apart. Embroider small eyebrows 2 rows above eyes before closing. R17: (sc 5, dec) x 6. (36) R18: (sc 4, dec) x 6. (30) R19: (sc 3, dec) x 6. (24) Start stuffing firmly. R20: (sc 2, dec) x 6. (18) R21: (sc 1, dec) x 6. (12) R22: dec x 6. (6) Fasten off and weave in end.
Component 2: The Pointed Ears (Make 2) (Using Skin Tone yarn) R1: Ch 5. Starting from 2nd ch from hook: sl st, sc, hdc, dc. (4) Fasten off, leaving a long tail for sewing. Pinch the base slightly to give it a cupped shape.
Component 3: The Tunic Body (Start with Green yarn) R1: Start 6 sc in a magic ring. (6) R2: inc in each st around. (12) R3: (sc 1, inc) x 6. (18) R4: (sc 2, inc) x 6. (24) R5–R9: sc in each st around. (24) R10: (sc 6, dec) x 3. (21) R11: sc in each st around. (21) R12: (sc 5, dec) x 3. (18) R13: sc in each st around. (18) R14: (sc 1, dec) x 6. (12) Fasten off, leaving a long tail to sew to the head. Stuff the body firmly, especially the neck area.
Component 4: The Boots & Legs (Make 2) (Start with Brown yarn) R1: Start 6 sc in a magic ring. (6) R2: inc in each st around. (12) R3: (BLO) sc in each st around. (12) R4: sc in each st around. (12) R5: (sc 2, dec) x 3. (9) Change to Skin Tone yarn (or White for leggings) R6–R9: sc in each st around. (9) Fasten off. Leave a tail for sewing. Stuff the feet firmly, lightly stuff the upper legs.
Component 5: The Arms (Make 2) (Start with Skin Tone yarn) R1: Start 5 sc in a magic ring. (5) R2: inc, sc 4. (6) R3–R5: sc in each st around. (6) Change to Green yarn R6–R9: sc in each st around. (6) Fasten off. Do not stuff the arms; they need to lay flat against the body.
Component 6: The Iconic Cap (Using Green yarn) R1: Start 4 sc in a magic ring. (4) R2: (sc 1, inc) x 2. (6) R3: sc in each st around. (6) R4: (sc 2, inc) x 2. (8) R5: sc in each st around. (8) R6: (sc 3, inc) x 2. (10) R7: sc in each st around. (10) R8: (sc 4, inc) x 2. (12) R9–R10: sc in each st around. (12) R11: (sc 2, inc) x 4. (16) R12: (sc 3, inc) x 4. (20) R13: (sc 4, inc) x 4. (24) R14: (sc 5, inc) x 4. (28) R15: (sc 6, inc) x 4. (32) R16: (sc 7, inc) x 4. (36) R17–R20: sc in each st around. (36) Fasten off. The tip should naturally droop.
Component 7: The Hair Wig (Using Muted Yellow/Blonde yarn) R1: Start 6 sc in a magic ring. (6) R2: inc in each st around. (12) R3: (sc 1, inc) x 6. (18) R4: (sc 2, inc) x 6. (24) R5: (sc 3, inc) x 6. (30) R6: (sc 4, inc) x 6. (36) Strand creation: S1 (Bangs): Ch 5, start 2nd ch from hook, sc 4 down, sl st into next base st. S2 (Bangs): Ch 6, sc 5 down, sl st into next base st. S3 (Side): Ch 8, sc 7 down, sl st into next base st. Continue creating strands around the back of the head (Ch 8 or 9) until you reach the other ear position. Leave a gap for the bangs to sweep across the forehead.
Component 8: The Hylian Shield (Start with Grey yarn) R1: Ch 6, start 2nd ch from hook, sc 5, ch 1, turn. R2: inc, sc 3, inc. (7) Change to Blue yarn for center R3–R5: sc across (using Blue in middle 5 stitches, Grey on edges). R6: dec, sc 3, dec. (5) R7: dec, sc 1, dec. (3) R8: dec all together. Artisan’s Note: Embroider the red bird feet and yellow triangles (Triforce) on top of the blue section using a thin needle. This creates a sharper image than color changing for such a small item.
Assembly & Final Touches
- Hair Assembly: Sew the wig cap onto the head first. Pin the bangs so they sweep slightly to the left or right, framing the face but not covering the eyes.
- Ears: Sew the ears directly to the head, positioned just below the hair line on the sides.
- Body: Sew the head to the body. Attach legs to the bottom of the body, spaced slightly apart for a sitting pose.
- Arms: Attach arms at the shoulder seam.
- The Belt: Chain 26 in Brown, sc across. Sew around the waist. Use a small square of Yellow yarn or felt to create the buckle in the center.
- Shield: Stitch the shield to one of the hands (or sew a small strap on the back of the shield to slide the arm through).
- Blush: Apply a tiny amount of pink blush under the eyes for that youthful glow.
Tips & FAQs
Q: The hat keeps falling off, what do I do? A: You can stitch the hat in place if you want it permanent. Alternatively, crochet the last round of the hat a bit tighter (use a smaller hook) for a snug friction fit.
Q: Can I use felt for the shield details? A: Absolutely. Cutting small triangles of yellow felt and a red shape for the crest is often easier and looks very clean on small amigurumi. Glue them carefully with fabric glue.
A Final Word There you have it—a hero born from yarn. Crafting characters with such a rich history is always a delight. May your loops be even and your stuffing perfectly squishy.