My dearest maker,
There is a quiet magic in the bond between the large and the small. Barnaby is not just a plush toy; he is a reminder to slow down, to breathe, and to carry our friends with us—sometimes quite literally. We are crafting peace today. Let your tension flow out of your shoulders and into your stitches.
About This Creation: The Art of Slow Living
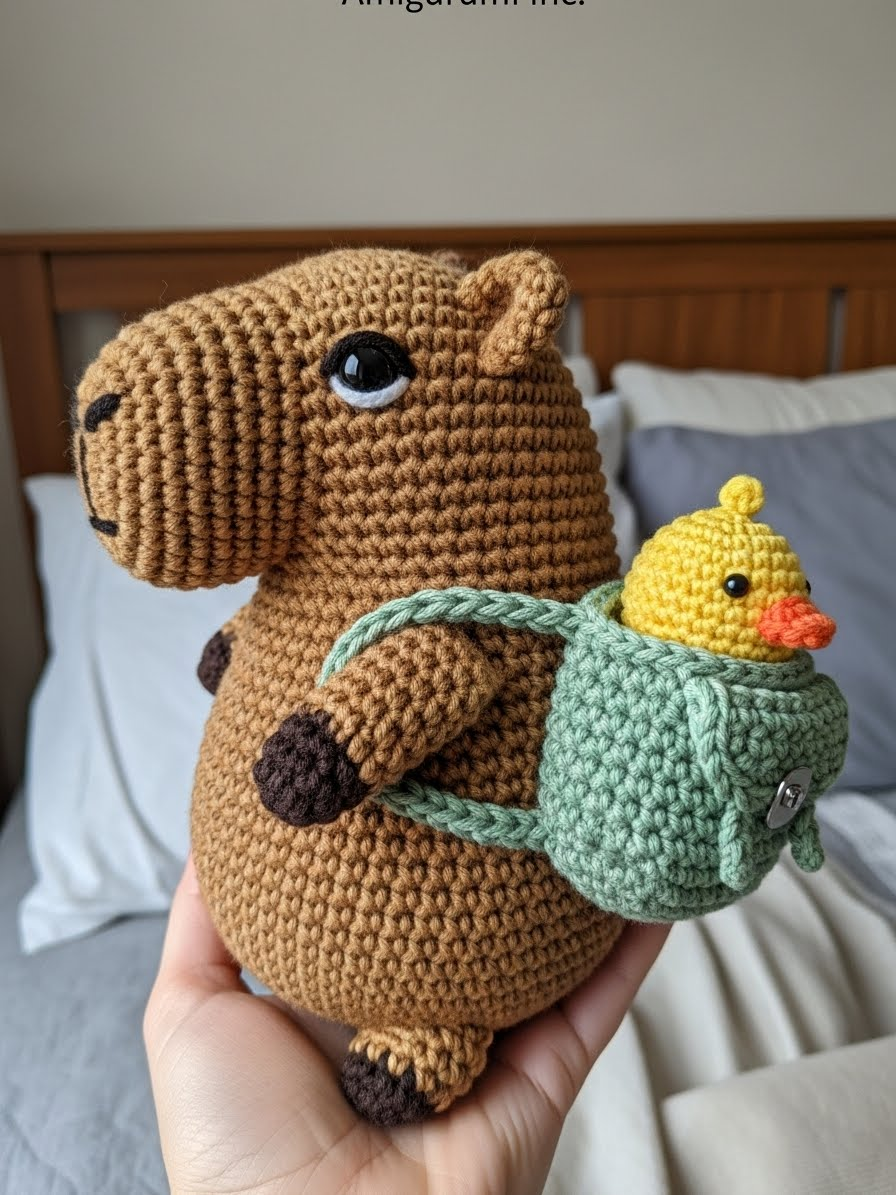
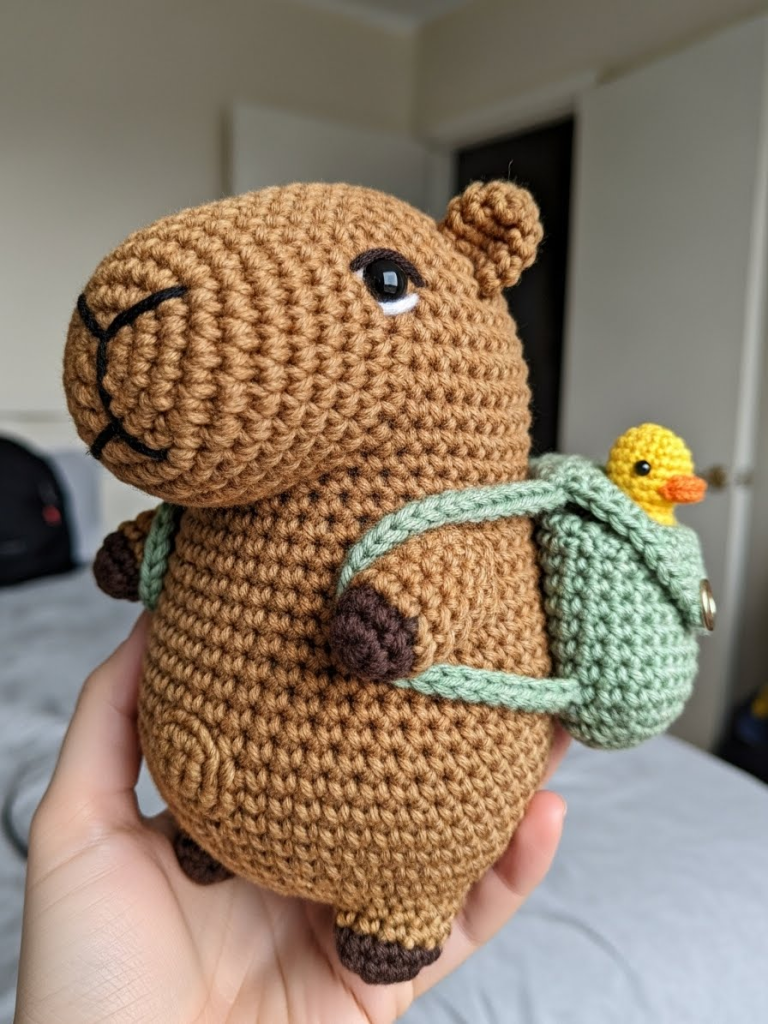
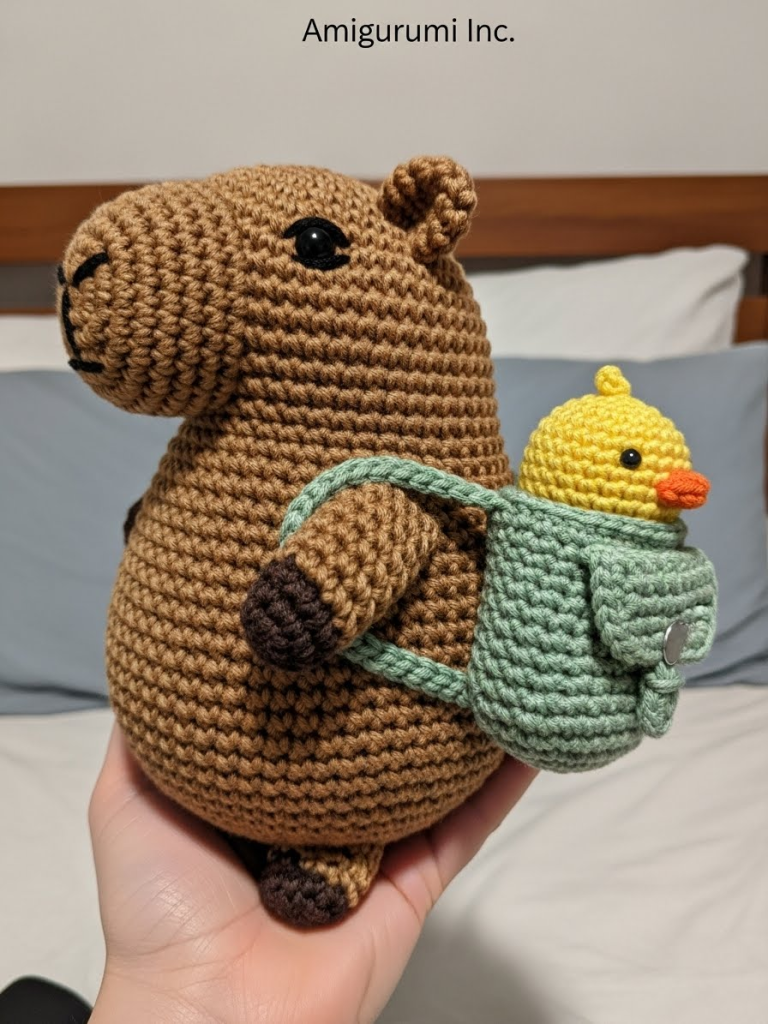
In a world that rushes, the Capybara remains unbothered. We have designed Barnaby to embody this “potato-shaped” zen. Unlike stiff, realistic replicas, Barnaby embraces the Aesthetic of Softness. He features a continuous head-and-body construction to ensure durability and a seamless silhouette.
The commercial appeal here is the “Play Set” factor. By including a removable satchel and a separate character (Pip), you transform a static display item into an interactive toy. This increases the perceived value for buyers and makes it an irresistible gift for children and stressed adults alike.
Project Snapshot
📊 Difficulty: Intermediate (requires shaping and small parts)
⏰ Est. Time: 4–6 Hours
📏 Size: Approx. 14cm (5.5 inches) tall
“The beauty of amigurumi lies not in perfection, but in personality. Give Barnaby a gaze that says, ‘I am listening.'” — Patricia
Materials & Tools Needed
🧶 Yarn:
- Toffee Brown: DK or Worsted Weight (approx. 70g) for Barnaby
- Butter Yellow: Small amount (approx. 10g) for Pip
- Sage Green: Small amount (approx. 15g) for the Satchel
- Dark Coffee: Scrap yarn for nose embroidery
🪡 Hook: 2.5mm or 2.75mm (aim for tight tension)
✨ Other Materials:
- Safety Eyes: 9mm (Barnaby) and 5mm (Pip)
- Fiberfill stuffing
- Yarn needle
- Stitch markers
- Pins for assembly
Abbreviations & Stitches Used
MR: Magic Ring
ch: Chain
sc: Single Crochet
inc: Increase (2 sc in one st)
dec: Decrease (invisible decrease preferred)
blo: Back Loop Only
The Complete Barnaby & Pip Pattern
Component 1: Barnaby’s Snout (Make First) Use Toffee Brown. We make the snout first so we can sew it onto the head while the head is still open.
➡️ Rnd 1: Chain 6. Start in 2nd ch from hook. 4 sc, 3 sc in last ch. Turn and work down other side: 3 sc, inc. (12)
➡️ Rnd 2: Inc, 3 sc, 3 inc, 3 sc, 2 inc. (18)
➡️ Rnd 3: (Sc, inc), 3 sc, (sc, inc) x 3, 3 sc, (sc, inc) x 2. (24)
➡️ Rnd 4-6: Sc around. (24)
Fasten off, leaving a long tail for sewing. Embroider a “Y” shaped nose on the front using Dark Coffee yarn.
Component 2: Barnaby’s Head & Body Use Toffee Brown. Stuff firmly as you go.
➡️ Rnd 1: 6 sc in MR. (6)
➡️ Rnd 2: Inc in every st. (12)
➡️ Rnd 3: (1 sc, inc) x 6. (18)
➡️ Rnd 4: (2 sc, inc) x 6. (24)
➡️ Rnd 5: (3 sc, inc) x 6. (30)
➡️ Rnd 6: (4 sc, inc) x 6. (36)
➡️ Rnd 7: (5 sc, inc) x 6. (42)
➡️ Rnd 8–15: Sc around. (42) Note: This creates the large, lovable head.
➡️ Rnd 16: (5 sc, dec) x 6. (36)
➡️ Rnd 17: (4 sc, dec) x 6. (30) Note: We are creating a subtle neck indentation.
➡️ Rnd 18: (4 sc, inc) x 6. (36)
➡️ Rnd 19: (5 sc, inc) x 6. (42)
➡️ Rnd 20: (6 sc, inc) x 6. (48) Note: Expanding for the chubby tummy.
➡️ Rnd 21–32: Sc around. (48) Note: This section determines his height. Add 2 rounds here if you want a taller capybara.
Pause here. Pin the Snout between Rounds 10 and 15. Sew it in place securely. Insert 9mm safety eyes just above the snout, wide-set, between Rounds 10 and 11.
➡️ Rnd 33: (6 sc, dec) x 6. (42)
➡️ Rnd 34: (5 sc, dec) x 6. (36)
➡️ Rnd 35: (4 sc, dec) x 6. (30)
➡️ Rnd 36: (3 sc, dec) x 6. (24)
➡️ Rnd 37: (2 sc, dec) x 6. (18)
➡️ Rnd 38: (1 sc, dec) x 6. (12)
➡️ Rnd 39: Dec around. (6) Fasten off and weave in end.
Component 3: The Ears (Make 2) Use Toffee Brown.
➡️ Rnd 1: 6 sc in MR. (6)
➡️ Rnd 2: (2 sc, inc) x 2. (8)
➡️ Rnd 3: Sc around. (8)
Flatten the piece. Do not stuff. Sew the opening closed.
Component 4: The Arms (Make 2) Use Toffee Brown.
➡️ Rnd 1: 6 sc in MR. (6)
➡️ Rnd 2: (1 sc, inc) x 3. (9)
➡️ Rnd 3–8: Sc around. (9)
Stuff lightly at the bottom only. Flatten the top and sew closed.
Component 5: The Stubby Legs (Make 2) Use Toffee Brown.
➡️ Rnd 1: 6 sc in MR. (6)
➡️ Rnd 2: Inc in every st. (12)
➡️ Rnd 3: (BLO) Sc around. (12)
➡️ Rnd 4: Sc around. (12)
Stuff firmly. Fasten off, leave tail for sewing.
Component 6: Pip the Duckling Use Butter Yellow.
➡️ Rnd 1: 6 sc in MR. (6)
➡️ Rnd 2: Inc in every st. (12)
➡️ Rnd 3–6: Sc around. (12)
Insert 5mm eyes between Rnd 4 and 5. Embroider a tiny orange beak.
➡️ Rnd 7: Dec around. (6)
Stuff. Close hole. Wings (Make 2): Ch 3, sc in 2nd ch, sl st in last ch. Sew to sides.
Component 7: The Satchel Use Sage Green.
➡️ Row 1: Ch 9. Sc in 2nd ch from hook and across. (8). Turn.
➡️ Row 2–16: Ch 1, sc across. (8) Fold the bottom up to create a pocket (about 6 rows deep). Sew the sides together.
➡️ Straps: Join yarn at top corner of bag. Ch 25 (check length on Barnaby), join to bottom corner. Repeat for other side.
Assembly & Final Touches
- Ears: Attach the ears high on the head, roughly at Round 5. They should look small compared to the head.
- Limbs: Sew the legs to the bottom of the body so Barnaby sits flat without tipping. Sew arms at the “neck” indentation (Round 17), angled slightly forward to hold the backpack straps.
- The Interaction: Place the satchel on Barnaby’s back. Slide the straps over his arms. Place Pip snugly inside.
Tips & FAQs
Q: My capybara tips over. A: Ensure the legs are sewn widely apart on the base. You can also add a small pouch of weighted beads (in a nylon stocking) at the bottom of the body before closing.
Q: Can I brush the yarn? A: Absolutely. Using a pet slicker brush on the Toffee yarn creates a “fuzzy” texture that looks incredibly realistic and soft.
A Final Word
You have created a friendship in fiber. Barnaby and Pip are ready for their adventures—or perhaps just a quiet nap on a bookshelf. May this project bring a sense of calm accomplishment to your day.
With love and stitches, Patricia