Greetings, my fellow artisans. Today, we bring a breath of fresh spring air into our hands. This sleeping floral bunny is a celebration of gentle mornings and blooming gardens, ready to be shaped stitch by stitch.
About This Creation & Angle
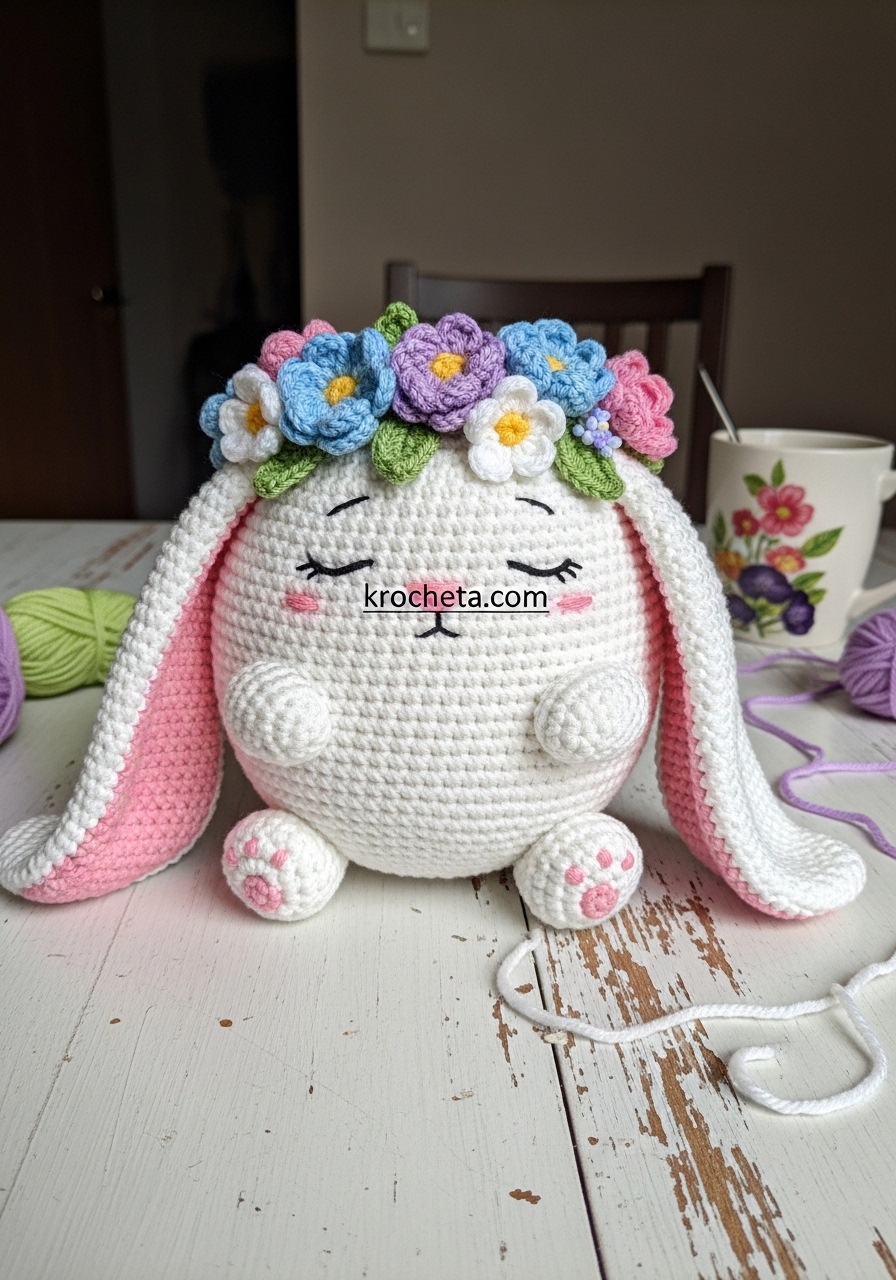
This rounded little darling captures the essence of tranquility. The design focuses entirely on the soft, unbroken curves of the body, creating a shape that begs to be held.
I designed this specific project to teach you the art of modular floral adornments. By mastering these small, separate blooms, you unlock endless variations for your craft.
You can customize the crown to match any nursery palette, making this an ideal tutorial for those looking to expand their catalog of high-quality, handmade gifts.
Project Snapshot:
📊 Difficulty: Intermediate
⏰ Est. Time: 4 to 5 hours
📏 Size: Approximately 15cm from base to ear tip
“A curve crafted with patience holds a lifetime of comfort.” – Patricia
Materials & Tools Needed
🧶 Yarn: DK weight cotton blend in Snow White, Soft Pink, Lavender, Sky Blue, Sunshine Yellow, and Leaf Green.
🪡 Hook: 2.5mm crochet hook.
✨ Other Materials: Fiberfill stuffing, a yarn needle, stitch markers, and soft pink blush for the cheeks.

Abbreviations & Stitches Used
➡️ ch: chain
➡️ sl st: slip stitch
➡️ sc: single crochet
➡️ hdc: half double crochet
➡️ dc: double crochet
➡️ inc: increase (2 sc in one stitch)
➡️ dec: invisible decrease (sc 2 together)
The Complete Spring Blooming Bunny Pattern
The Spherical Body (Snow White)
➡️ Round 1: 6 sc in a magic ring (6)
➡️ Round 2: 6 inc (12)
➡️ Round 3: [1 sc, inc] 6 times (18)
➡️ Round 4: [2 sc, inc] 6 times (24)
➡️ Round 5: [3 sc, inc] 6 times (30)
➡️ Round 6: [4 sc, inc] 6 times (36)
➡️ Round 7: [5 sc, inc] 6 times (42)
➡️ Round 8: [6 sc, inc] 6 times (48)
➡️ Round 9: [7 sc, inc] 6 times (54)
➡️ Round 10: [8 sc, inc] 6 times (60)
➡️ Round 11: [9 sc, inc] 6 times (66)
➡️ Rounds 12-25: sc in each st around (66)
Artisan’s Note: Maintain an even, tight tension here. This continuous stretch forms the flawless, chubby base.
➡️ Round 26: [9 sc, dec] 6 times (60)
➡️ Round 27: [8 sc, dec] 6 times (54)
➡️ Round 28: [7 sc, dec] 6 times (48)
➡️ Round 29: [6 sc, dec] 6 times (42)
➡️ Round 30: [5 sc, dec] 6 times (36)
➡️ Round 31: [4 sc, dec] 6 times (30)
Artisan’s Note: Begin stuffing firmly right now, shaping it into a perfect, wide sphere with your palms.
➡️ Round 32: [3 sc, dec] 6 times (24)
➡️ Round 33: [2 sc, dec] 6 times (18)
➡️ Round 34: [1 sc, dec] 6 times (12)
➡️ Round 35: 6 dec (6)
Fasten off, weave the tail through the remaining stitches and pull tightly to close.
The Sweeping Outer Ears (Snow White – Make 2)
➡️ Round 1: 6 sc in a magic ring (6)
➡️ Round 2: [1 sc, inc] 3 times (9)
➡️ Round 3: [2 sc, inc] 3 times (12)
➡️ Round 4: [3 sc, inc] 3 times (15)
➡️ Round 5: [4 sc, inc] 3 times (18)
➡️ Rounds 6-18: sc in each st around (18)
➡️ Round 19: [4 sc, dec] 3 times (15)
➡️ Rounds 20-22: sc in each st around (15)
Fasten off, leaving a long tail for sewing. Do not stuff. Flatten the piece entirely.
The Inner Ear Panels (Soft Pink – Make 2)
➡️ Row 1: Ch 15. Starting in the second ch from hook: 1 sc, 1 hdc, 10 dc, 1 hdc, 3 sc in the last ch. Working down the opposite side of the chain: 1 hdc, 10 dc, 1 hdc, 1 sc. (29)
Fasten off, leaving a long tail.
Artisan’s Note: Sew this flat pink panel directly onto the center of the flattened outer ear, securing the edges neatly.
The Little Paws (Snow White – Make 2)
➡️ Round 1: 6 sc in a magic ring (6)
➡️ Round 2: 6 inc (12)
➡️ Round 3: [3 sc, inc] 3 times (15)
➡️ Rounds 4-6: sc in each st around (15)
➡️ Round 7: [3 sc, dec] 3 times (12)
➡️ Round 8: sc in each st around (12)
Stuff lightly. Flatten the open end and crochet 6 sc through both layers to close perfectly. Fasten off with a long tail.
The Large Petal Flowers (Sky Blue / White – Make 2 or 3)
➡️ Round 1: With Sunshine Yellow, 6 sc in a magic ring. Sl st to first sc. (6)
➡️ Round 2: Change to Sky Blue or White. [Ch 3, 2 dc in same st, ch 3, sl st in same st, sl st in next st] 6 times to create 6 full petals.
Fasten off, leaving a long tail for attachment.
The Medium Petal Flowers (Lavender / Pink – Make 3 or 4)
➡️ Round 1: With Sunshine Yellow, 5 sc in a magic ring. Sl st to first sc. (5)
➡️ Round 2: Change to Lavender or Pink. [Ch 2, 2 hdc in same st, ch 2, sl st in same st, sl st in next st] 5 times to create 5 delicate petals.
Fasten off, leaving a long tail.
Small Green Leaves (Leaf Green – Make 4)
➡️ Row 1: Ch 6. Starting in the second ch from hook: 1 sc, 1 hdc, 1 dc, 1 hdc, 1 sc. (5)
Fasten off, leaving a tail for attaching beneath the blooms.
The Gentle Face Details (Soft Pink)
➡️ Nose: Embroider a small, horizontal oval of pink yarn directly in the center of the body, falling between rounds 18 and 20.
➡️ Mouth: Stitch a single, straight vertical line dropping down from the nose over 2 rounds.
➡️ Eyes: Stitch two small curved lines to create sleeping eyes, spanning 2 stitches, about 3 stitches away from each side of the nose. Keep them resting low on the face.
Assembly & Final Touches
Sew the inner pink ear panels to the outer white ears.
Pinch the base of each assembled ear in half and sew them securely to the top of the head, spanning rounds 5 to 8.
Attach the little paws to the bottom front of the body, allowing the bunny to sit slightly tilted forward.
Arrange the flowers and leaves around the base of the ears, sewing each one down firmly to create a lush, blooming crown.
Gently brush soft pink blush beneath the embroidered eyes for a sweet, restful glow.
Tips & FAQs
➡️ Q: How do I ensure the body remains perfectly round and not egg-shaped?
➡️ A: The secret lies in the stuffing process. Add small amounts of fiberfill gradually, pushing it against the outer walls of the crochet fabric to mold the sphere, rather than clumping it all in the center.
➡️ Q: Can I use acrylic yarn instead of cotton?
➡️ A: You certainly can. Keep in mind that acrylic has more stretch, so your bunny may emerge slightly larger and softer. Adjust your hook size accordingly to maintain a tight, professional fabric.
A Final Word
Your hands have breathed life into something truly peaceful today. May this sleeping bunny bring quiet joy to whoever is lucky enough to hold it. Until our next creation, keep your tension even and your heart open.

