Welcome back to the atelier, my fellow artisan. Today, we are bringing a truly enchanting creature to life—a little guardian of the autumn harvest. Let us take our hooks and shape a charming companion that captures the cozy spirit of the season.
About This Creation & Angle
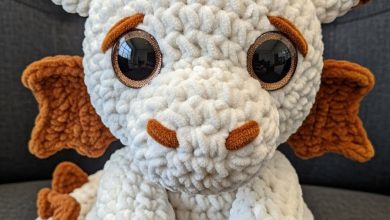
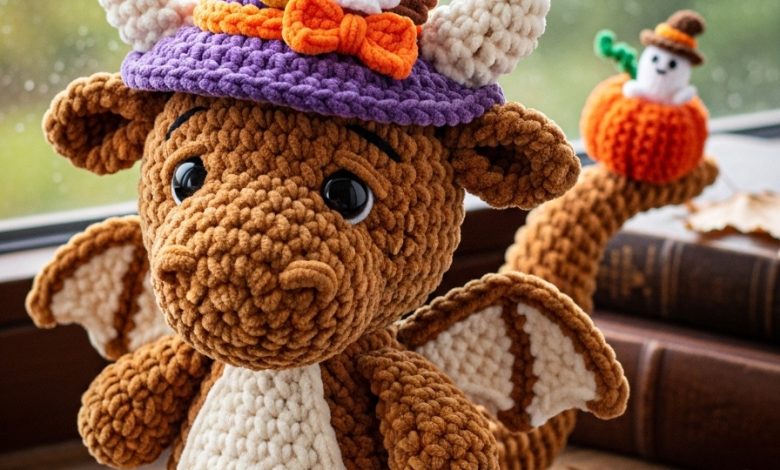
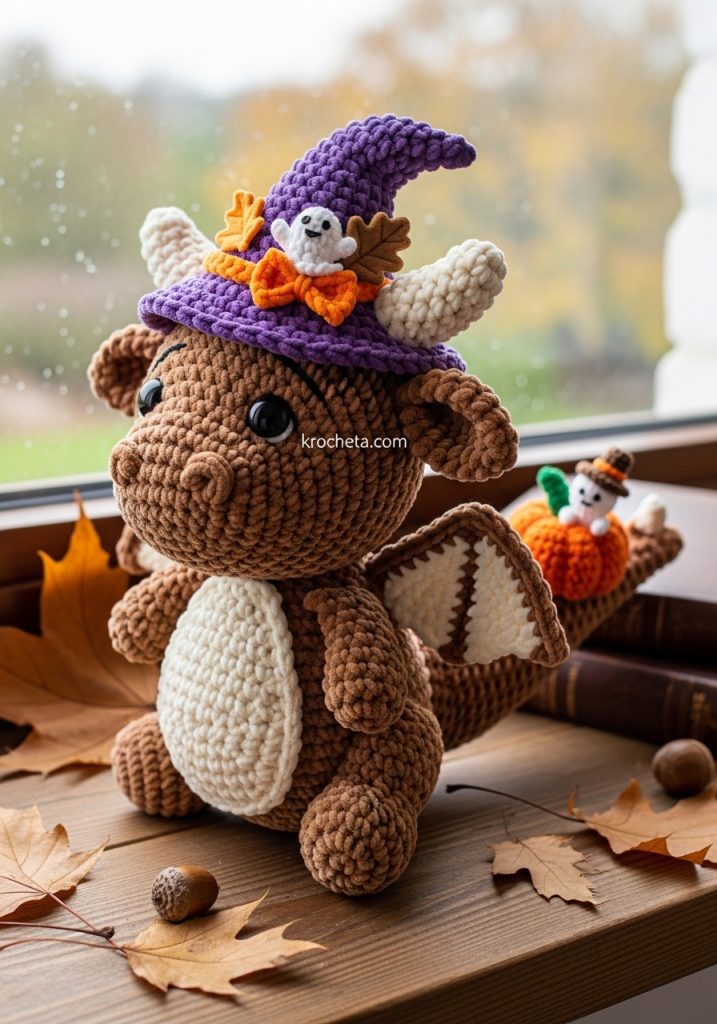
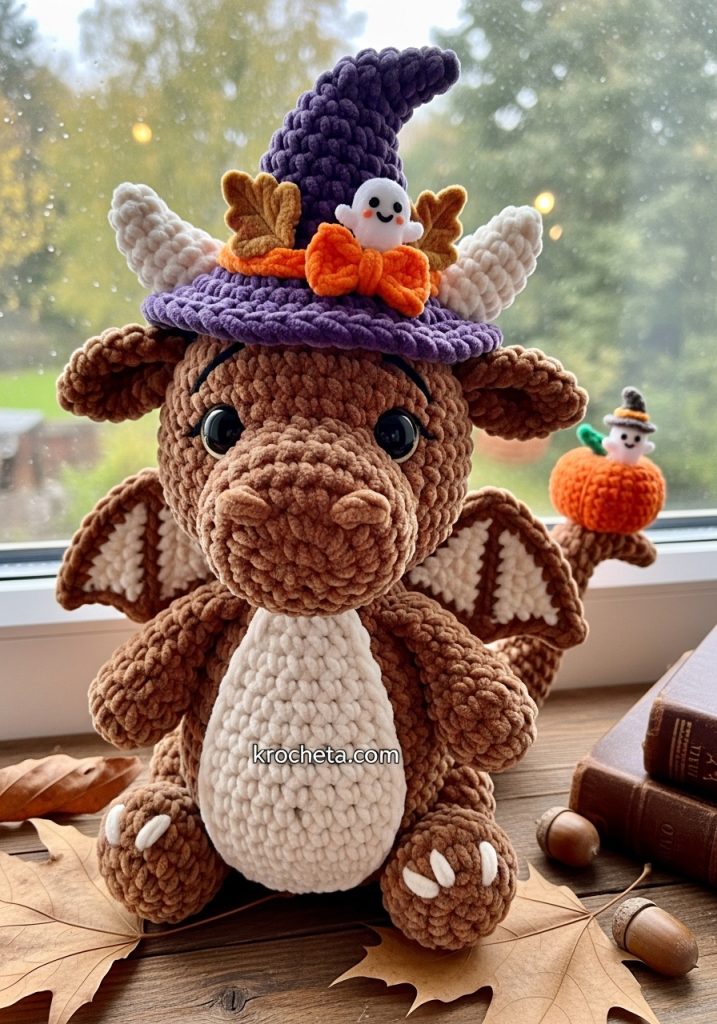
This harvest dragon project is a celebration of texture and storytelling. We are creating a piece that speaks of crisp autumn air and magical evenings. The chunky chenille yarn works wonderfully here, providing that essential, irresistible softness. When you craft pieces with such rich accessories—like the detailed witch hat and the miniature pumpkin companion—you elevate a simple toy into a true artisan collectible. This guide is designed to help you master those adorable, chubby proportions while keeping the features low and sweet for that perfect innocent gaze.
Project Snapshot:
📊 Difficulty: Intermediate
⏰ Est. Time: 8 to 10 hours
📏 Size: Approximately 14cm tall
“A well-placed stitch is a promise of character. Shape his cheeks with care, and he will look back at you with a soul of his own.” – Patricia
Materials & Tools Needed
🧶 Yarn: Super bulky chenille yarn (Size 6) in Warm Brown, Cream, Deep Purple, Bright Orange, White, and Autumnal Gold.
🪡 Hook: 4.5mm crochet hook.
✨ Other Materials: 14mm safety eyes, fiberfill stuffing, yarn needle, stitch markers, and a small amount of black embroidery thread for facial details.
Abbreviations & Stitches Used
ch: chain
sl st: slip stitch
sc: single crochet
inc: increase (two single crochets in one stitch)
dec: invisible decrease (crochet two stitches together)
hdc: half double crochet
dc: double crochet
BLO: back loops only
FLO: front loops only
The Complete Autumn Dragon Pattern
The Head (Warm Brown Yarn)
Round 1: 6 sc in a magic ring (6)
Round 2: 6 inc (12)
Round 3: (1 sc, inc) x 6 (18)
Round 4: (2 sc, inc) x 6 (24)
Round 5: (3 sc, inc) x 6 (30)
Round 6: (4 sc, inc) x 6 (36)
Round 7: (5 sc, inc) x 6 (42)
Rounds 8-13: sc in each st around (42) for 6 rounds
Artisan’s Note: Now we will shape the chubby cheeks to give him that wide, sweet face.
Round 14: 12 sc, (inc) x 6, 6 sc, (inc) x 6, 12 sc (54)
Rounds 15-19: sc in each st around (54) for 5 rounds
Artisan’s Note: Insert safety eyes between rounds 13 and 14, spacing them 9 stitches apart, resting right above the cheek increases. Stuff the upper head firmly.
Round 20: (7 sc, dec) x 6 (48)
Round 21: (6 sc, dec) x 6 (42)
Round 22: (5 sc, dec) x 6 (36)
Round 23: (4 sc, dec) x 6 (30)
Round 24: (3 sc, dec) x 6 (24)
Round 25: (2 sc, dec) x 6 (18)
Stuff the cheek areas generously to ensure they remain plump.
Round 26: (1 sc, dec) x 6 (12)
Round 27: 6 dec (6)
Fasten off, weaving the tail through the front loops of the remaining 6 stitches to pull tight.
The Muzzle (Warm Brown Yarn)
Round 1: 6 sc in a magic ring (6)
Round 2: 6 inc (12)
Round 3: (1 sc, inc) x 6 (18)
Rounds 4-5: sc in each st around (18)
Fasten off, leaving a long tail for sewing. Stuff lightly.
The Horns (Cream Yarn – Make 2)
Round 1: 4 sc in a magic ring (4)
Round 2: (1 sc, inc) x 2 (6)
Round 3: sc in each st around (6)
Round 4: (2 sc, inc) x 2 (8)
Rounds 5-7: sc in each st around (8)
Fasten off, leaving a long tail. Stuff gently.
The Body (Warm Brown Yarn)
Round 1: 6 sc in a magic ring (6)
Round 2: 6 inc (12)
Round 3: (1 sc, inc) x 6 (18)
Round 4: (2 sc, inc) x 6 (24)
Round 5: (3 sc, inc) x 6 (30)
Round 6: (4 sc, inc) x 6 (36)
Round 7: (5 sc, inc) x 6 (42)
Round 8: (6 sc, inc) x 6 (48)
Rounds 9-13: sc in each st around (48) for 5 rounds
Round 14: (6 sc, dec) x 6 (42)
Rounds 15-16: sc in each st around (42)
Round 17: (5 sc, dec) x 6 (36)
Rounds 18-19: sc in each st around (36)
Round 20: (4 sc, dec) x 6 (30)
Rounds 21-22: sc in each st around (30)
Round 23: (3 sc, dec) x 6 (24)
Round 24: sc in each st around (24)
Round 25: (2 sc, dec) x 6 (18)
Fasten off, leaving a long tail for sewing. Stuff the base heavily to create a stable, pear-shaped bottom.
The Belly Patch (Cream Yarn)
Row 1: ch 7, starting in the 2nd ch from hook, 6 sc, turn (6)
Row 2: ch 1, inc, 4 sc, inc, turn (8)
Rows 3-8: ch 1, sc across, turn (8) for 6 rows
Row 9: ch 1, dec, 4 sc, dec, turn (6)
Row 10: ch 1, dec, 2 sc, dec, turn (4)
Fasten off, leaving a long tail for sewing.
The Arms (Warm Brown Yarn – Make 2)
Round 1: 6 sc in a magic ring (6)
Round 2: (2 sc, inc) x 2 (8)
Round 3: (3 sc, inc) x 2 (10)
Rounds 4-9: sc in each st around (10) for 6 rounds
Round 10: (3 sc, dec) x 2 (8)
Fasten off, leaving a tail. Lightly stuff the lower half only.
The Legs (Warm Brown Yarn – Make 2)
Round 1: 6 sc in a magic ring (6)
Round 2: 6 inc (12)
Round 3: (1 sc, inc) x 6 (18)
Rounds 4-6: sc in each st around (18)
Round 7: 6 dec, 6 sc (12)
Rounds 8-9: sc in each st around (12)
Fasten off, leaving a tail. Stuff firmly at the bottom for stable footing.
The Tail (Warm Brown Yarn, tapering to Cream)
Start with Warm Brown:
Round 1: 6 sc in a magic ring (6)
Round 2: (1 sc, inc) x 3 (9)
Rounds 3-4: sc in each st around (9)
Round 5: (2 sc, inc) x 3 (12)
Rounds 6-7: sc in each st around (12)
Round 8: (3 sc, inc) x 3 (15)
Rounds 9-10: sc in each st around (15)
Round 11: (4 sc, inc) x 3 (18)
Rounds 12-14: sc in each st around (18)
Fasten off Warm Brown. Leave a long tail.
Tail Spade Tip (Cream Yarn):
Round 1: 4 sc in a magic ring (4)
Round 2: (1 sc, inc) x 2 (6)
Round 3: (2 sc, inc) x 2 (8)
Round 4: (3 sc, inc) x 2 (10)
Round 5: (3 sc, dec) x 2 (8)
Round 6: (2 sc, dec) x 2 (6)
Fasten off and sew to the very tip of the brown tail.
The Back Spikes (Cream Yarn)
Row 1: ch 20. Starting in 2nd ch from hook, (sl st, 3 dc in next ch, sl st in next ch) repeat across the chain. Fasten off and leave a tail for sewing.
The Wings (Make 2 Outer in Brown, 2 Inner in Cream)
Outer Wing (Warm Brown):
Row 1: ch 10. Starting in 2nd ch from hook, 9 sc, turn.
Row 2: ch 1, 7 sc, dec, turn (8)
Row 3: ch 1, dec, 6 sc, turn (7)
Row 4: ch 1, 5 sc, dec, turn (6)
Row 5: ch 1, dec, 4 sc, turn (5)
Row 6: ch 1, 3 sc, dec, turn (4)
Fasten off.
Inner Wing (Cream): Repeat the exact same pattern as the Outer Wing.
Assembly: Place inner cream wing over outer brown wing. Using warm brown yarn, sc around the edges of both pieces to join them together. Embroider two lines of cream yarn radiating outward on the inner wing.
The Enchanted Purple Hat (Deep Purple Yarn)
Round 1: 6 sc in a magic ring (6)
Round 2: (2 sc, inc) x 2 (8)
Round 3: sc in each st around (8)
Round 4: (3 sc, inc) x 2 (10)
Round 5: sc in each st around (10)
Round 6: (4 sc, inc) x 2 (12)
Round 7: (2 sc, inc) x 4 (16)
Round 8: sc in each st around (16)
Round 9: (3 sc, inc) x 4 (20)
Round 10: (4 sc, inc) x 4 (24)
Round 11: sc in each st around (24)
Round 12: (3 sc, inc) x 6 (30)
Round 13: (4 sc, inc) x 6 (36)
Round 14: (5 sc, inc) x 6 (42)
Round 15: sc in each st around (42)
Round 16: (6 sc, inc) x 6 (48)
Round 17: FLO (7 sc, inc) x 6 (54)
Round 18: (8 sc, inc) x 6 (60)
Round 19: (9 sc, inc) x 6 (66)
Round 20: sc in each st around (66). Fasten off and weave in ends.
The Hat Trimmings & Accessories
Tiny Ghost (White Yarn – Make 2: One for hat, one for tail):
Round 1: 6 sc in magic ring (6)
Round 2: 6 inc (12)
Rounds 3-5: sc around (12)
Round 6: (sl st, 2 sc in next st) x 6 around edge to make a ruffle. Fasten off. Embroider tiny black eyes.
Orange Bow (Bright Orange Yarn):
ch 6. In 2nd ch from hook, hdc across (5). Fasten off. Wrap yarn tightly around the middle to cinch into a bow.
Autumn Leaf (Autumnal Gold):
ch 5. sl st in 2nd ch, sc in next, hdc in next, 3 dc in last ch. Rotate and work down the other side: hdc in next, sc in next, sl st in last. Fasten off.
The Tail Companions
Miniature Pumpkin (Bright Orange):
Round 1: 6 sc in magic ring (6)
Round 2: 6 inc (12)
Round 3: (1 sc, inc) x 6 (18)
Rounds 4-6: sc around (18)
Round 7: (1 sc, dec) x 6 (12)
Round 8: 6 dec (6). Fasten off. Loop yarn around the outside from top to bottom 5 times and pull tightly to create pumpkin ridges. Add a tiny green stem (ch 3, sc down).
Tiny Brown Ghost Hat (Warm Brown):
Round 1: 4 sc in magic ring.
Round 2: (1 sc, inc) x 2 (6)
Round 3: FLO 6 inc (12). Fasten off. Place on the second tiny ghost, and sit the ghost atop the pumpkin.
Assembly & Final Touches
➡️ Sew the head to the body. Keep the chin tilted slightly downward for a bashful look.
➡️ Attach the muzzle below the eyes, centered on the face.
➡️ Sew the horns to the top of the head, leaning slightly backward.
➡️ Stitch the cream belly patch to the front of the body.
➡️ Attach the legs to the bottom sides of the body so he sits evenly.
➡️ Sew the arms just beneath the neck, angling them slightly inward.
➡️ Pin and stitch the tail to the lower back, ensuring it acts as a stabilizing tripod.
➡️ Attach the back spikes starting from the base of the neck down to the tail.
➡️ Sew the wings securely to the upper back, on either side of the spikes.
➡️ Assemble the hat trimmings (ghost, bow, leaf) to the brim of the purple hat, and place the hat on the dragon’s head.
➡️ Place the pumpkin and its tiny ghost rider onto the spade tip of the tail.
Tips & FAQs
➡️ Q: Why is my dragon’s head leaning back?
➡️ A: This often happens if the neck joint lacks firm stuffing. Add extra fiberfill to the very top of the body before sewing the head completely on.
➡️ Q: Can I use worsted weight yarn instead of chenille?
➡️ A: Absolutely. Your dragon will simply be much smaller. Adjust your hook size down to 2.5mm or 3.0mm accordingly.
A Final Word
Your hands have fashioned pure joy today. This harvest dragon is more than yarn and stuffing; it is a quiet little companion ready to guard your autumn days. Be proud of the care you poured into every stitch.