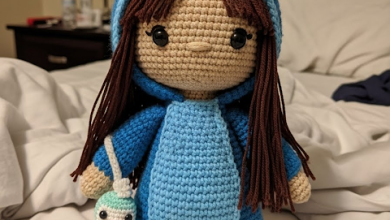
Greetings, my fellow artisans of the hook and yarn. Today, we welcome Flora into our homes, a testament to the exquisite softness of velvet and the renewing spirit of spring. I am overjoyed to share her complete tutorial with you here at krocheta.com, where every stitch is a true labor of love.
About This Creation & Angle
Working with plush velvet transforms a simple toy into a cherished family heirloom. It requires a gentle hand and a bit of patience, but the resulting huggable softness is unparalleled.
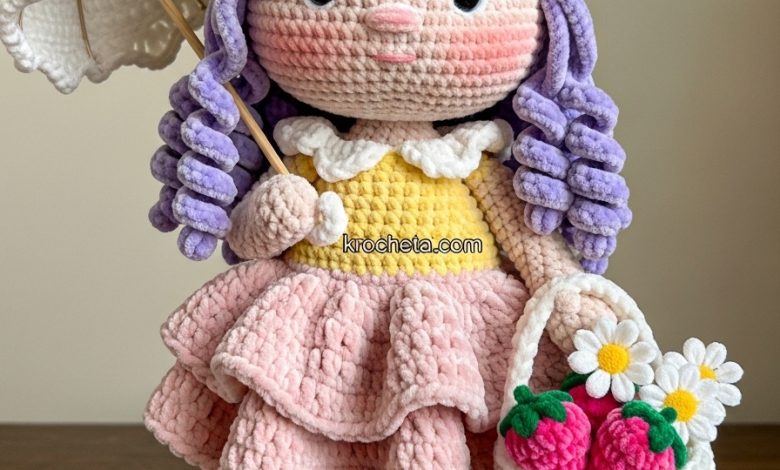
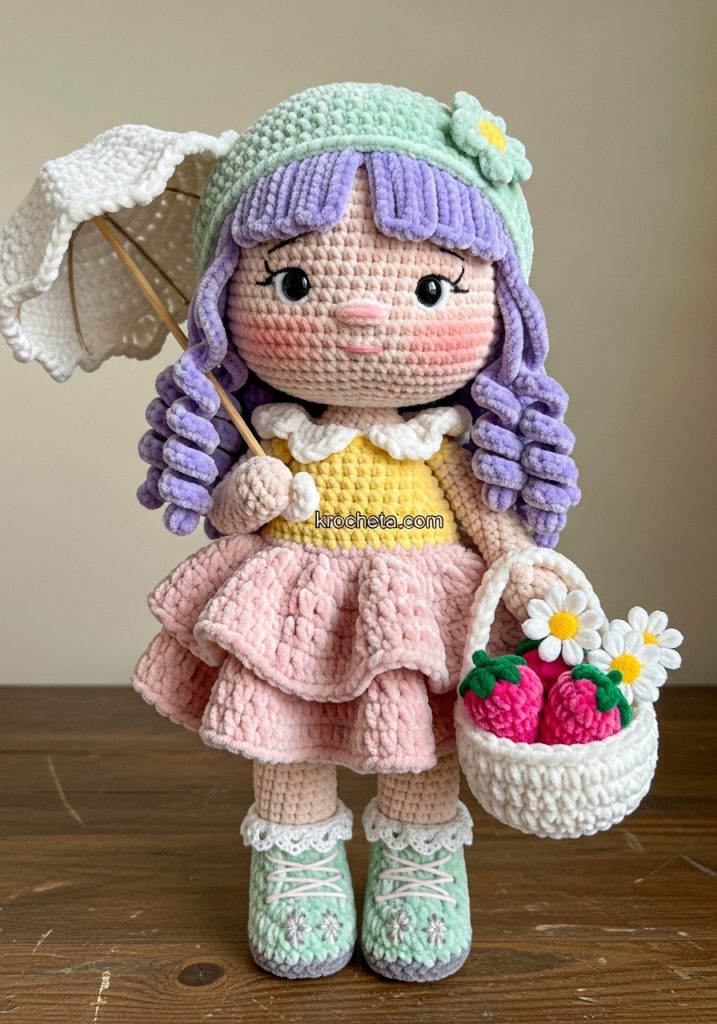
Flora embodies this luxurious texture perfectly. Her pastel palette mimics the first blooms of the season.
Her rounded, chubby cheeks invite immediate adoration, capturing that precious gaze of innocence we so dearly love.
By following this guide, you will master the tension required for velvet, ensuring your creation is both sturdy and unimaginably soft.
Project Snapshot
📊 Difficulty: Intermediate
⏰ Est. Time: 12-14 hours
📏 Size: 30cm tall
“A handmade doll is a quiet friend, born from your hands and waiting to be loved.”
Materials & Tools Needed
🧶 Yarn: Chunky Velvet Yarn (Bulky Weight 5) in Buttercup Yellow, Blush Pink, Lavender, Mint Green, and Ivory. Sport Weight Cotton in Light Peach for the skin tone.
🪡 Hook: 4.0mm for velvet pieces, 2.5mm for cotton skin pieces.
✨ Other Materials: 10mm safety eyes, stitch markers, premium fiberfill stuffing, long tapestry needle, and a thick craft wire for the parasol handle.
Abbreviations & Stitches Used
➡️ ch: chain
➡️ sl st: slip stitch
➡️ sc: single crochet
➡️ hdc: half double crochet
➡️ dc: double crochet
➡️ inc: increase (2 sc in one stitch)
➡️ dec: decrease (invisible decrease preferred)
➡️ blo: back loop only
➡️ flo: front loop only
The Complete Flora Pattern
The Head (Use 2.5mm hook and Light Peach Cotton)
Rnd 1: 6 sc in magic ring (6)
Rnd 2: 6 inc (12)
Rnd 3: (sc 1, inc) x 6 (18)
Rnd 4: (sc 2, inc) x 6 (24)
Rnd 5: (sc 3, inc) x 6 (30)
Rnd 6: (sc 4, inc) x 6 (36)
Rnd 7: (sc 5, inc) x 6 (42)
Rnd 8: (sc 6, inc) x 6 (48)
Rnd 9: (sc 7, inc) x 6 (54)
Rnd 10: (sc 8, inc) x 6 (60)
Rnd 11: (sc 9, inc) x 6 (66)
Rnd 12-17: 66 sc (66)
Rnd 18: sc 21, (inc, sc 1) x 6, (sc 1, inc) x 6, sc 21 (78)
Artisan’s Note: The increases in Round 18 create the foundation for Flora’s chubby, wide cheeks. Place your safety eyes low on the face between rounds 17 and 18, leaving 14 stitches between them to achieve that wide-set gaze of innocence.
Rnd 19-25: 78 sc (78)
Rnd 26: sc 21, (dec, sc 1) x 6, (sc 1, dec) x 6, sc 21 (66)
Rnd 27: (sc 9, dec) x 6 (60)
Rnd 28: (sc 8, dec) x 6 (54)
Rnd 29: (sc 7, dec) x 6 (48)
Rnd 30: (sc 6, dec) x 6 (42)
Rnd 31: (sc 5, dec) x 6 (36)
Rnd 32: (sc 4, dec) x 6 (30)
Rnd 33: (sc 3, dec) x 6 (24)
Rnd 34: (sc 2, dec) x 6 (18)
Fasten off. Stuff the head very firmly, focusing the fiberfill outwards into the cheek areas to maintain the round, soft baby schema.
The Hair (Use 4.0mm hook and Lavender Velvet)
Rnd 1: 6 sc in magic ring (6)
Rnd 2: 6 inc (12)
Rnd 3: (sc 1, inc) x 6 (18)
Rnd 4: (sc 2, inc) x 6 (24)
Rnd 5: (sc 3, inc) x 6 (30)
Rnd 6: (sc 4, inc) x 6 (36)
Rnd 7-10: 36 sc (36)
Artisan’s Note: Do not fasten off. We will now crochet the long, thick curls directly from the cap.
Curls: (Ch 25, hdc in 2nd ch from hook, 23 hdc back down the chain, sl st into the next stitch on the cap) x 36. Fasten off and leave a very long tail for sewing the cap to the head.
The Body (Use 2.5mm hook and Light Peach Cotton)
Rnd 1: 6 sc in magic ring (6)
Rnd 2: 6 inc (12)
Rnd 3: (sc 1, inc) x 6 (18)
Rnd 4: (sc 2, inc) x 6 (24)
Rnd 5: (sc 3, inc) x 6 (30)
Rnd 6: (sc 4, inc) x 6 (36)
Rnd 7: (sc 5, inc) x 6 (42)
Rnd 8: (sc 6, inc) x 6 (48)
Rnd 9-14: 48 sc (48)
Rnd 15: (sc 6, dec) x 6 (42)
Rnd 16-18: 42 sc (42)
Rnd 19: (sc 5, dec) x 6 (36)
Rnd 20-22: 36 sc (36)
Rnd 23: (sc 4, dec) x 6 (30)
Rnd 24-26: 30 sc (30)
Rnd 27: (sc 3, dec) x 6 (24)
Rnd 28-30: 24 sc (24)
Rnd 31: (sc 2, dec) x 6 (18)
Rnd 32-34: 18 sc (18)
Fasten off, leaving a long tail to attach the body to the head. Stuff firmly, ensuring the neck area is dense to support her large head.
The Arms (Make 2. Use 2.5mm hook and Light Peach Cotton)
Rnd 1: 5 sc in magic ring (5)
Rnd 2: 5 inc (10)
Rnd 3: (sc 1, inc) x 5 (15)
Rnd 4-6: 15 sc (15)
Rnd 7: sc 6, 3 dec, sc 3 (12) – This shapes the chubby little hand.
Rnd 8-22: 12 sc (12)
Fasten off, stuff only the bottom half of the arms lightly, and pinch the top flat to sew later.
The Legs (Make 2. Use 2.5mm hook and Light Peach Cotton)
Rnd 1: 6 sc in magic ring (6)
Rnd 2: 6 inc (12)
Rnd 3: (sc 1, inc) x 6 (18)
Rnd 4: (sc 2, inc) x 6 (24)
Rnd 5-8: 24 sc (24)
Rnd 9: sc 8, 4 dec, sc 8 (20)
Rnd 10: sc 6, 4 dec, sc 6 (16) – This shapes the cute, stout foot.
Rnd 11-25: 16 sc (16)
Fasten off and stuff firmly up to the top.
Spring Boots (Make 2. Use 4.0mm hook and Mint Green Velvet)
Rnd 1: Ch 7, sc in 2nd ch from hook, sc 4, 3 sc in last ch, work down the other side of the chain: sc 4, inc (14)
Rnd 2: inc, sc 4, 3 inc, sc 4, 2 inc (20)
Rnd 3: blo 20 sc (20)
Rnd 4-5: 20 sc (20)
Rnd 6: sc 6, 4 dec, sc 6 (16)
Rnd 7-8: 16 sc (16)
Fasten off and weave in ends.
The Maiden’s Dress (Use 4.0mm hook. Start with Buttercup Yellow Velvet)
Rnd 1: Ch 25, sl st to join in a circle. 25 sc (25)
Rnd 2: (sc 4, inc) x 5 (30)
Rnd 3: (sc 5, inc) x 5 (35)
Rnd 4-8: 35 sc (35)
Change to Blush Pink Velvet for the skirt.
Rnd 9: flo 35 inc (70)
Rnd 10-15: 70 dc (70)
Rnd 16: (ch 3, sl st in next stitch) x 70 to create a delicate ruffled hem.
Fasten off and weave in ends.
The Crocheted Parasol (Use 4.0mm hook and Ivory Velvet)
Rnd 1: 6 sc in magic ring (6)
Rnd 2: 6 inc (12)
Rnd 3: (sc 1, inc) x 6 (18)
Rnd 4: (sc 2, inc) x 6 (24)
Rnd 5: (sc 3, inc) x 6 (30)
Rnd 6: (sc 4, inc) x 6 (36)
Rnd 7: (sc 5, inc) x 6 (42)
Rnd 8: (sc 6, inc) x 6 (48)
Rnd 9-11: 48 sc (48)
Rnd 12: (sc 7, sl st in next st, skip 1, 5 dc in next st, skip 1) x 6 to create the scalloped canopy edge.
Fasten off. Wrap your craft wire tightly in Ivory velvet yarn, securing the ends with glue, and insert it through the magic ring of the canopy.
The Crocheted Basket (Use 4.0mm hook and Ivory Velvet)
Rnd 1: 8 sc in magic ring (8)
Rnd 2: 8 inc (16)
Rnd 3: (sc 1, inc) x 8 (24)
Rnd 4: blo 24 sc (24)
Rnd 5-9: 24 sc (24)
Handle: Ch 15, skip 11 stitches, sl st to the 12th stitch. Fasten off.
Plush Strawberries (Make 3. Use 4.0mm hook and Blush Pink Velvet)
Rnd 1: 4 sc in magic ring (4)
Rnd 2: (sc 1, inc) x 2 (6)
Rnd 3: (sc 1, inc) x 3 (9)
Rnd 4: (sc 2, inc) x 3 (12)
Rnd 5: 12 sc (12)
Fasten off, stuff lightly, and sew the top closed. Use a tiny bit of mint yarn to embroider a leaf on top.
Plush Daisies (Make 2. Use 2.5mm hook and Buttercup/Ivory Cotton)
Center: With Yellow, 5 sc in magic ring. Sl st to join.
Petals: Change to Ivory. (Ch 4, sc in 2nd ch from hook, hdc 2, sl st into next st on center) x 5. Fasten off.
Assembly & Final Touches
➡️ Using your long peach tail, sew the body securely to the head, checking multiple angles to ensure her gaze remains forward.
➡️ Attach the legs to the bottom of the body. They should be positioned slightly forward so she can sit comfortably.
➡️ Sew the arms to the sides of the body, right beneath the neck joint.
➡️ Secure the hair cap to the head, letting the thick velvet curls fall naturally over her shoulders.
➡️ Dress Flora in her Buttercup and Blush Pink gown, slip on her Mint Green boots, and place the basket and parasol in her hands.
Tips & FAQs
➡️ How do I keep my velvet yarn from snapping? Velvet yarn is luxurious but lacks elasticity. Pull your magic rings closed very gently, pushing the stitches along rather than yanking the tail.
➡️ Why are there gaps in my amigurumi? If you see holes, drop your hook size down. Amigurumi requires tight tension to hide the stuffing, especially with chunky fibers.
A Final Word
Your atelier has just produced something truly beautiful. Flora is a reminder that with patience and quality materials, we can crochet warmth and joy into existence. May she brighten your spring days and bring a smile to all who see her.