Welcome back to the atelier, my fellow artists. Today, we are bringing an absolute vision of innocence into the world. Gather your softest yarns, for we are about to create a masterpiece that will capture hearts instantly.
About This Creation & The Viral Angle
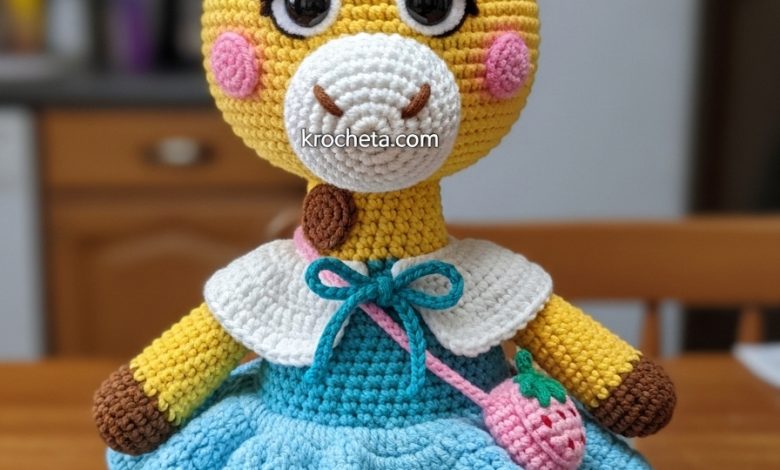
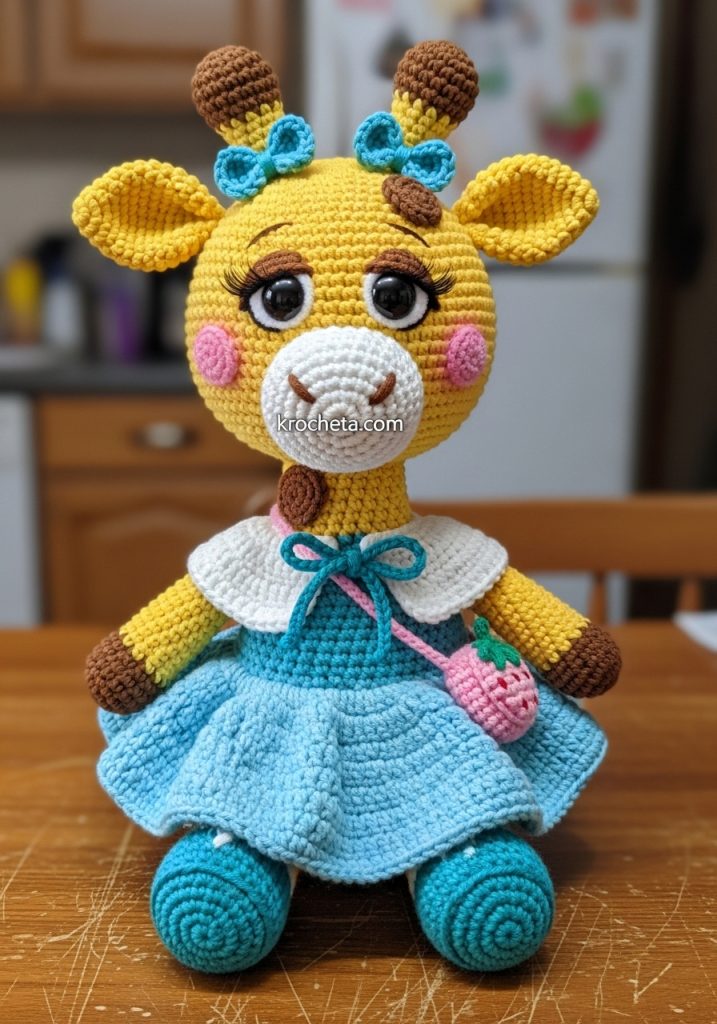
We are crafting a darling giraffe designed specifically to stop the endless scrolling on social media. The secret to a truly magnetic amigurumi lies in the profound exaggeration of baby features. By dropping the eye placement to the lower third of the face and expanding the width of the cheeks, we activate a deeply human response to cuteness.
This project is meticulously structured for artisans looking to elevate their craft fair inventory or build a highly engaged online audience. The addition of miniature storytelling accessories, like our little pastel strawberry satchel, provides that highly desirable, picture-perfect finish that collectors adore.
Project Snapshot
📊 Difficulty: Intermediate Artisan
⏰ Est. Time: 8 to 10 Hours
📏 Size: Approximately 8 inches (20 cm) tall
“We do not merely count stitches; we shape character and breathe life into every single loop.” – Patricia Poltera
Materials & Tools Needed
🧶 Yarn: Premier Parfait Chunky (or similar weight 6 plush yarn) in Butter Yellow, Teal, Cloud White, Pastel Blue, Cocoa Brown, and Pastel Pink.
🧶 Yarn: A small amount of Kelly Green for the strawberry leaf.
🪡 Hook: 4.0mm ergonomic crochet hook.
✨ Other Materials: 18mm black safety eyes.
✨ Other Materials: Dramatic false eyelashes and fabric glue.
✨ Other Materials: Premium polyfil stuffing.
✨ Other Materials: Soft pink blush and a makeup brush.
✨ Other Materials: Brown felt for the spots (optional, can also be embroidered).
✨ Other Materials: Long tapestry needle for assembly.
Abbreviations & Stitches Used
➡️ ch: chain
➡️ sl st: slip stitch
➡️ sc: single crochet
➡️ inc: single crochet increase (two stitches in one space)
➡️ dec: invisible decrease (pulling two front loops together)
➡️ hdc: half double crochet
➡️ dc: double crochet
➡️ FLO: front loop only
➡️ BLO: back loop only
The Complete Sweet Giraffe Pattern
The Oversized Head
We begin from the top of the head, working our way down. Stuff firmly as you go, paying special attention to the cheeks.
Rnd 1: 6 sc in a magic ring (6)
Rnd 2: inc in each st around (12)
Rnd 3: [1 sc, inc] 6 times (18)
Rnd 4: [2 sc, inc] 6 times (24)
Rnd 5: [3 sc, inc] 6 times (30)
Rnd 6: [4 sc, inc] 6 times (36)
Rnd 7: [5 sc, inc] 6 times (42)
Rnd 8: [6 sc, inc] 6 times (48)
Rnd 9: [7 sc, inc] 6 times (54)
Rnd 10: [8 sc, inc] 6 times (60)
Rnds 11-23: sc in each st around (60)
Artisan’s Note: The following round creates the sharp expansion for our signature chubby cheeks.
Rnd 24: 15 sc, [inc, 1 sc] 6 times, 6 sc, [1 sc, inc] 6 times, 15 sc (72)
Rnds 25-30: sc in each st around (72)
Rnd 31: [10 sc, dec] 6 times (66)
Rnd 32: [9 sc, dec] 6 times (60)
Rnd 33: [8 sc, dec] 6 times (54)
Rnd 34: [7 sc, dec] 6 times (48)
Rnd 35: [6 sc, dec] 6 times (42)
Artisan’s Note: Insert the 18mm safety eyes between rounds 23 and 24, exactly 12 stitches apart. Secure the false eyelashes behind the top edge of the eyes before adding the safety washers.
Rnd 36: [5 sc, dec] 6 times (36)
Rnd 37: [4 sc, dec] 6 times (30)
Rnd 38: [3 sc, dec] 6 times (24)
Rnd 39: [2 sc, dec] 6 times (18)
Fasten off, leaving a long tail for sewing. Stuff the cheeks until they are perfectly round and firm.
The Chubby Snout
Using Cloud White yarn.
Rnd 1: ch 6, starting in the second ch from the hook: 4 sc, 3 sc in the last ch. Working down the opposite side of the chain: 3 sc, 2 sc in the last ch (12)
Rnd 2: inc, 3 sc, 3 inc, 3 sc, 2 inc (18)
Rnd 3: 1 sc, inc, 3 sc, [1 sc, inc] 3 times, 3 sc, [1 sc, inc] 2 times (24)
Rnds 4-5: sc in each st around (24)
Fasten off, leaving a long tail. Stuff lightly before attaching.
The Ears (Make 2)
Using Butter Yellow yarn.
Rnd 1: 4 sc in a magic ring (4)
Rnd 2: [1 sc, inc] 2 times (6)
Rnd 3: [2 sc, inc] 2 times (8)
Rnd 4: [3 sc, inc] 2 times (10)
Rnd 5: [4 sc, inc] 2 times (12)
Rnd 6: [5 sc, inc] 2 times (14)
Rnds 7-9: sc in each st around (14)
Rnd 10: [5 sc, dec] 2 times (12)
Rnd 11: [4 sc, dec] 2 times (10)
Fasten off. Do not stuff. Flatten the ear and fold the bottom edges together, securing with a stitch.
The Ossicones / Horns (Make 2)
Starting with Cocoa Brown yarn.
Rnd 1: 6 sc in a magic ring (6)
Rnd 2: inc in each st around (12)
Rnds 3-4: sc in each st around (12)
Rnd 5: dec 6 times (6)
Change to Butter Yellow yarn.
Rnds 6-11: sc in each st around (6)
Fasten off, leaving a tail. Lightly stuff the brown top.
The Legs & Tiny Boots (Make 2)
Starting with Teal yarn for the boot base.
Rnd 1: 6 sc in a magic ring (6)
Rnd 2: inc in each st around (12)
Rnd 3: [1 sc, inc] 6 times (18)
Rnd 4: BLO sc in each st around (18)
Rnds 5-6: sc in each st around (18)
Change to Cloud White yarn for the sock.
Rnd 7: sc in each st around (18)
Rnd 8: FLO [sl st, 2 hdc in next st, sl st] 6 times to create the scallop trim.
Change to Butter Yellow yarn. Work the next round into the BLO of round 7, behind the scallops.
Rnd 9: BLO sc in each st around (18)
Artisan’s Note: The following round shapes the little knee.
Rnd 10: 6 sc, 3 dec, 6 sc (15)
Rnds 11-13: sc in each st around (15)
Fasten off the first leg. Do not fasten off the second leg; we will continue to the body. Stuff both legs firmly.
The Petite Body
Continuing from the second leg with Butter Yellow yarn.
Rnd 14: ch 3, join to the first leg with a sc. Sc 14 around the first leg, sc 3 across the chain, sc 15 around the second leg, sc 3 across the opposite side of the chain (36)
Rnd 15: [5 sc, inc] 6 times (42)
Rnd 16: [6 sc, inc] 6 times (48)
Rnds 17-21: sc in each st around (48)
Rnd 22: [6 sc, dec] 6 times (42)
Rnds 23-24: sc in each st around (42)
Rnd 25: [5 sc, dec] 6 times (36)
Rnd 26: sc in each st around (36)
Rnd 27: [4 sc, dec] 6 times (30)
Rnd 28: sc in each st around (30)
Rnd 29: [3 sc, dec] 6 times (24)
Rnd 30: sc in each st around (24)
Artisan’s Note: The final decrease creates a sturdy, sloped neck.
Rnd 31: [2 sc, dec] 6 times (18)
Rnd 32: sc in each st around (18)
Fasten off. Stuff the body firmly, ensuring the chest and hips are plump.
The Little Arms (Make 2)
Using Butter Yellow yarn.
Rnd 1: 6 sc in a magic ring (6)
Rnd 2: [1 sc, inc] 3 times (9)
Rnd 3: [2 sc, inc] 3 times (12)
Rnds 4-6: sc in each st around (12)
Artisan’s Note: This round creates a gentle bend at the elbow.
Rnd 7: 3 sc, 3 dec, 3 sc (9)
Rnds 8-14: sc in each st around (9)
Fasten off, leaving a tail. Stuff only the bottom half of the arm. Flatten the top and crochet across the opening with 4 sc to seal it.
The Pastel Blue Dress
Using Pastel Blue yarn. We will work this in joined rounds.
Rnd 1: ch 24, join with a sl st to form a ring. ch 1, sc in each st around, sl st to join (24)
Rnd 2: ch 1, [3 sc, inc] 6 times, sl st to join (30)
Rnd 3: ch 2, dc inc in each st around, sl st to join (60)
Rnd 4: ch 2, [1 dc, dc inc] 30 times, sl st to join (90)
Rnds 5-7: ch 2, dc in each st around, sl st to join (90)
Change to Cloud White yarn for the petticoat ruffle.
Rnd 8: ch 1, [sc in next st, ch 2, sc in same st, skip 1 st] repeat around. Sl st to join.
Fasten off and weave in ends. The dress slips over the body before the head is attached.
The Frosting Capelet
Using Cloud White yarn. Worked in rows.
Row 1: ch 19, starting in the second ch from hook, sc 18. Turn (18)
Row 2: ch 2, [2 dc, dc inc] 6 times. Turn (24)
Row 3: ch 2, [3 dc, dc inc] 6 times. Turn (30)
Row 4: ch 2, dc in each st across (30)
Fasten off. Cut a long piece of Teal yarn and weave it through the top edge of Row 1 to act as a functional tie string.
The Viral Strawberry Satchel
Using Pastel Pink yarn.
Rnd 1: 6 sc in a magic ring (6)
Rnd 2: [1 sc, inc] 3 times (9)
Rnd 3: [2 sc, inc] 3 times (12)
Rnd 4: [3 sc, inc] 3 times (15)
Rnd 5: sc in each st around (15)
Rnd 6: [3 sc, dec] 3 times (12)
Change to Kelly Green yarn.
Rnd 7: [sl st, ch 3, sl st in same st] repeat around to create leaves.
To create the strap, chain 35 (or until it fits diagonally across the body). Attach the end of the chain to the opposite side of the strawberry. Fasten off.
Assembly & Final Touches
➡️ Secure the Snout to the lower center of the face, between rounds 24 and 30.
➡️ Attach the Ears to the sides of the head at round 14.
➡️ Sew the Ossicones firmly to the top of the head, centered just above the ears.
➡️ Slip the Dress over the neck of the body.
➡️ Sew the Head onto the Body, ensuring the chin rests just above the dress neckline. Add extra stuffing to the neck right before closing the seam to prevent wobbling.
➡️ Attach the Arms directly below the neck seam on either side of the body.
➡️ Tie the Frosting Capelet around the shoulders, finishing with a neat bow in the Teal yarn.
➡️ Sling the Strawberry Satchel over one shoulder so it rests gracefully on the hip.
➡️ Using a makeup brush, apply generous pink blush beneath the eyes and across the top of the snout.
➡️ Cut small irregular circles from brown felt and glue them to the forehead and sides of the head. Add two tiny Teal yarn bows to the base of the ossicones.
Tips & FAQs
➡️ My amigurumi’s head keeps flopping backwards. What should I do? This is common with oversized heads! Always over-stuff the neck region. You can also insert a firm piece of rolled felt or a craft dowel down the center of the neck during assembly for guaranteed stability.
➡️ How do I ensure the eyelashes stay attached securely? Apply a tiny bead of fabric glue to the base of the false lash. Press it firmly against the fabric just behind the plastic rim of the safety eye using tweezers. Hold for thirty seconds until the bond is permanent.
A Final Word
You have done beautifully today, my dear artisan. By embracing these soft shapes and gentle colors, you have created something that brings immediate joy to anyone who sees it. Share your stunning new creation proudly with the world.