My dearest maker, there is a quiet magic in creating something that seems ready to scurry off your table. Pipkin is designed to capture that fleeting moment of joy when a small creature finds a treat. We are not just making a toy today; we are crafting a little companion who offers a permanent smile. Take your time with his cheeks; that is where his personality lives.
About This Creation
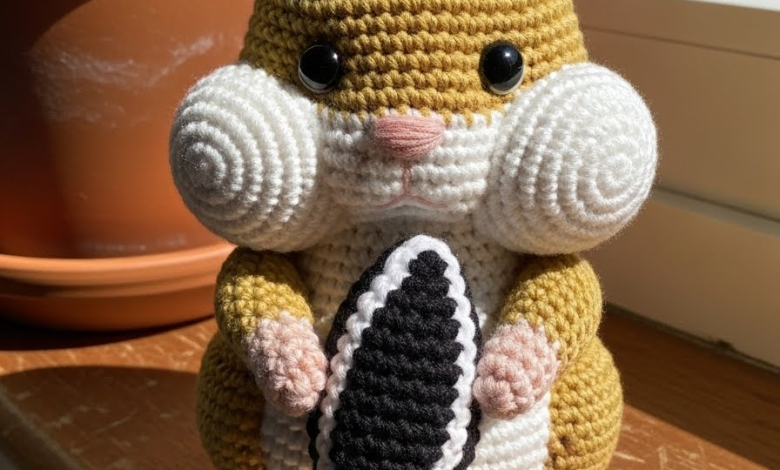
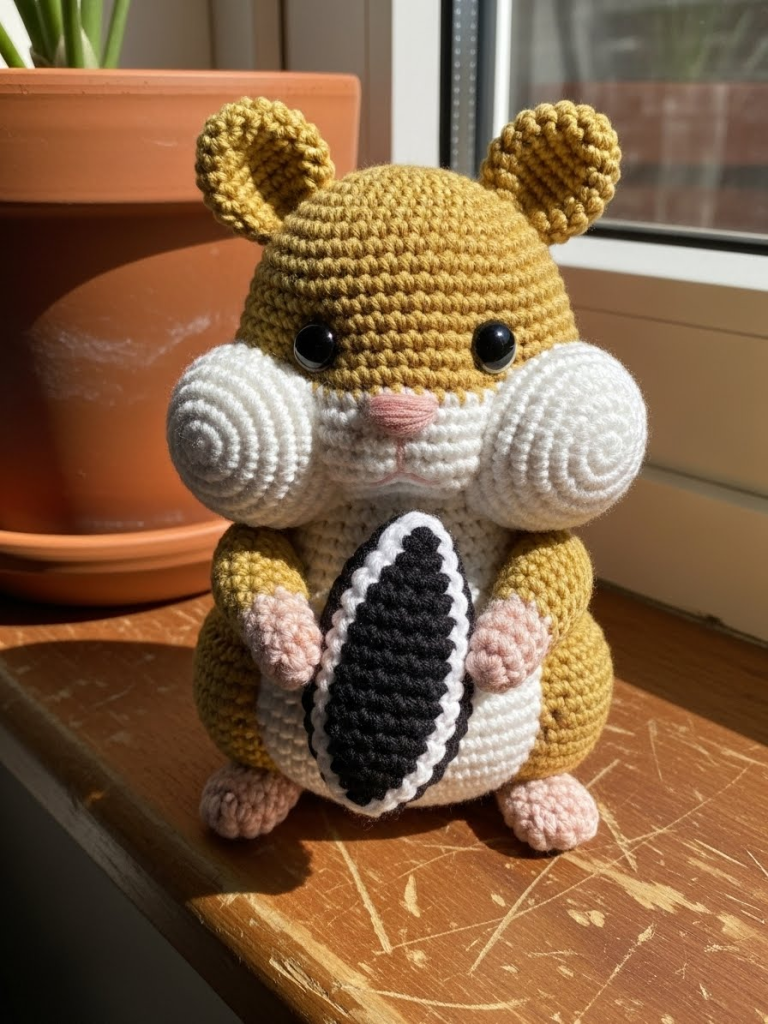
This project focuses on “structural character.” Often, amigurumi hamsters are simple balls, but Pipkin features deliberate shaping to create a pear-like, seated posture and those signature stuffed cheeks. We are using a tight gauge to ensure he looks robust and holds his shape well, especially when grasping his prized sunflower seed. It is an exercise in creating expression through silhouette rather than just facial features.
Project Snapshot
📊 Difficulty: Intermediate (requires precise counting for cheek shaping)
⏰ Est. Time: 5–7 Hours
📏 Size: Approx. 14cm tall (seated)
“True charm lies not in perfection, but in the character of the stitches.” — Patricia Poltera
Materials & Tools Needed
🧶 Yarn: Matte Cotton or Acrylic blend (DK or Worsted weight). Colors: Golden Tan (Main), Cream/Off-White (Muzzle/Tummy/Inner Ears), Soft Pink (Nose/Cheeks/Paws), Black & White (Seed).
🪡 Hook: 2.5mm or 2.75mm (to keep stitches tight and hole-free)
✨ Other Materials: 10mm Safety Eyes, Polyester Fiberfill, Yarn Needle, Stitch Markers, Black embroidery thread.
Abbreviations & Stitches Used
ch: chain
sl st: slip stitch
sc: single crochet
inc: increase (2 sc in one st)
dec: decrease (sc 2 together)
BLO: back loop only
The Complete Pipkin Pattern
The Head (Create 1 in Golden Tan)
We begin at the crown. The shaping here is crucial for that “baby face” look.
➡️ R1: Start 6 sc in a magic ring (6)
➡️ R2: Inc in every st (12)
➡️ R3: (Sc 1, inc) x 6 (18)
➡️ R4: (Sc 2, inc) x 6 (24)
➡️ R5: (Sc 3, inc) x 6 (30)
➡️ R6: (Sc 4, inc) x 6 (36)
➡️ R7: (Sc 5, inc) x 6 (42)
➡️ R8: (Sc 6, inc) x 6 (48)
➡️ R9–14: Sc in each st around (48)
➡️ R15 (Cheek Expansion): Sc 15, (inc, sc 1) x 3, sc 6, (inc, sc 1) x 3, sc 15 (54)
➡️ R16–20: Sc in each st around (54)
➡️ R21: (Sc 7, dec) x 6 (48)
➡️ R22: (Sc 6, dec) x 6 (42)
Insert safety eyes between R15 and R16, spacing them about 9 stitches apart, amidst the cheek increases.
➡️ R23: (Sc 5, dec) x 6 (36)
➡️ R24: (Sc 4, dec) x 6 (30)
➡️ R25: (Sc 3, dec) x 6 (24)
Stuff the head firmly, paying extra attention to pushing stuffing into the cheek pockets.
➡️ R26: (Sc 2, dec) x 6 (18)
➡️ Fasten off, leaving a long tail for sewing.
The Body (Create 1 in Golden Tan)
We want a bottom-heavy shape so he sits well.
➡️ R1: Start 6 sc in a magic ring (6)
➡️ R2: Inc in every st (12)
➡️ R3: (Sc 1, inc) x 6 (18)
➡️ R4: (Sc 2, inc) x 6 (24)
➡️ R5: (Sc 3, inc) x 6 (30)
➡️ R6: (Sc 4, inc) x 6 (36)
➡️ R7: (Sc 5, inc) x 6 (42)
➡️ R8: (Sc 6, inc) x 6 (48)
➡️ R9–13: Sc in each st around (48)
➡️ R14: (Sc 6, dec) x 6 (42)
➡️ R15–16: Sc in each st around (42)
➡️ R17: (Sc 5, dec) x 6 (36)
➡️ R18–19: Sc in each st around (36)
➡️ R20: (Sc 4, dec) x 6 (30)
➡️ R21: (Sc 3, dec) x 6 (24)
➡️ R22: (Sc 2, dec) x 6 (18)
➡️ Fasten off, stuff firmly, and leave a tail for assembly.
The Tummy Patch (Create 1 in Cream)
Worked in rows to create an oval.
➡️ R1: Ch 7, turn.
➡️ R2: Sc in 2nd ch from hook, sc 4, 3 sc in last ch. Rotate to work on other side of chain. Sc 4, 2 sc in last st (14)
➡️ R3: Inc, sc 4, inc x 3, sc 4, inc x 2 (20)
➡️ R4: Sc around loosely. Fasten off with long tail.
Ears (Make 2 Outer in Tan, 2 Inner in Cream)
➡️ R1: Start 6 sc in a magic ring (6)
➡️ R2: Inc in every st (12)
➡️ R3: (Sc 1, inc) x 6 (18)
➡️ Fasten off.
Artisan’s Note: Place the Cream circle inside the Tan circle (wrong sides facing) and sc around both edges with Tan yarn to join them into a thick, sturdy ear.
Arms (Make 2 in Golden Tan)
➡️ R1: Start 6 sc in a magic ring (6)
➡️ R2: (Sc 2, inc) x 2 (8)
➡️ R3–7: Sc in each st around (8)
➡️ R8: Flatten the opening and sc through both layers to close.
Feet (Make 2 in Pink)
➡️ R1: Start 6 sc in a magic ring (6)
➡️ R2: Inc in every st (12)
➡️ R3–5: Sc in each st around (12)
➡️ R6: Dec x 6 (6)
➡️ Fasten off and sew hole closed. These are small pebbles for feet.
The Sunflower Seed (Create 1 in Black)
➡️ R1: Start 4 sc in a magic ring (4)
➡️ R2: (Sc 1, inc) x 2 (6)
➡️ R3: (Sc 2, inc) x 2 (8)
➡️ R4–6: Sc in each st around (8)
➡️ R7: (Sc 2, dec) x 2 (6)
➡️ R8: Dec x 3 (3)
➡️ Fasten off. Use white yarn to embroider a vertical line or edge on the seed for realism.
Assembly & Final Touches
➡️ Body & Head: Sew the head to the body. Ensure the cheeks are facing forward and the head is not tilted too far back.
➡️ Face: Sew the Tummy Patch to the lower front of the body. Embroider a small “Y” shape nose with pink thread between the eyes. Using Pink yarn, sew small horizontal ovals just below the eyes for the blush/cheeks.
➡️ Limbs: Sew the feet to the bottom front of the body so they poke out slightly. Sew the arms at R20 of the body, angled inward so they can touch.
➡️ The Prize: Tack stitch the Sunflower Seed securely between the two paws.
Tips & FAQs
Q: My hamster’s head is wobbling. A: Be generous with the stuffing in the neck area. When sewing, go through the post of the stitch, not just the top loops, for a rigid connection.
Q: Can I brush the yarn? A: Yes! If using acrylic, gently brushing the body with a pet slicker brush creates a fuzzy, fur-like texture which adds to the realism.
A Final Word
There you have it—Pipkin is complete. Notice how the simple addition of the seed changes his entire demeanor? He is no longer just a hamster; he is a hamster with a purpose. I hope he brings a touch of warmth to your home. Until we meet again at the crafting table.