My dear creator, enter the atelier and leave the noise of the world behind. Today, we are not just counting stitches; we are sculpting with clouds. Working with velvet yarn offers a tactile joy that standard cotton simply cannot match, though it demands a gentle hand and patience. Pippin is designed to be a burst of joy on your shelf—bright, bold, and impossibly soft.
About This Creation & The Velvet Touch
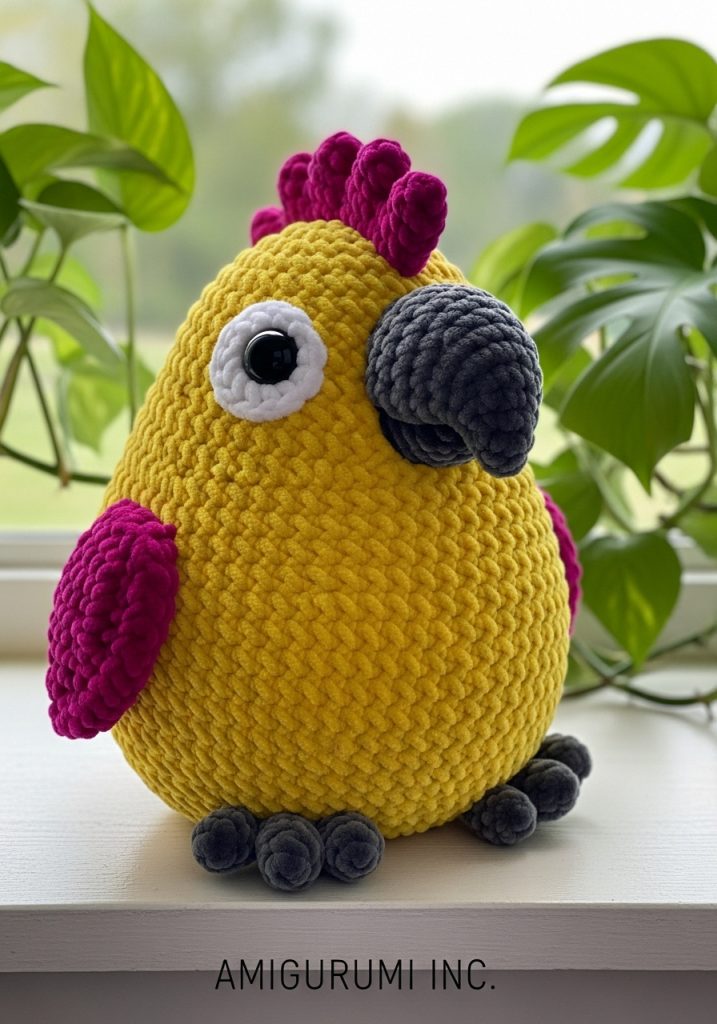
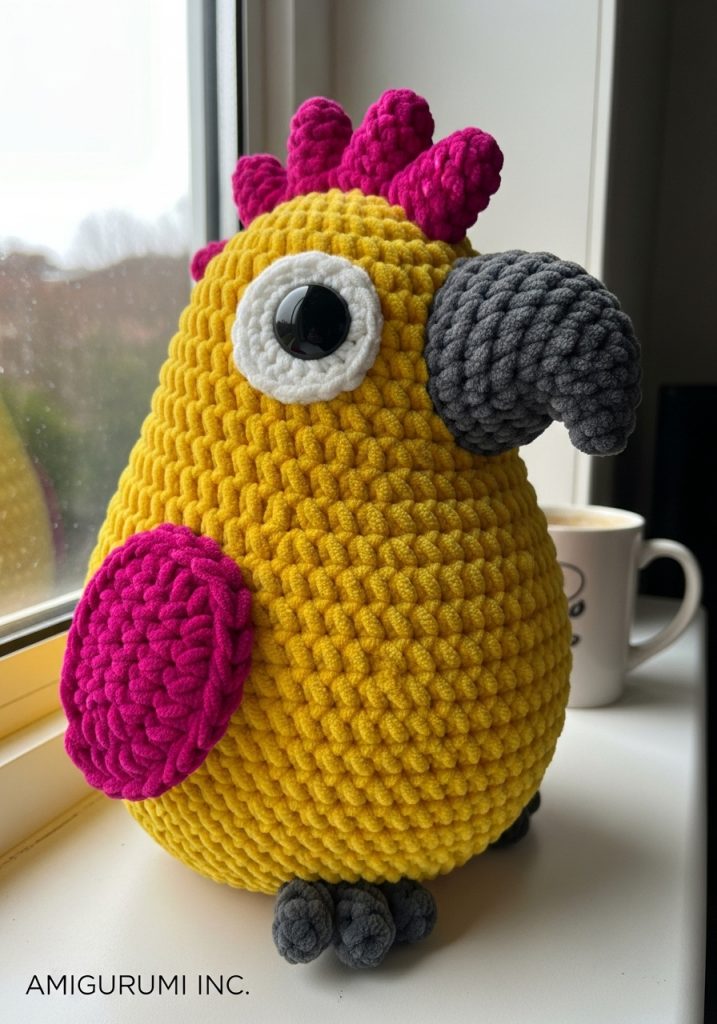
The secret to a “viral” creation often lies in texture. The human eye craves what the hand wants to touch. Pippin combines the high-contrast visuals of a tropical bird with the luxurious finish of chenille.
While many patterns result in stiff, collectible dolls, Pippin is engineered for squishability. We are using a specific shaping technique in the head to maximize the “Baby Schema”—large eyes, low features, and a rounded forehead—which triggers an immediate emotional connection. He is not just a bird; he is a companion.
Project Snapshot:
📊 Difficulty: Intermediate (Velvet yarn requires feeling stitches rather than seeing them)
⏰ Est. Time: 3–4 Hours
📏 Size: Approx. 14cm tall (using Fine/DK Velvet) or 22cm (using Super Bulky)
“The yarn does not forgive, but it rewards the patient hand with luxury.” — Patricia
Materials & Tools Needed
🧶 Yarn: Fine Chenille/Velvet (DK Weight) in Bright Yellow (Main), Magenta (Accents), Dark Grey (Beak/Feet), and White (Belly). Note: You may use Super Bulky for a giant version.
🪡 Hook: 2.5mm (for DK) or 4.0mm (for Super Bulky)
✨ Safety Eyes: 14mm (for DK) or 20mm (for Bulky)
✨ Polyester stuffing
✨ Stitch markers (Essential for velvet!)
✨ Yarn needle with a large eye
Abbreviations & Stitches Used
ch: chain
sl st: slip stitch
sc: single crochet
inc: increase (2 sc in one stitch)
dec: decrease (invisible decrease preferred)
blo: back loop only
The Complete Pippin Pattern
The Head (In Yellow)
We begin with the focal point. Do not pull your magic ring too tight, or the velvet will snap.
R1: 6 sc in a magic ring (6)
R2: inc in each st around (12)
R3: 🧶 sc 1, inc 🧶 rep around (18)
R4: 🧶 sc 2, inc 🧶 rep around (24)
R5: 🧶 sc 3, inc 🧶 rep around (30)
R6: 🧶 sc 4, inc 🧶 rep around (36)
R7–13: sc in each st around (36) Builds the forehead height
R14: 🧶 sc 5, inc 🧶 rep around (42) Cheek shaping
R15–17: sc in each st around (42)
Insert Safety Eyes between R13 and R14, roughly 7 stitches apart. They should sit low on the face.
R18: 🧶 sc 5, dec 🧶 rep around (36)
R19: 🧶 sc 4, dec 🧶 rep around (30)
R20: 🧶 sc 3, dec 🧶 rep around (24)
Stuff the head firmly now. Ensure the cheeks are rounded.
R21: 🧶 sc 2, dec 🧶 rep around (18)
Fasten off, leaving a tail for sewing.
The Beak (In Dark Grey)
This must be curved to give him that classic parrot profile.
R1: 4 sc in a magic ring (4)
R2: 🧶 sc 1, inc 🧶 rep twice (6)
R3: 🧶 sc 2, inc 🧶 rep twice (8)
R4: 🧶 sc 3, inc 🧶 rep twice (10)
R5: sc in each st around (10)
R6: 4 hdc (creates the top curve), 6 sc (10)
Fasten off. Stuff lightly.
The Punk Crest (Make 3 in Magenta)
These are the crown jewels.
R1: 4 sc in magic ring (4)
R2: inc in each st around (8)
R3–5: sc in each st around (8)
R6: 🧶 sc 2, dec 🧶 rep twice (6)
Fasten off. Do not stuff. Flatten them.
The Body (In Yellow)
R1: 6 sc in magic ring (6)
R2: inc in each st around (12)
R3: 🧶 sc 1, inc 🧶 rep around (18)
R4: 🧶 sc 2, inc 🧶 rep around (24)
R5: 🧶 sc 3, inc 🧶 rep around (30)
R6–10: sc in each st around (30)
R11: 🧶 sc 3, dec 🧶 rep around (24)
R12–13: sc in each st around (24)
R14: 🧶 sc 2, dec 🧶 rep around (18)
Fasten off. Stuff firmly.
The Belly Patch (In White)
Worked in rows for a flat oval.
R1: Ch 5, start in 2nd ch from hook.
R2: sc 3, 3 sc in last ch. Turn to other side of chain. sc 2, inc in last st.
R3: Join with sl st and fasten off, leaving a long tail for sewing.
The Wings (Make 2 in Magenta)
R1: 6 sc in magic ring (6)
R2: inc in each st around (12)
R3: 🧶 sc 1, inc 🧶 rep around (18)
R4–6: sc in each st around (18)
R7: 🧶 sc 1, dec 🧶 rep around (12)
R8: Flatten the piece and crochet through both layers to close (6 sc).
The Tail (In Magenta)
R1: 6 sc in magic ring (6)
R2: sc in each st around (6)
R3: 🧶 sc 1, inc 🧶 rep around (9)
R4–6: sc in each st around (9)
Fasten off. Make 2 pieces and sew them together side-by-side, or make one wider piece if preferred.
Assembly & Final Touches
- Face First: Sew the beak centered between the eyes, slightly lower than the eye center line. This creates the “cute” proportion.
- The Crown: Sew the three crest pieces in a line along the top of the head (like a Mohawk).
- Body: Sew the head to the body. Use plenty of pins to keep it centered.
- Wings: Attach the wings at R12 of the body, slightly angled backward.
- Belly: Appliqué the white patch onto the lower front of the body.
- Details: Using a strand of black cotton yarn (not velvet), embroider small eyebrows above the eyes to give him expression.
Tips & FAQs
Q: My velvet yarn keeps “worming” (loops coming loose). Why?
A: This usually happens if your hook is too large or tension is too loose. Try sizing down your hook by 0.5mm.
Q: Can I wash Pippin?
A: Velvet yarn can be machine washed on gentle, but hand washing is always the safest route to preserve the stuffing shape.
A Final Word
There you have it—a splash of color and softness ready to brighten a corner of your home. Pippin is a testament to the fact that even the wildest creatures can be made soft and approachable with the right materials. I cannot wait to see the flock you create.
Patricia.