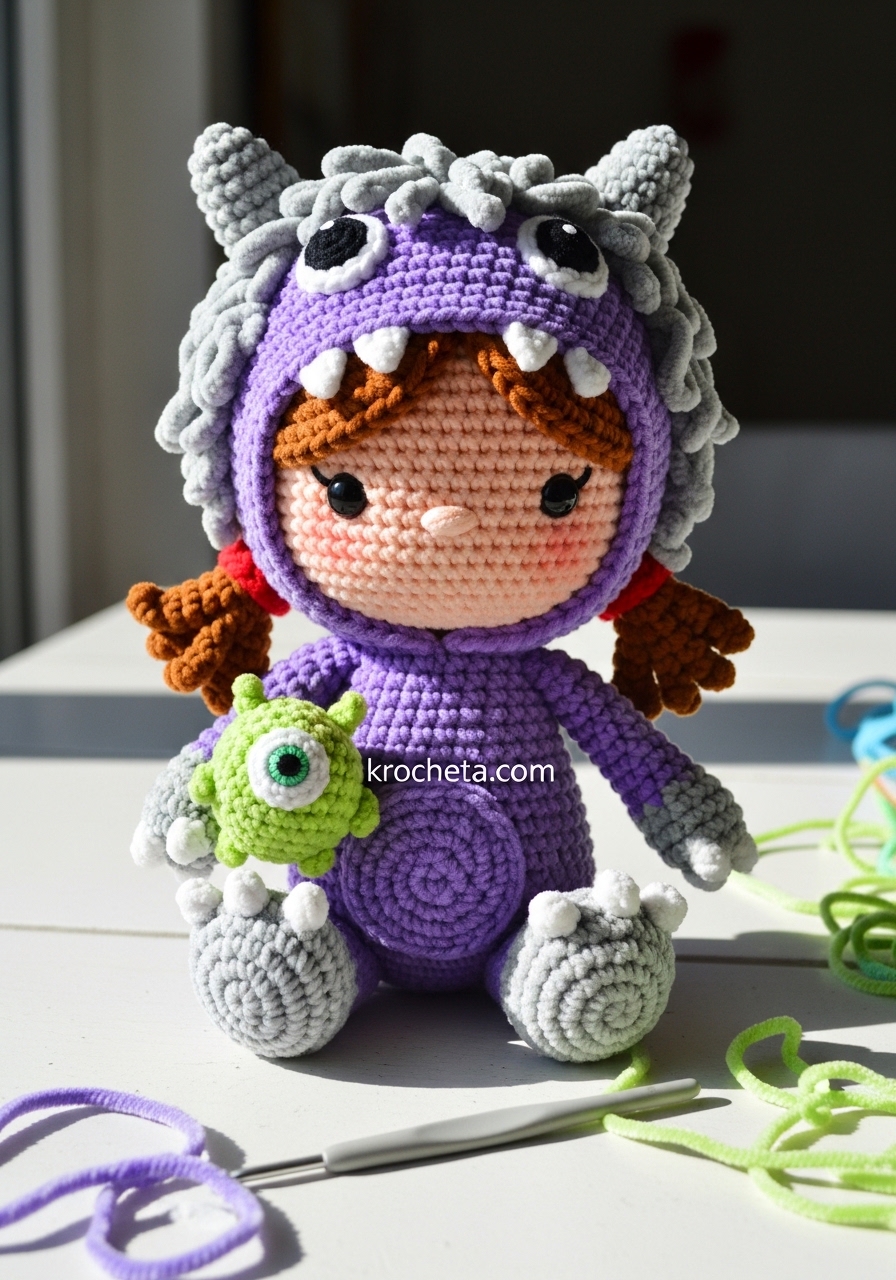
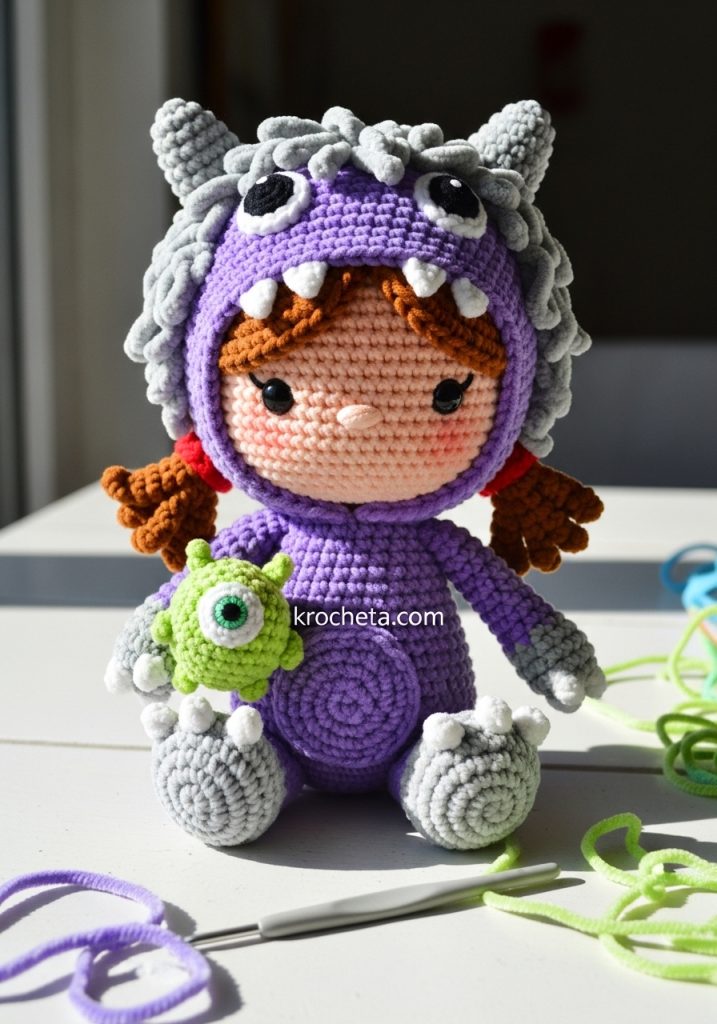
There is a particular magic in capturing the innocence of childhood, especially when wrapped in the softest of textures. Today, we turn strands of velvet into a story of friendship and playful disguise. This project is a test of patience with textured yarn, but the result—a squishy, huggable keepsake—is worth every stitch.
About This Creation & The Velvet Angle Working with chenille or velvet yarn requires a tactile intuition; the stitches can be elusive to the eye but obvious to the touch. This project is designed to help you master “blind stitching” by feeling for your loops. We are building a character that feels as soft as a cloud. The design relies on simple shapes elevated by texture and precise color changes to create the illusion of a child wearing a costume, rather than a single entity.
Project Snapshot: 📊 Difficulty: Intermediate (Due to textured yarn) ⏰ Est. Time: 6–8 Hours 📏 Size: Approx. 14cm – 16cm (seated) “Texture is the language of comfort; let your hands read what your eyes might miss.” — Patricia
Materials & Tools Needed 🧶 Yarn: Super Bulky (Category 6) Chenille/Velvet yarn. Colors:
- Deep Purple (Costume)
- Soft Peach/Beige (Skin)
- Grey (Mop hair/Limbs)
- Lime Green (Mini Sidekick)
- Scrap White & Dark Brown (Details) 🪡 Hook: 4.0mm or 4.5mm (We want tight tension so stuffing doesn’t show) ✨ Other Materials:
- 12mm Safety Eyes (Black) for the girl
- One large (15mm-20mm) Safety Eye or Felt circle for the sidekick
- Fiberfill stuffing
- Yarn needle (wide eye)
- Stitch markers (Essential for velvet yarn!)
Abbreviations & Stitches Used ch: chain sl st: slip stitch sc: single crochet inc: increase (2 sc in one st) dec: decrease (invisible decrease preferred) BLO: back loop only FLO: front loop only Bobble: 3-dc bobble stitch (for costume teeth/toes)
The Complete Little Disguise Pattern
Component 1: The Inner Head (Peach/Skin Tone) Worked in continuous rounds.
Round 1: 6 sc in a magic ring (6) Round 2: inc in each st around (12) Round 3: ➡️ 1 sc, inc ⬅️ repeat around (18) Round 4: ➡️ 2 sc, inc ⬅️ repeat around (24) Round 5: ➡️ 3 sc, inc ⬅️ repeat around (30) Round 6: ➡️ 4 sc, inc ⬅️ repeat around (36) Rounds 7–12: sc in each st around (36) Round 13: (Cheek shaping) 10 sc, inc x 4, 8 sc, inc x 4, 10 sc (44) Rounds 14–16: sc in each st around (44) Insert safety eyes between Round 12 and 13, roughly 7 stitches apart. Round 17: ➡️ 4 sc, dec ⬅️ repeat until last 2 sts, sc 2 (37) Round 18: ➡️ 3 sc, dec ⬅️ repeat around (30) Round 19: ➡️ 2 sc, dec ⬅️ repeat around (24) Stuff the head firmly. Round 20: ➡️ 1 sc, dec ⬅️ repeat around (18) Fasten off. We will sew this into the hood later.
Component 2: The Monster Hood (Deep Purple) This must fit over the Inner Head.
Round 1: 6 sc in magic ring (6) Round 2: inc in each st (12) Round 3: ➡️ 1 sc, inc ⬅️ repeat (18) Round 4: ➡️ 2 sc, inc ⬅️ repeat (24) Round 5: ➡️ 3 sc, inc ⬅️ repeat (30) Round 6: ➡️ 4 sc, inc ⬅️ repeat (36) Round 7: ➡️ 5 sc, inc ⬅️ repeat (42) Rounds 8–15: sc in each st around (42) Test fit: Place over the peach head. It should be snug but cover the forehead. Round 16: (Creating the Face Opening) sc 10, ch 12, skip 12 sts, sc 20 (42) Round 17: sc 10, sc 12 along the chain, sc 20 (42) Round 18: sc in each st around (42) Fasten off, leaving a long tail for sewing to the body.
Component 3: The Mop Eyestalks (Grey) Make 2. These sit on top of the hood.
Round 1: 6 sc in magic ring (6) Round 2: inc in each st (12) Round 3: In BLO sc around (12) Rounds 4–6: sc around (12) Stuff lightly. Round 7: dec x 6 (6) Fasten off. Artisan’s Note: To create the “mop” look, cut 3-inch strands of grey yarn. Latch hook them into every stitch of Round 1 and 2 of the eyestalks. Fray the ends.
Component 4: The Costume Body (Deep Purple) Worked from the bottom up to simulate a chubby sitting posture.
Round 1: 8 sc in magic ring (8) Round 2: inc in each st (16) Round 3: ➡️ 1 sc, inc ⬅️ repeat (24) Round 4: ➡️ 2 sc, inc ⬅️ repeat (32) Round 5: ➡️ 3 sc, inc ⬅️ repeat (40) Rounds 6–10: sc in each st around (40) Round 11: ➡️ 8 sc, dec ⬅️ repeat around (36) Rounds 12–14: sc in each st around (36) Round 15: ➡️ 4 sc, dec ⬅️ repeat around (30) Rounds 16–18: sc in each st around (30) Round 19: ➡️ 3 sc, dec ⬅️ repeat around (24) Round 20: ➡️ 2 sc, dec ⬅️ repeat around (18) Stuff firmly. Fasten off.
Component 5: Costume Arms (Grey) Make 2. Long and slouchy.
Round 1: 6 sc in magic ring (6) Round 2: inc in each st (12) Rounds 3–5: sc around (12) Round 6: dec, dec, sc 8 (10) Rounds 7–14: sc around (10) Round 15: Flatten the opening and sc through both layers to close. Do not stuff the upper arm heavily; keep it floppy.
Component 6: Costume Feet (Grey) Make 2. Flat and wide.
Round 1: Chain 6. Start in 2nd ch from hook. Round 2: sc 4, 3 sc in last ch. Turn to other side. sc 3, inc (12) Round 3: inc, sc 3, inc x 3, sc 3, inc x 2 (18) Rounds 4–6: sc around (18) Round 7: ➡️ 1 sc, dec ⬅️ repeat around (12) Stuff lightly. Round 8: dec x 6 (6) Fasten off and weave in end.
Component 7: Mini Sidekick (Lime Green)
Body: Round 1: 6 sc in magic ring (6) Round 2: inc in each st (12) Round 3: ➡️ 1 sc, inc ⬅️ repeat (18) Rounds 4–7: sc around (18) Round 8: ➡️ 1 sc, dec ⬅️ repeat (12) Insert large central eye now. Stuff. Round 9: dec x 6 (6). Close hole.
Limbs (Make 4): Chain 8. Sl st back down the chain. Sew 2 as legs, 2 as arms.
Assembly & Final Touches
- Head & Hood: Insert the peach head into the purple hood. Align the face opening. Sew the perimeter of the opening to the peach face to secure it.
- Hair: Attach small brown pigtails to the peach head before fully securing the hood if you want them poking out, or attach them to the forehead area.
- Body: Sew the hood/head assembly to the body neck opening.
- Limbs: Attach the grey arms at the shoulder line (Round 19 of body). Attach the grey feet to the bottom front of the body so the doll sits stably.
- Mop Eyes: Sew the two grey “mop” eyestalks to the top of the hood.
- Teeth/Details: Using white yarn, embroider small “V” shapes or sew small white French knots around the neck of the costume to mimic teeth.
Tips & FAQs
- My chenille yarn is shedding! Velvet yarn can be tricky. Use a lighter to carefully singe the ends of the yarn before starting to prevent fraying.
- The neck is wobbly. When sewing the head to the body, insert a rolled-up piece of felt or a secondary “neck tube” of crochet inside the neck for stability.
A Final Word
There is no perfection in art, only character. If her smile is slightly crooked or the hood sits askew, it only adds to the story of a child hastily dressing up for adventure. May this creation bring a smile to whoever holds it.
Yours in creativity, Patricia

