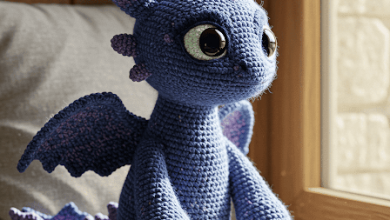
There is a quiet magic in the garden after the rain, isn’t there? That is the feeling we are capturing today. We are taking our beloved, cheeky Chibi Fox and softening his spirit with the “Botanical Stroll” collection.
This project is less about complex stitches and more about texture and layering. We are mixing the matte structure of the “straw” hat with the delicate embroidery of the pinafore. It is a joy to see him transform from a wild creature of the woods into a refined little gentleman out for a spring walk.
Pour yourself a cup of tea. Let us begin.
About The Chibi Fox (Botanical Stroll Edition)
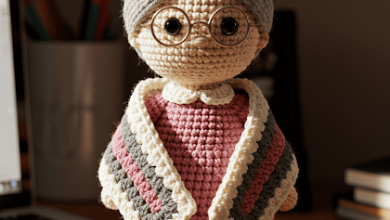
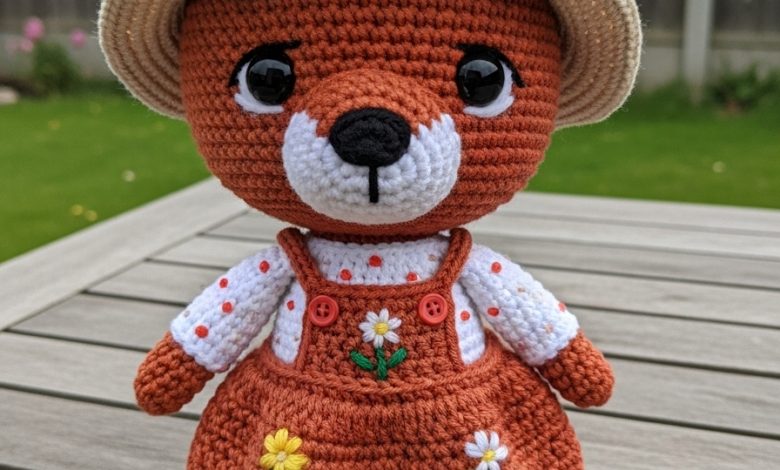
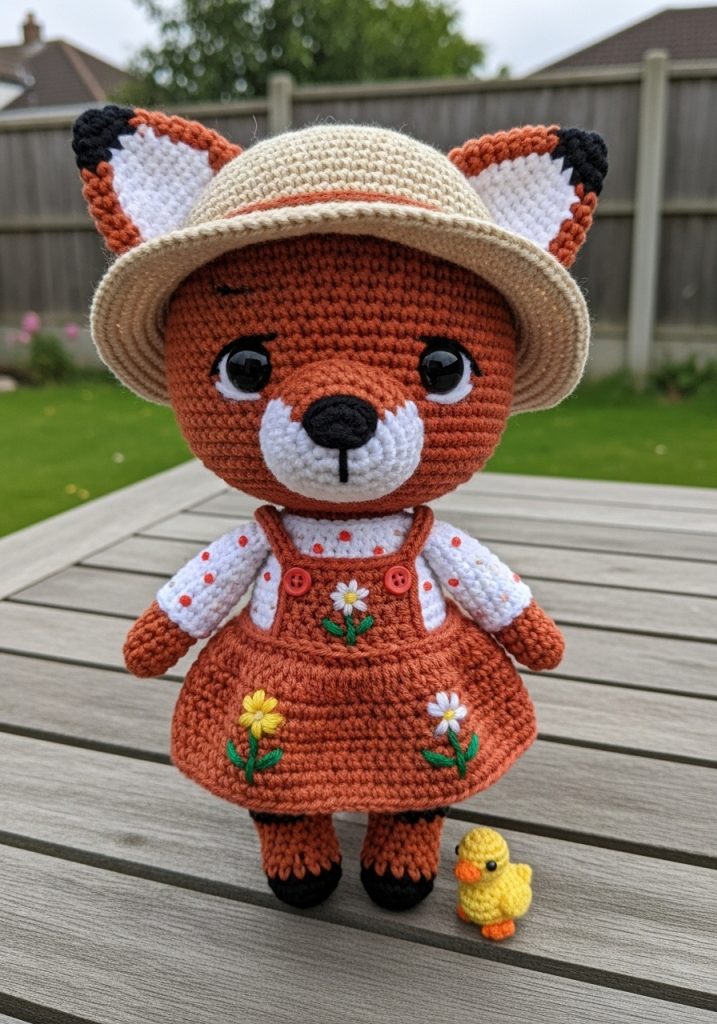
Our little Fox usually loves mischief, but today he is feeling serene. He is dressed for a slow walk through the vegetable patch. The star of this ensemble is the Terra Cotta Pinafore, featuring hand-embroidered blossoms that mimic the vintage bunny inspiration.
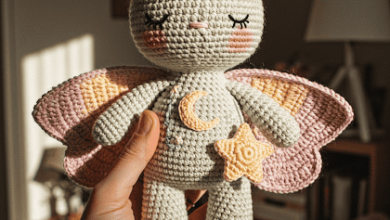
He carries a sturdy backpack for collecting pebbles and seeds, and he is never without his new best friend—a tiny, waddling Duckling who insists on wearing a matching blue hat.
Project Snapshot
📊 Difficulty: Intermediate (Requires patience with small clothing items) ⏰ Est. Time: 6–8 Hours 📏 Size: 20cm (Standing)
“The beauty of amigurumi lies in the tiniest details—the tilt of a hat, the placement of a stitch.” — Patricia
Materials & Tools Needed
🧶 Yarn (100% Cotton, DK/Light Worsted):
- Fox Orange (Body)
- Fluffy White (Muzzle/Chest)
- Terra Cotta/Peach (Pinafore Dress)
- Clean White (Shirt)
- Beige/Tan (Straw Hat & Shoes)
- Cream (Backpack & Hat Band)
- Sunny Yellow (Duckling)
- Powder Blue (Duckling Hat & Embroidery)
- Scrap Pink/Green yarn (Flower Embroidery)
🪡 Hook: 2.5mm (for Fox) and 3.0mm (for Clothes to ensure fit) ✨ Other Materials: 12mm Safety Eyes, stuffing, tapestry needle, stitch markers.
Abbreviations & Stitches Used
ch: chain sl st: slip stitch sc: single crochet inc: increase (2 sc in one st) dec: decrease (sc 2 together) hdc: half double crochet BLO: back loop only FLO: front loop only
The Complete Chibi Fox Pattern
I. The Chibi Head (Fox Orange) Using 2.5mm hook. This creates the signature “huge” head. R1: 6 sc in magic ring (6) R2: Inc in every st (12) R3: (1 sc, inc) x 6 (18) R4: (2 sc, inc) x 6 (24) R5: (3 sc, inc) x 6 (30) R6: (4 sc, inc) x 6 (36) R7: (5 sc, inc) x 6 (42) R8: (6 sc, inc) x 6 (48) R9: (7 sc, inc) x 6 (54) R10: (8 sc, inc) x 6 (60) R11–R22: Sc in each st around (60) Builds the forehead height. R23: (8 sc, dec) x 6 (54) R24: (7 sc, dec) x 6 (48) R25: (6 sc, dec) x 6 (42) Insert Safety Eyes between R18 and R19, roughly 11 stitches apart. They must be wide-set! R26: (5 sc, dec) x 6 (36) R27: (4 sc, dec) x 6 (30) R28: (3 sc, dec) x 6 (24) Stuff firmly. We want a very round, solid shape. R29: (2 sc, dec) x 6 (18) R30: (1 sc, dec) x 6 (12) R31: Dec around (6). Fasten off.
II. The Fluffy Muzzle Patch (White Fluffy Yarn) Worked flat, then sewn on. This is the secret to his sweet face. R1: Ch 6. Sc in 2nd ch from hook and across. (5) Turn. R2: Inc, 3 sc, inc (7) Turn. R3: Sc across (7) Turn. R4: Inc, 5 sc, inc (9) Turn. R5–R7: Sc across (9). R8: Dec, 5 sc, dec (7). R9: Dec, 3 sc, dec (5). R10: Dec, 1 sc, dec (3). Fasten off. Leave a LONG tail. Sew this onto the lower center of the face. Place the black nose button right in the middle of this white patch.
III. The Stubby Body (Fox Orange) R1: 6 sc in magic ring (6) R2: Inc in every st (12) R3: (1 sc, inc) x 6 (18) R4: (2 sc, inc) x 6 (24) R5: (3 sc, inc) x 6 (30) R6: (4 sc, inc) x 6 (36) R7–R11: Sc around (36) The “pot belly” section. R12: (4 sc, dec) x 6 (30) R13–R14: Sc around (30) R15: (3 sc, dec) x 6 (24) R16: (2 sc, dec) x 6 (18). Fasten off. Leave tail for sewing to head.
IV. Limbs & Tail Arms (Make 2): Orange. 6 sc in MR. Inc to 9 sc. Sc 8 rows. Legs (Make 2): Orange. 6 sc in MR. Inc to 12 sc. Sc 4 rows (very short!). Ears (Make 2): Orange. 4 sc in MR. Inc to 18 sc over several rows to make a large triangle. Pinch flat. Tail: Start with White. 6 sc in MR. Increase to 18. Switch to Orange. Work 5 rows. Dec to close.
The Botanical Wardrobe (All Crocheted)
V. The Dotted Undershirt (Clean White) Worked as a separate piece to be worn under the dress. R1: Ch 25 (check fit around neck), sl st to join. R2: 3 sc, ch 4 (skip 3 for armhole), 9 sc, ch 4 (skip 3 for armhole), 3 sc. R3–R6: Sc around. Fasten off. Sleeves: Join yarn at armhole. Sc 10 around for 6 rows. Detail: Using Blue yarn, embroider tiny French knots or “V” shapes scattered on the sleeves to mimic rain or dots.
VI. The Terra Cotta Pinafore Dress Using 3.0mm hook for drape. Waist/Bodice: R1: Ch 30 (measure around the Fox’s tummy—it must be loose enough to fit over the body). Join. R2–R3: Sc around. Skirt: R4: (2 dc, inc) around (creates the A-line flare). R5–R8: Dc around. R9 (Ruffle): (Ch 3, sl st in next st) repeat around. Bib: Join yarn at front center of waist. Sc 8 across for 4 rows. Straps: Ch 12 from top corners of bib. Sew to back of waist. Embroidery: Use pink and green yarn to stitch 3 simple flowers on the skirt front.
VII. The “Straw” Sun Hat (Beige/Tan) R1: 6 sc in MR. R2: Inc around (12). R3: (1 sc, inc) (18)… Increase until you have 48 stitches (matches head width). R4–R7: Sc around (height of hat). R8 (Brim): FLO (Front Loop Only) (1 sc, inc) around. R9: (2 sc, inc) around. R10: Sc around. Fasten off. Band: Chain a length of Cream yarn, sew around the base of the crown. Make a small bow.
VIII. Accessories Mary Janes (Beige): 6 sc in MR, inc to 15. Work BLO row, then 2 rows sc. Add a small strap. Backpack (Cream): Make a small rectangle (10 sc wide), fold up, sew sides. Add a flap and two chain straps. The Duckling (Yellow): 6 sc in MR, inc to 12, sc 2 rows, dec to 6. Sew on a tiny orange beak. Crochet a tiny blue cap (6 sc in MR, inc to 10).
Assembly & Final Touches
- The Anatomy: Sew the head to the body. Attach the limbs.
- The Face: Sew the Fluffy White Muzzle Patch on the lower face. Attach the nose on top of the patch.
- Dressing: Put the White Shirt on first. Pull the Pinafore over the legs and up (or over the head if the waist is loose). Slide the arms through the straps.
- Accessories: Place the Hat. Put on the shoes. Slip the backpack on. Place the Duckling next to his foot.
Tips & FAQs
Q: My dress is too tight! A: Amigurumi bodies vary greatly depending on stuffing. If the dress is tight, simply add 3-5 chains to the starting waist chain. It should fit loosely!
Q: Can I use acrylic yarn? A: You can, but cotton provides that matte, high-definition stitch definition that makes the “straw” hat and “fabric” dress look authentic.
A Final Word
You have created a masterpiece of texture and charm. I hope this little botanical fox brings a breath of fresh air to your shelf. He is ready for his stroll—are you?