There is something profoundly grounding about recreating our largest dreams in miniature. This project—a rolling home of cornflower blue—is a love letter to the slow life. It requires patience, yes, but the result is a pocket-sized sanctuary that invites the mind to wander. Let us stitch this little escape together.
About This Creation & The Heirloom Angle
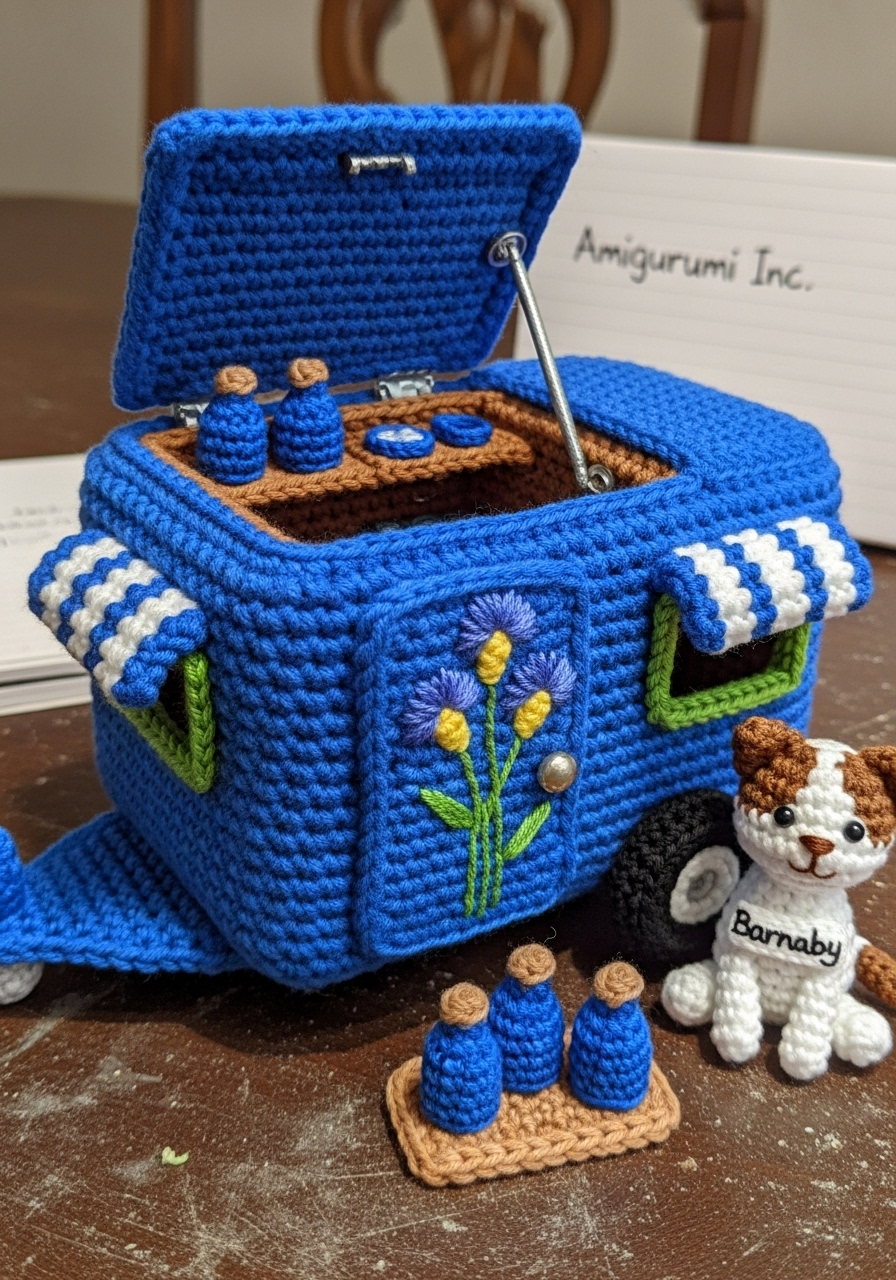
We often crochet dolls, but rarely do we crochet their worlds. The “Cornflower Wanderer” is designed not just as a toy, but as a kinetic playset. The hinged roof opens to reveal a “lived-in” space, teaching us construction techniques that bridge the gap between soft sculpture and structural design. It is a piece meant to sit on a mantle as art, or in a child’s hand as an adventure waiting to happen.
Project Snapshot:
📊 Difficulty: Advanced (Structure & fine details)
⏰ Est. Time: 15–20 Hours
📏 Size: Approx. 18cm wide x 14cm tall
“Structure is the silent language of amigurumi. Without it, beauty collapses.” — Patricia
Materials & Tools Needed
🧶 Yarn: DK/Light Worsted Cotton. Colors: Royal Blue (100g), Crisp White (50g), Wood/Beige (50g), Scrap amounts of Leaf Green, Black, and Navy.
🪡 Hook: 2.25mm (B-1) or 2.5mm (depending on tension—we want it stiff).
✨ Other Materials: Plastic canvas (7 mesh) for lining the walls (crucial!), thin craft wire for flower stems, fiberfill, tapestry needle.
Abbreviations & Stitches Used
ch: chain
sl st: slip stitch
sc: single crochet
inc: increase (2 sc in one st)
dec: decrease (sc 2 together)
BLO: back loop only
FLO: front loop only
The Complete Cornflower Wanderer Pattern
I. The Caravan Base & Exterior Walls
Worked in Royal Blue. We work in a spiral.
R1: ch 31. Starting in 2nd ch from hook, sc 29, 3 sc in last ch. Rotate to work on other side of ch. sc 28, 2 sc in last st. (62)
R2: inc, sc 28, inc x 3, sc 28, inc x 2. (68)
R3: sc 1, inc, sc 29, sc 1, inc x 3, sc 29, sc 1, inc x 2. (74)
R4: BLO sc around. (74) This creates the sharp bottom edge.
R5–R12: sc around. (74)
R13 (Door Gap): sc 10, ch 12 (skip 12 sts), sc 52. (74)
R14: sc 10, sc 12 into the chains, sc 52. (74)
R15–R30: sc around. (74)
R31–R35: sc around. Fasten off.
Artisan’s Note: Cut plastic canvas to match the floor and walls exactly. Insert it now before we close anything off. It must be rigid.
II. The Lift-Up Roof
Worked in Royal Blue rows.
Row 1: ch 32. sc in 2nd ch and across. (31)
Row 2–40: ch 1, turn, sc across. (31)
Border: sc evenly around the entire rectangle to smooth edges.
III. The Interior: Kitchenette Counter
Worked in Wood/Beige.
R1: ch 13. sc in 2nd ch and across. (12)
R2–R10: sc across. (12)
R11: BLO sc across (to turn the corner).
R12–R18: sc across.
Fold along the BLO line to create an ‘L’ shape bench. Stuff firmly to create a blocky shape.
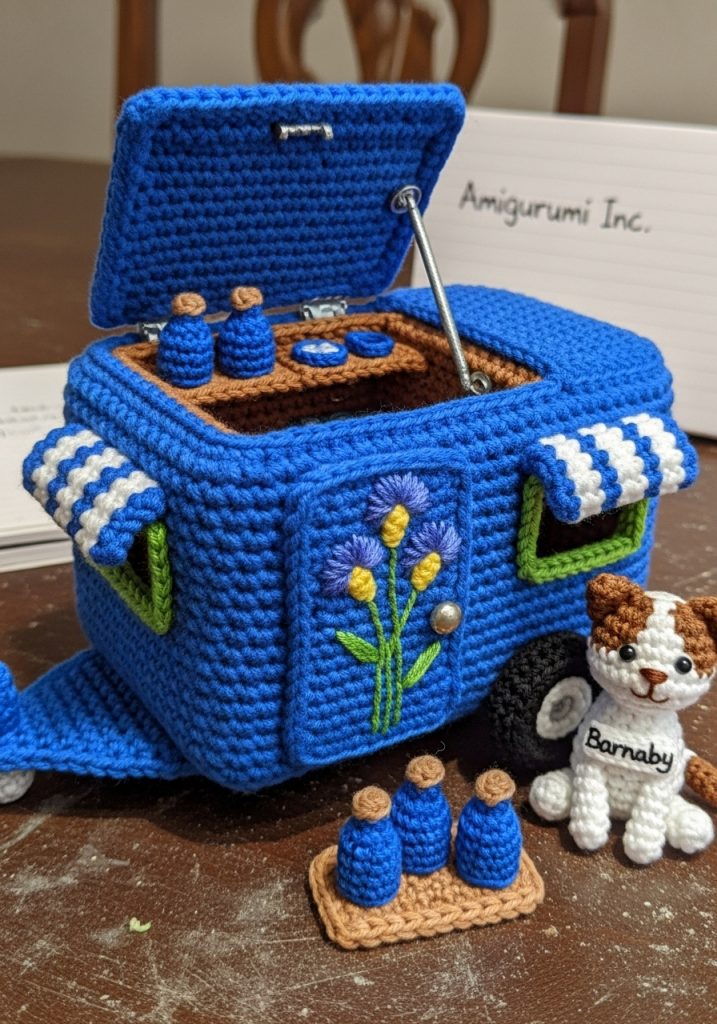
IV. Barnaby The Campground Cat
Worked in White with Brown color changes.
R1: 6 sc in Magic Ring.
R2: inc x 6. (12)
R3: sc 1, inc x 6. (18)
R4: sc 2, inc x 6. (24)
R5: sc 3, inc x 6. (30)
R6–R10: sc around. (30)
R11: sc 3, dec x 6. (24)
R12: sc 2, dec x 6. (18)
R13: sc around. (18)
R14: sc 2, inc x 6. (24) Body starts here
R15–R19: sc around. (24)
R20: sc 2, dec x 6. (18)
R21: dec x 9. (9)
Stuff head and body firmly before closing.
R22: dec around to close.
Ears (Make 2): ch 4, sc in 2nd ch, hdc, dc. Sew to head.
[📸 PASTE IMAGE 3 HERE: Detail/Variation B]
V. Accessories Inventory
Tiny Blue Bottles (Make 2): Magic ring 5 sc. R2-4 sc around. R5 dec, sc 3. R6 sc 4. R7 inc around (8) for the cork lip.
Cornflower Stalks: Take green yarn, ch 10. For petals, use Blue yarn, sl st into top of chain, ch 3, sl st back into same st repeat 5 times. Wrap wire with green yarn and insert into the chain for stability.
Miniature Umbrella: Canopy: Magic Ring 6 sc. Inc to 18. R4-7 sc around. R8 sc 2, ch 2, sl st in next (scalloped edge). Handle: ch 15 tight with brown yarn. Insert wire.
Assembly & Final Touches
➡️ Structure: Glue or stitch the plastic canvas liner inside the blue body. It must stand boxy and proud on its own.
➡️ Roof: Stitch the back edge of the Roof piece to the back top edge of the Body. This creates the “hinge.”
➡️ Interior: Glue or stitch the Kitchenette and Shelves onto the back interior wall.
➡️ Details: Embroider the large cornflowers on the outside door using long straight stitches for stems and lazy daisy stitches for leaves.
➡️ Wheels: Sew the black wheels to the bottom sides, ensuring they clear the ground so it sits level.
Tips & FAQs
Q: My walls are bulging! A: Your tension is likely too loose, or you skipped the plastic canvas. The canvas is the skeleton; the crochet is the skin.
Q: Can I use wire for the door hinge? A: A simple yarn join is more durable for play. Wire fatigue creates breakage over time.
A Final Word
There is a quiet joy in placing the final tiny bottle on the shelf. You have built a home, stitch by stitch. May it carry your imagination to places maps cannot show.
Yours in creation,
Patricia

