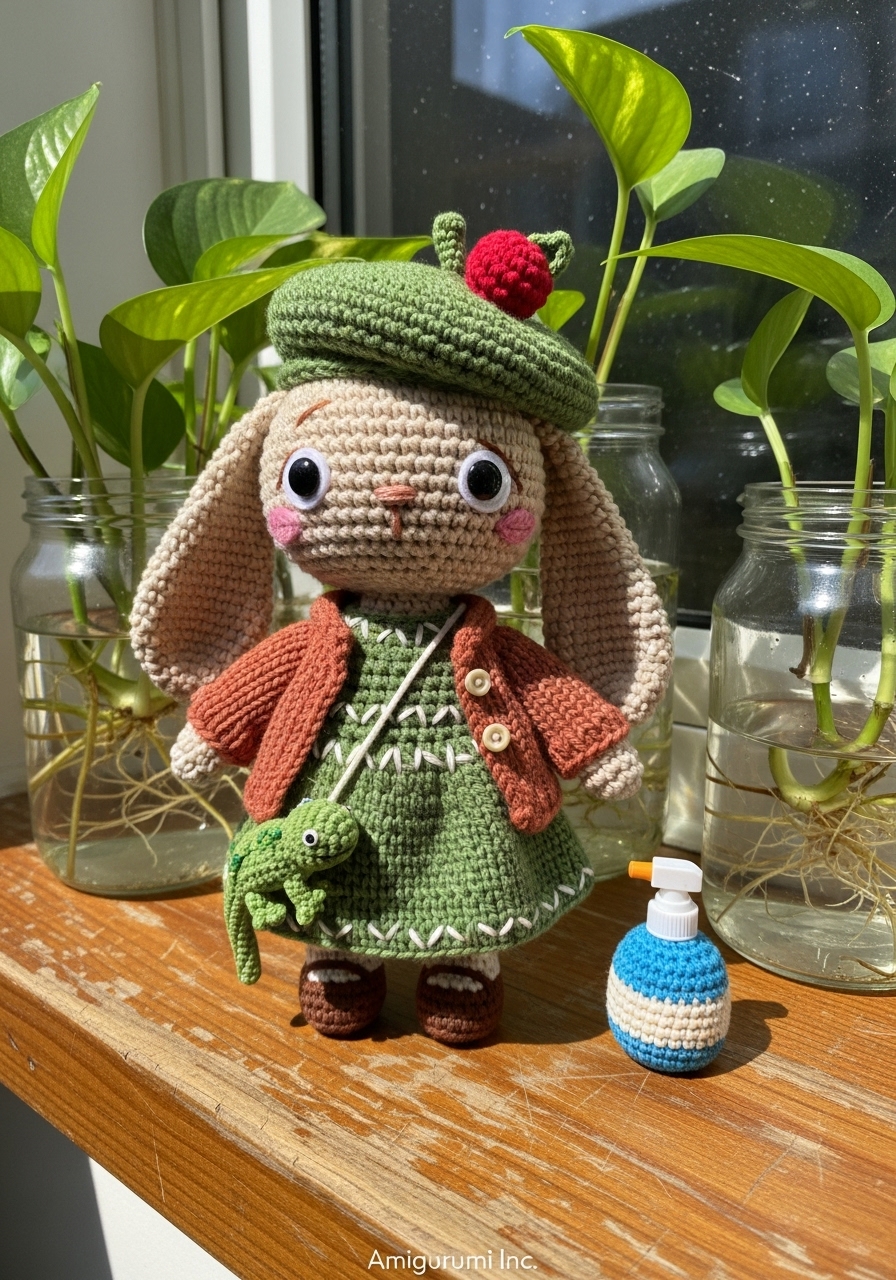
Welcome back to the atelier. Today, we turn our hooks toward the soil and the sun. We are crafting a guardian for your indoor jungle—a bunny so sweet she seems to have sprouted from a sugar snap pea. We have reimagined a rustic classic into something softer, rounder, and infinitely more huggable. Let her bring a quiet joy to your workspace.
About This Creation & The Garden Angle
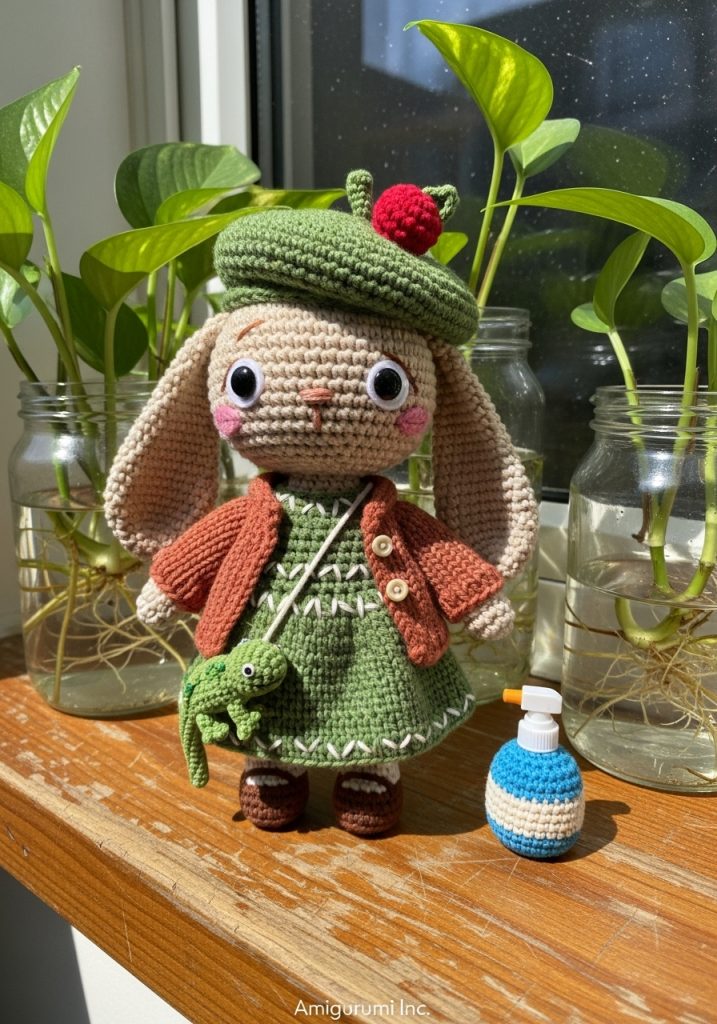
Pip is not merely a doll; she is a story of growth. Designed with the “Echo of Youth” aesthetic, she features a larger-than-life head and a petite, pear-shaped body that begs to be held. This project is excellent for using up scrap yarns in earthy greens and terracottas. While she looks complex with her layers—the dress, the cardigan, the hat—each piece is simple in construction. The true magic lies in the assembly and the thoughtful placement of her features to ensure maximum adorableness.
Project Snapshot:
📊 Difficulty: Intermediate (due to color changes and small accessories)
⏰ Est. Time: 6–8 Hours
📏 Size: Approx. 18cm (7 inches) tall
“The eyes are the window to the soul, but in amigurumi, their placement is the key to the heart. Place them low, and the cuteness doubles.” — Patricia
Materials & Tools Needed
🧶 Yarn: Cotton or acrylic blend in DK weight. Colors: Beige (Skin/Fur), Forest Green (Dress), Terracotta/Rust (Cardigan), Cream (Spray bottle), and scraps of Red, Yellow, and Lime Green.
🪡 Hook: 2.5mm or 3.0mm (to ensure tight stitches)
✨ Other Materials: 8mm Safety Eyes, Fiberfill stuffing, Embroidery needle, White embroidery thread, Stitch markers, Blush for cheeks.
Abbreviations & Stitches Used
MR: Magic Ring
ch: chain
sc: single crochet
inc: increase (2 sc in one stitch)
dec: invisible decrease (sc 2 together through front loops)
sl st: slip stitch
hdc: half double crochet
BLO: back loop only
The Complete Pip Pattern
The Head (Beige Yarn)
We begin with the seat of her expression. We want a round, generous shape.
R1: 6 sc in MR (6)
R2: inc in each st (12)
R3: (1 sc, inc) x 6 (18)
R4: (2 sc, inc) x 6 (24)
R5: (3 sc, inc) x 6 (30)
R6: (4 sc, inc) x 6 (36)
R7: (5 sc, inc) x 6 (42)
R8: (6 sc, inc) x 6 (48)
R9–R18: sc in each st around (48) [Note: Maintain tension here for a smooth face]
R19: (6 sc, dec) x 6 (42)
R20: (5 sc, dec) x 6 (36)
Insert safety eyes between R14 and R15, about 9 stitches apart. Embroider a tiny ‘Y’ nose between them.
R21: (4 sc, dec) x 6 (30)
R22: (3 sc, dec) x 6 (24)
Stuff the head firmly, focusing on cheeks.
R23: (2 sc, dec) x 6 (18)
R24: (1 sc, dec) x 6 (12)
R25: dec x 6 (6). Fasten off, weave in end.
The Ears (Beige Yarn – Make 2)
Long and loppy to frame the face.
R1: 6 sc in MR (6)
R2: inc in each st (12)
R3: (1 sc, inc) x 6 (18)
R4–R8: sc in each st around (18)
R9: (4 sc, dec) x 3 (15)
R10–R14: sc in each st around (15)
R15: (3 sc, dec) x 3 (12)
R16–R20: sc in each st around (12).
Do not stuff. Flatten and fold the opening in half, sc across to close. Leave a long tail for sewing.
The Body & Dress (Green and Beige)
We start with the feet and join them, working up into the dress.
Legs (Make 2): Start with Brown (Shoes).
R1: 6 sc in MR (6)
R2: inc in each st (12)
R3: BLO sc in each st (12)
R4: sc in each st (12)
R5: (2 sc, dec) x 3 (9). Switch to Beige.
R6–R8: sc in each st (9).
Fasten off first leg. Do not fasten off second leg. Chain 3, join to first leg.
Body:
R9: sc 9 around first leg, sc 3 along chain, sc 9 around second leg, sc 3 along other side of chain (24)
R10: (3 sc, inc) x 6 (30)
R11–R12: sc around (30). Switch to Green (Dress).
R13: BLO sc around (30) [This creates the rim for the skirt later]
R14–R16: sc around (30)
R17: (3 sc, dec) x 6 (24)
R18–R19: sc around (24)
R20: (2 sc, dec) x 6 (18)
R21: sc around (18).
Stuff the body well. Fasten off, leaving a tail.
Skirt (Green):
Attach yarn to the front loops left at R13.
R1: (4 sc, inc) around (36)
R2–R5: sc around (36)
R6: (5 sc, inc) around (42)
R7: sc around. Fasten off.
Artisan’s Note: Use white thread to embroider small vertical dashes (“seeds”) all over the green dress.
The Arms (Beige – Make 2)
R1: 5 sc in MR (5)
R2: inc in each st (10)
R3–R4: sc around (10)
R5: (3 sc, dec) x 2 (8)
R6–R9: sc around (8).
Lightly stuff the hand only. Flatten top and sc across to close.
The Cardigan (Terracotta)
Worked in rows.
Row 1: ch 21.
Row 2: sc in 2nd ch from hook and across (20). ch 1, turn.
Row 3: (inc, 4 sc) x 4 (24). ch 1, turn.
Row 4: 3 sc, ch 4 (skip 4 sts for armhole), 10 sc, ch 4 (skip 4 sts), 3 sc (24). ch 1, turn.
Row 5: sc in each st and ch across (24).
Row 6–9: hdc across (24). Fasten off.
The Berry Beret (Green & Red)
R1 (Green): 6 sc in MR (6)
R2: inc around (12)
R3: (1 sc, inc) around (18)
R4: (2 sc, inc) around (24)
R5: (3 sc, inc) around (30)
R6: (4 sc, inc) around (36)
R7: sc around (36)
R8: (4 sc, dec) around (30).
R9: sc around. Fasten off.
Berry Topper (Red): 4 sc in MR, inc around (8), sc 2 rounds, dec around (4). Sew to top of hat.
The Chubby Salamander (Lime Green)
A tiny companion.
R1: 4 sc in MR (4)
R2: (1 sc, inc) x 2 (6)
R3–R6: sc around (6)
R7: (1 sc, dec) x 2 (4).
Embroider tiny eyes with black thread. Chain 4 for legs and attach.
The Spray Bottle (Blue & Cream)
R1 (Blue): 6 sc in MR (6)
R2: (1 sc, inc) x 3 (9)
R3–R6: sc around (9). Switch to Cream.
R7: (1 sc, dec) x 3 (6).
R8: sc around. Fasten off.
Insert a small piece of wire or pipe cleaner to form the nozzle handle.
Assembly & Final Touches
- Sew the Head: Attach the head to the neck opening of the body. Ensure she looks slightly downward for cuteness.
- Attach Ears: Sew ears to R5–R6 of the head, spacing them about 6 stitches apart.
- The Face: Apply a generous amount of blush under the eyes.
- Dressing: Put the cardigan on Pip. It should fit snugly.
- Accessories: Sew the salamander to the side of her dress or cardigan. Place the beret tilted on one ear.
Tips & FAQs
Q: My beret keeps falling off.
A: I recommend using a single strand of matching sewing thread to tack it permanently in place once you find the jauntiest angle.
Q: Can I use chenille yarn?
A: Absolutely. Chenille will make Pip much larger and softer—a true plushie experience. Just ensure you increase your hook size to match the yarn (usually 4.0mm or 5.0mm).
A Final Word
There is a profound peace in creating something that smiles back at you. Pip is more than a pattern; she is a reminder to nurture the small, growing things in your life. May your stitches be even and your heart be light.
Patrica.

