My Dearest Creator,
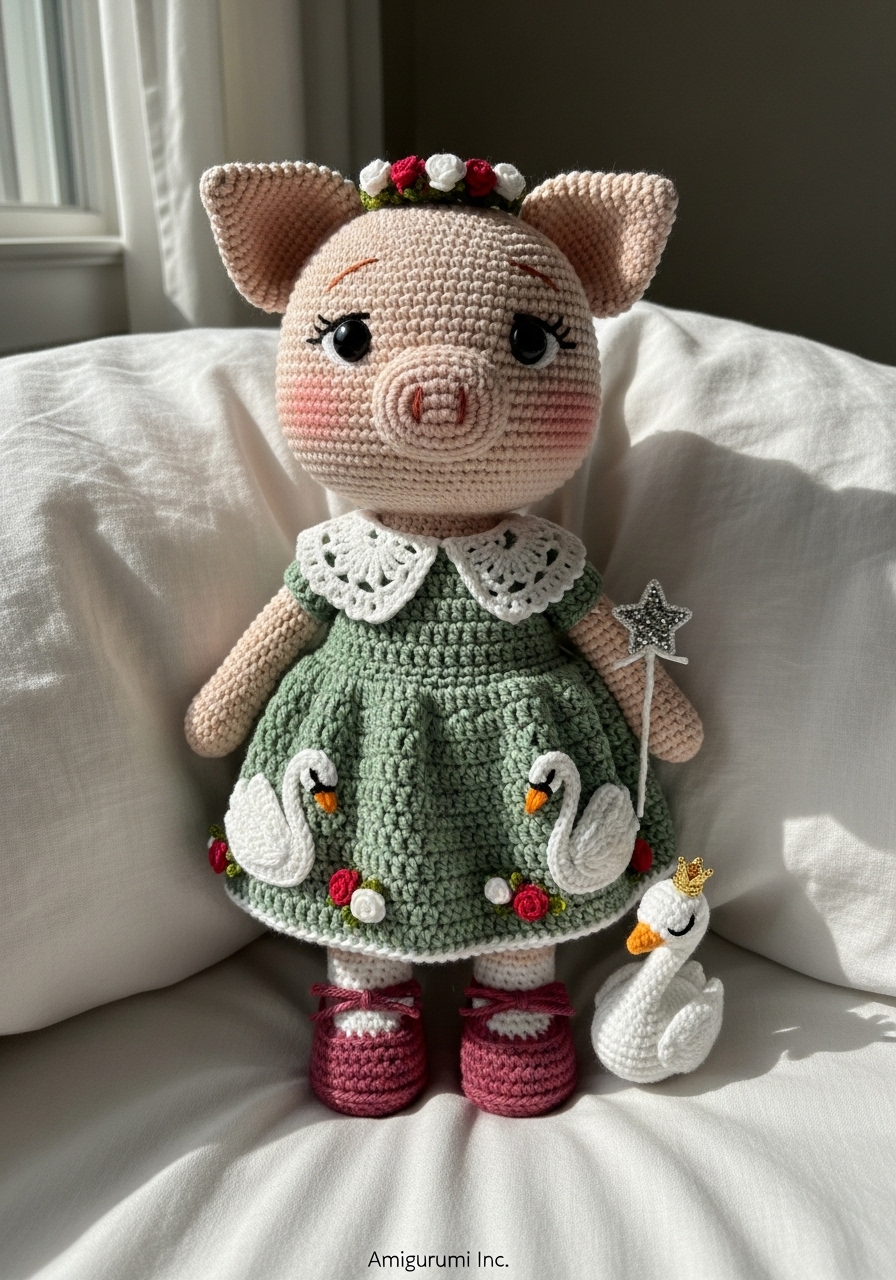
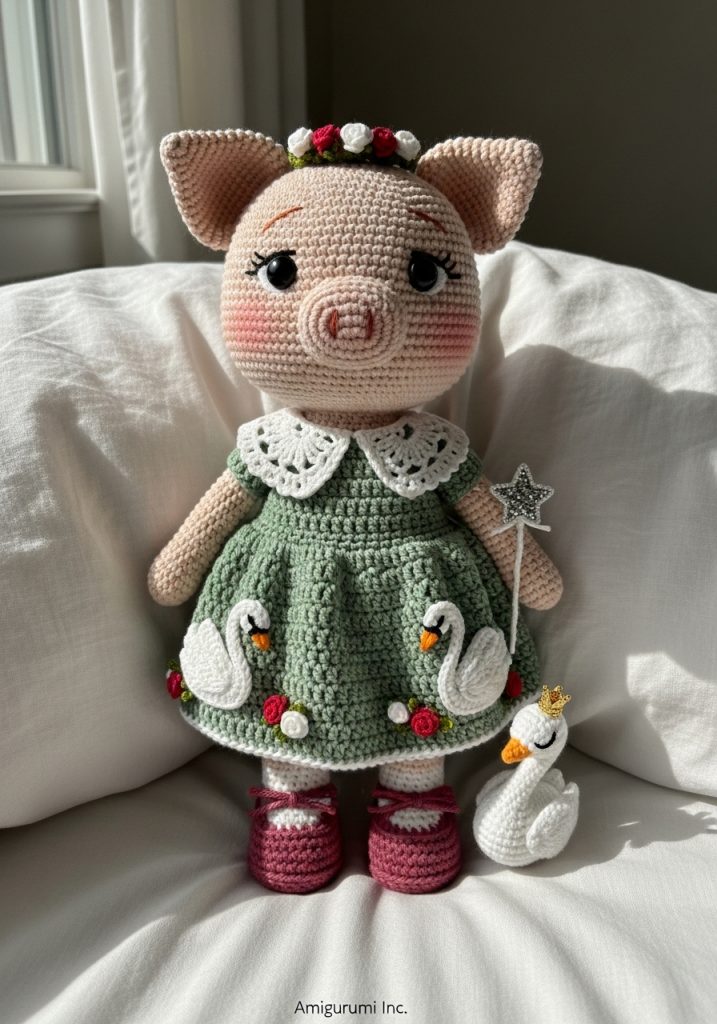
Welcome back to the workbench. Today, we are not merely stitching loops; we are breathing life into a storybook romance. Seraphina is a gentle soul, a guardian of fairytales, and she requires a patient hand to bring out her quiet dignity. Take your time with her rose crown and the delicate swans on her skirt—these are the details that turn a toy into a keepsake.
About This Creation & The “Heirloom” Angle
In a world of mass-produced plastics, Seraphina stands as a testament to the “Slow Craft” movement. She is designed with the “Echo of Youth” aesthetic—a larger head and wide-set eyes that trigger an immediate nurturing response.
This project is perfect for the “Heirloom Gift” market. By using high-quality cotton yarn and focusing on the intricate appliqué work of the swans and roses, you are creating a piece meant to be passed down, not discarded. The sage and dusty rose palette is specifically chosen to appeal to modern, neutral nursery trends while retaining a vintage charm.
Project Snapshot
📊 Difficulty: Intermediate to Advanced (Requires patience with appliqué)
⏰ Est. Time: 12–15 Hours of focused joy
📏 Size: Approx. 24cm tall (using DK weight yarn)
“True beauty lies in the tension of the thread and the patience of the maker.” — Patricia
Materials & Tools Needed
🧶 Yarn: 100% Mercerized Cotton (DK or Sport Weight). Colors: Blush Pink (Skin), Sage Green (Dress), Deep Rose (Shoes/Roses), Antique White (Collar/Swan), Mustard Gold (Crown).
🪡 Hook: 2.5mm (or size needed to obtain tight fabric)
✨ Other Materials: 10mm Safety Eyes Fiberfill stuffing Tapestry needle (long and short) Stitch markers Black embroidery thread Small piece of wire (optional for poseable arms) Cardboard or plastic rounds (for shoe soles)
Abbreviations & Stitches Used
ch: chain
sl st: slip stitch
sc: single crochet
hdc: half double crochet
dc: double crochet
inc: increase (2 sc in one st)
dec: decrease (sc 2 together)
BLO: back loop only
FLO: front loop only
st(s): stitch(es)
The Complete Seraphina Pattern
Component 1: The Head (Blush Pink)
We begin with the seat of her expression. Stuff firmly as you go.
R1: Start 6 sc in a magic ring (6)
R2: Inc in all 6 st (12)
R3: (Sc 1, inc) x 6 (18)
R4: (Sc 2, inc) x 6 (24)
R5: (Sc 3, inc) x 6 (30)
R6: (Sc 4, inc) x 6 (36)
R7: (Sc 5, inc) x 6 (42)
R8: (Sc 6, inc) x 6 (48)
R9: (Sc 7, inc) x 6 (54)
R10: (Sc 8, inc) x 6 (60)
R11–R19: Sc in each st around (60) [9 rounds of height]
R20: (Sc 9, inc) x 6 (66) [Cheek expansion]
R21–R24: Sc in each st around (66)
R25: (Sc 9, dec) x 6 (60)
Insert safety eyes between R20 and R21, roughly 11 stitches apart. Ensure they sit low on the face for the “Innocence” look.
R26: (Sc 8, dec) x 6 (54)
R27: (Sc 7, dec) x 6 (48)
R28: (Sc 6, dec) x 6 (42)
R29: (Sc 5, dec) x 6 (36)
R30: (Sc 4, dec) x 6 (30)
R31: (Sc 3, dec) x 6 (24)
R32: (Sc 2, dec) x 6 (18)
Fasten off, leaving a long tail for sewing.
Component 2: The Snout (Blush Pink)
R1: Ch 5. Start in 2nd ch from hook. Sc 3, 3 sc in last ch. Turn and work down other side: Sc 2, inc in last ch (10)
R2: Inc, Sc 2, Inc x 3, Sc 2, Inc x 2 (16)
R3: (Sc 1, inc), Sc 2, (Sc 1, inc) x 3, Sc 2, (Sc 1, inc) x 2 (22)
R4: BLO Sc in each st around (22)
R5–R6: Sc in each st around (22)
Fasten off. Leave tail. Embroider two vertical lines for nostrils in Deep Rose.
Component 3: The Ears (Make 2, Blush Pink)
R1: 6 sc in magic ring (6)
R2: (Sc 1, inc) x 3 (9)
R3: (Sc 2, inc) x 3 (12)
R4: (Sc 3, inc) x 3 (15)
R5: (Sc 4, inc) x 3 (18)
R6–R8: Sc in each st around (18)
R9: (Sc 1, dec) x 6 (12)
Flatten the opening. Do not stuff. Fold the ear slightly in half at the base and sew to create a curved, “perked” shape before attaching to head.
Component 4: Legs & Body (Deep Rose & Blush Pink)
We start with the shoes in Deep Rose.
R1: Ch 6. Start in 2nd ch. Sc 4, 3 sc in last ch. Turn. Sc 3, inc (12)
R2: Inc, Sc 3, Inc x 3, Sc 3, Inc x 2 (18)
R3: (Sc 1, inc), Sc 3, (Sc 1, inc) x 3, Sc 3, (Sc 1, inc) x 2 (24)
R4: BLO Sc in each st around (24) [Sole created]
Insert cardboard sole here if using.
R5–R7: Sc in each st around (24)
R8: Sc 6, (dec) x 6, sc 6 (18) [Shape toe]
R9: Sc 6, (dec) x 3, sc 6 (15)
R10: Sc in each st around (15)
Change color to Blush Pink (Skin).
R11: BLO Sc in each st (15) [Leave front loops for shoe strap]
R12–R20: Sc in each st around (15)
Fasten off first leg. Make second leg but do not cut yarn.
R21: Ch 3 (to join legs), sc into first leg. Sc 15 around first leg, sc 3 along chain, sc 15 around second leg, sc 3 along chain (36)
R22: (Sc 5, inc) x 6 (42)
R23–R28: Sc in each st around (42) [Tummy]
Change color to Sage Green (Dress Base – Undergarment).
R29: Sc in each st around (42)
R30: BLO Sc in each st (42) [This leaves loops to attach the skirt later]
R31–R35: Sc in each st around (42)
R36: (Sc 5, dec) x 6 (36)
R37–R38: Sc in each st around (36)
R39: (Sc 4, dec) x 6 (30)
R40: Sc in each st around (30)
R41: (Sc 3, dec) x 6 (24)
R42: (Sc 2, dec) x 6 (18)
Fasten off.
Component 5: The Swan Dress Skirt (Sage Green)
Attach yarn to the FLO of R30 on the body, holding the doll upside down.
R1: Ch 2, (Dc 1, Dc inc) around. Join (63)
R2: (Dc 6, Dc inc) around (72)
R3–R10: Dc in each st around (72)
R11: (Sc, ch 2, sc in next st) around to create a subtle picot hem.
Fasten off.
Component 6: The Lace Collar (Antique White)
Make separately and sew on.
R1: Ch 24. Join to form ring.
R2: Dc in each ch around (24)
R3: (Dc 1, Dc inc) around (36)
R4: Skip 1, 5 dc in next st (Shell), skip 1, sl st in next. Repeat around.
Fasten off.
Component 7: Arms (Make 2, Blush Pink)
R1: 6 sc in magic ring (6)
R2: (Sc 2, inc) x 2 (8)
R3–R15: Sc in each st around (8)
Fasten off. Stuff lightly only at the hands.
Component 8: Appliqués & Details
The Flat Swans (Make 2, White)
R1: Ch 10. (Neck): Sc in 2nd ch, sc in next 4. (Body): 3 hdc in next ch, 3 dc in next ch, 5 dc in last ch. Work on other side: sl st down to start.
Artisan Note: This is a freeform shape. Use your hook to pull the neck into a curve and stitch it onto the dress securely.
The Roses (Deep Rose)
R1: Ch 12. 2 sc in each ch across. Roll tightly into a bud and stitch base. Make 8 (some for dress, some for crown).
Component 9: The Swan Companion (Antique White)
Body:
R1: 6 sc in MR.
R2: Inc around (12).
R3: (Sc 1, inc) (18).
R4–R6: Sc around.
R7: (Sc 1, dec) (12).
R8: Dec around (6). Close.
Neck/Head:
R1: Ch 8. Sc in 2nd ch and next 6. Roll and sew to body. Embroider black beak and eyes.
Assembly & Final Touches
- Face Sculpting: Before attaching the snout, use a scrap of pink yarn to indent the eye sockets slightly by pulling from the back of the neck to the eye points.
- Mounting: Sew the head to the body. Ensure it is firm; a wobbly head breaks the illusion.
- Dressing: Sew the collar around the neck.
- Scene Setting: Sew the two swans onto the front of the skirt, facing each other. Stitch small roses between them and around the hem.
- The Crown: Stitch the remaining roses onto a small chain loop that fits Seraphina’s head.
- Blush: Apply a gentle dusting of pink blush to her cheeks and the inside of her ears.
Tips & FAQs
- Q: My dress flares too much.
- A: If your tension is loose, switch to a smaller hook for the skirt. It should be an A-line, not a circle skirt.
- Q: Can I use acrylic yarn?
- A: You may, but cotton provides that sharp, defined stitch definition seen in professional Japanese amigurumi.
A Final Word
Seraphina is now ready to leave your hands and enter the world. She is not just a toy; she is a character waiting for her story to be told. I cannot wait to see the personality you stitch into her smile.
Yours in creativity,
Patricia

