My dearest maker, it brings me such joy to see you back in the studio. Today, we are attempting something truly special—working with velvet. There is a particular magic to this fiber; it turns a simple stitch into a cloud and a toy into a keepsake that demands to be held. Let us take our time with this little cub, ensuring every loop is placed with love and intention.
About This Creation & The Velvet Touch
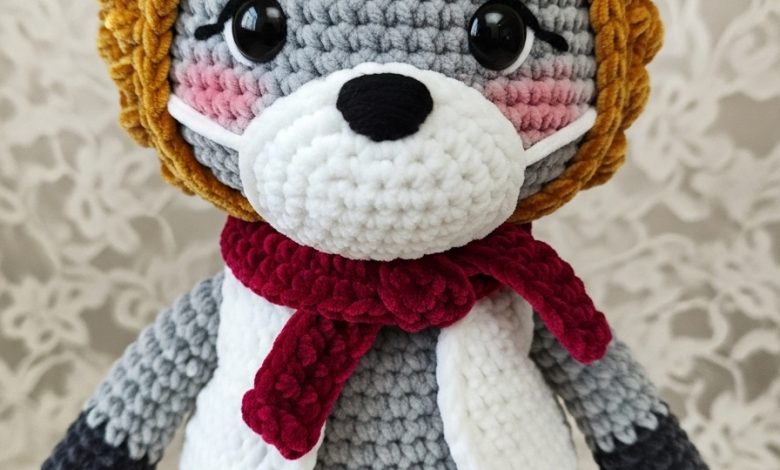
We are moving away from standard cotton for this project to embrace the luxurious feel of chenille or velvet yarn. This choice changes everything. It softens the silhouette, giving our little fox a “vintage toy” appeal right off the hook.
The commercial angle here is significant: “sensory-friendly” and “premium heirloom” toys are highly sought after. By mastering velvet, you elevate your portfolio from standard amigurumi to boutique-quality plushies. This pattern is designed to handle the unique challenges of velvet—specifically preventing worming (loose loops) and managing visibility—so you can crochet with confidence.
Project Snapshot:
📊 Difficulty: Intermediate (due to yarn texture)
⏰ Est. Time: 5–7 Hours
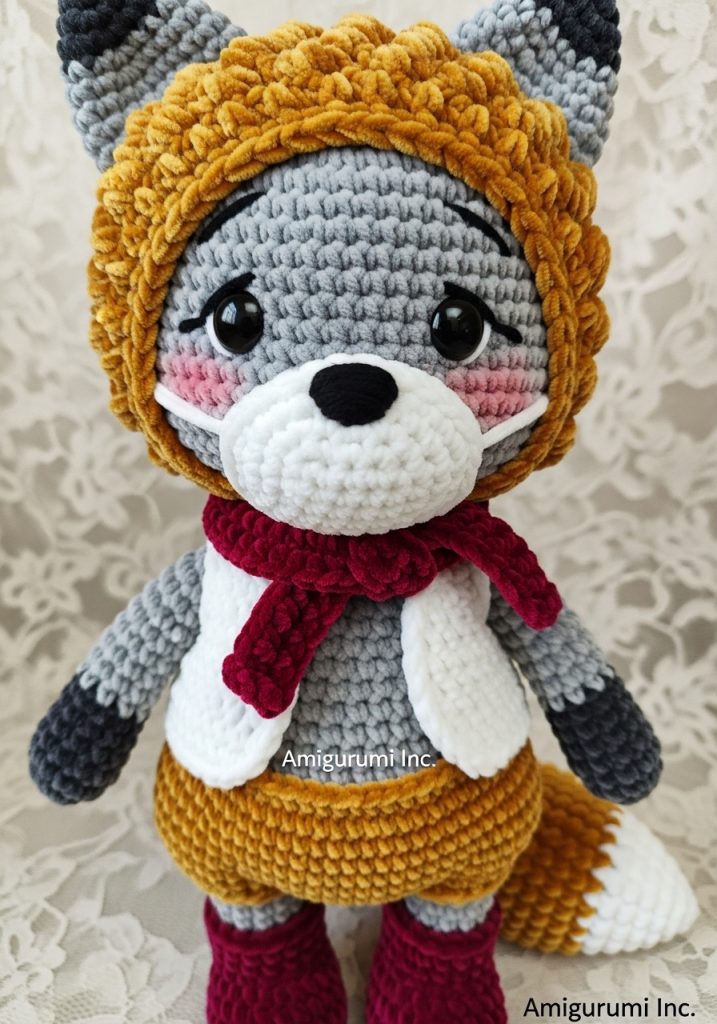
📏 Size: Approx. 22cm (standing) using bulky velvet yarn
“Velvet yarn is unforgiving of mistakes but endlessly generous in softness. Trust your fingers more than your eyes.” — Patricia
Materials & Tools Needed
🧶 Yarn: Super Bulky or Bulky Velvet/Chenille Yarn.
- Main Color: Silver Grey (approx. 100g)
- Contrast A: Creamy White (snout/face)
- Contrast B: Mustard Gold (pants/bonnet)
- Contrast C: Deep Burgundy (boots/scarf)
🪡 Hook: 4.0mm or 4.5mm (Go smaller than the yarn label suggests to keep stitches tight!)
✨ Other Materials:
- 12mm Safety Eyes (Black)
- Polyester fiberfill (stuff firmly!)
- Yarn needle with a large eye
- Stitch markers (essential for velvet)
- Pink pastel chalk or blush for cheeks
Abbreviations & Stitches Used
ch: chain
sl st: slip stitch
sc: single crochet
inc: increase (2 sc in one stitch)
dec: decrease (invisible decrease preferred)
BLO: back loop only
The Complete Velvet Fox Cub Pattern
The Head (Grey & White) Worked from the nose backward to the back of the head.
Start with White Yarn. R1: Magic ring, 6 sc (6) R2: inc in each st (12) R3: (sc 1, inc) x 6 (18) R4: (sc 2, inc) x 6 (24) R5–R6: sc around (24) Change to Grey Yarn. We will now shape the forehead. R7: sc 9, (inc) x 6 [forehead shaping], sc 9 (30) R8: (sc 4, inc) x 6 (36) R9: (sc 5, inc) x 6 (42) R10: (sc 6, inc) x 6 (48) R11–R18: sc around (48) [8 rounds of height for that cute “big head” look] R19: (sc 6, dec) x 6 (42) R20: (sc 5, dec) x 6 (36) R21: (sc 4, dec) x 6 (30) Insert safety eyes between R7 and R8, about 10 stitches apart. Stuff the snout firmly. R22: (sc 3, dec) x 6 (24) R23: (sc 2, dec) x 6 (18) Stuff the head very firmly. R24: (sc 1, dec) x 6 (12) R25: dec x 6 (6) Fasten off and weave in end.
The Ears (Make 2) Use Grey Yarn, switching to Dark Grey/Black for tips if desired.
R1: Magic ring, 4 sc (4) R2: (sc 1, inc) x 2 (6) R3: (sc 2, inc) x 2 (8) R4: (sc 3, inc) x 2 (10) R5: (sc 4, inc) x 2 (12) R6: (sc 5, inc) x 2 (14) R7–R8: sc around (14) Flatten and sew to the head at R14–16.
The Boots & Legs (Make 2) Start with Burgundy Yarn.
R1: Magic ring, 6 sc (6) R2: inc in each st (12) R3: (sc 1, inc) x 6 (18) R4: BLO sc around (18) [Creates the sole edge] R5–R6: sc around (18) R7: sc 6, dec x 3, sc 6 (15) [Shape the toe] R8: sc around (15) Change to Grey Yarn. R9–R14: sc around (15) Fasten off the first leg. Do not fasten off the second leg.
The Body Continue from the second leg.
R15: ch 3, join to first leg with a sc. sc 14 around first leg, sc 3 along chain, sc 15 around second leg, sc 3 along other side of chain. (36) R16: (sc 5, inc) x 6 (42) R17–R22: sc around (42) [Building the tummy] R23: (sc 5, dec) x 6 (36) R24–R25: sc around (36) R26: (sc 4, dec) x 6 (30) R27–R28: sc around (30) R29: (sc 3, dec) x 6 (24) R30: sc around (24) R31: (sc 2, dec) x 6 (18) Fasten off, leaving a long tail for sewing. Stuff firmly.
The Arms (Make 2) Use Grey Yarn.
R1: Magic ring, 6 sc (6) R2: (sc 1, inc) x 3 (9) R3–R10: sc around (9) R11: Flatten opening and sc across through both layers. Fasten off.
The Wardrobe Components
Puffy Bloomers (Mustard Gold) R1: ch 42, join to form a circle. R2: sc around (42) R3–R8: sc around (42) R9: Split for legs. Skip 21 sts, join to start. sc 21 for first leg. R10–R11: sc around (21) R12: dec around (11) Fasten off. Repeat R9–R12 for the second leg.
The Bonnet (Mustard Gold) R1: Magic ring, 6 sc (6) R2: inc around (12) R3: (sc 1, inc) x 6 (18) R4: (sc 2, inc) x 6 (24) R5: (sc 3, inc) x 6 (30) R6: (sc 4, inc) x 6 (36) R7: (sc 5, inc) x 6 (42) R8–R14: sc around (42) R15: Turn, ch 1, sc 38. Leave last 4 stitches unworked (for the neck opening). R16: Turn, ch 1, sc across (38). Fasten off. Add ties to the corners if desired.
The Vest (White) R1: ch 31. R2: starting 2nd ch from hook, sc 30. R3: sc 30. R4: sc 5, ch 6 (skip 4 sts for armhole), sc 12, ch 6 (skip 4 sts), sc 5. R5: sc across, working into chains (34). R6–R8: sc across (34). Fasten off.
Assembly & Final Touches
- Head Assembly: Pin the ears symmetrically. Sew firmly. Using black thread, embroider a small “V” nose on the snout tip and a straight line down for the mouth.
- Body Build: Sew the head to the body. Attach arms at round 29 of the body.
- Dressing: Put on the bloomers first, then the vest. Tie the scarf (a simple strip of burgundy crochet, ch 40, sc back) around the neck. Finally, place the bonnet.
- Blush: Apply pink chalk dust gently under the eyes for that sweet, shy look.
Tips & FAQs
- My stitches look messy! Velvet creates a “worming” effect if your tension is loose. Use a smaller hook than usual and keep tension consistent.
- Can I brush the yarn? Do not use a wire brush on velvet yarn; it will snap the threads. It is plush enough on its own!
A Final Word
There is a quiet dignity in a handmade toy like this. It is not just a fox; it is a character waiting for a story. I hope you found joy in the challenge of the velvet, my friend.