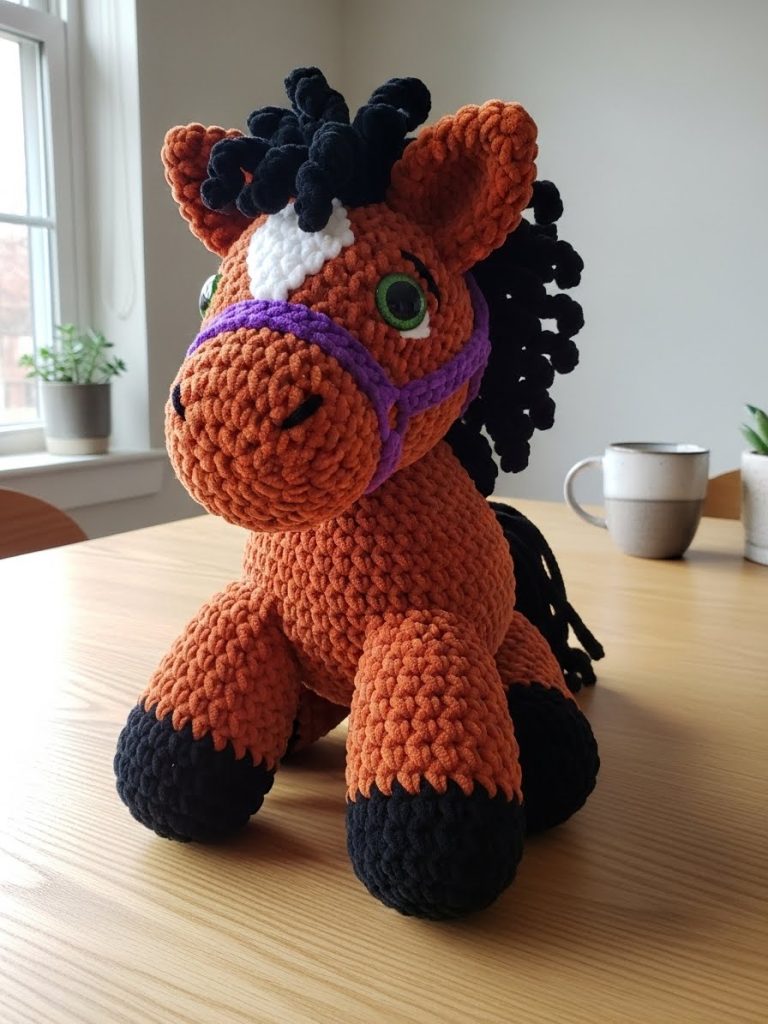
There is a profound joy in working with velvet yarn—the way it absorbs light and offers immediate comfort to the touch. However, it requires a gentle but firm hand to ensure our creations stand proud rather than slumping. Pippin is designed to teach you exactly that balance. He is robust, cheerful, and ready to gallop off your hook. Let us begin.
About This Creation & The Velvet Touch
Many shy away from chenille or velvet yarns for structural amigurumi, fearing the dreaded “flop.” The secret lies not just in tension, but in the architecture of the stitch work. Pippin utilizes a tighter gauge and strategic increases to build a dense fabric that holds its shape without plastic armature.
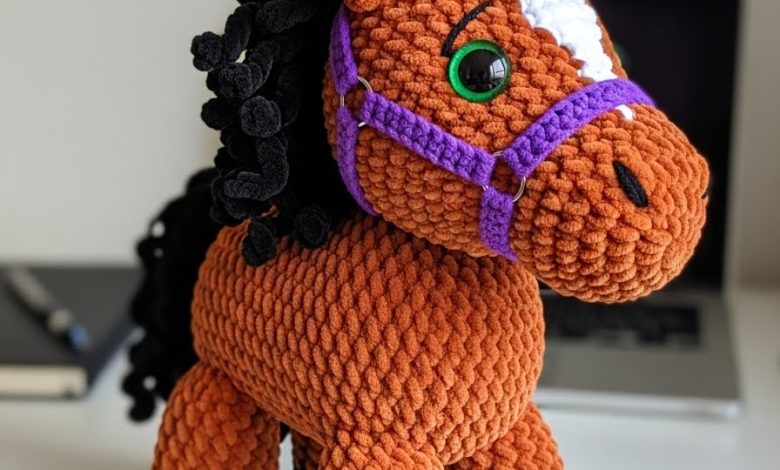
This project is also a study in texture contrast. The smooth, matte finish of the muzzle against the riotous, spiraling curls of the mane creates a tactile experience that is visually arresting and lovely to hold.
Project Snapshot
📊 Difficulty: Intermediate (Handling velvet requires care)
⏰ Est. Time: 4 – 6 Hours
📏 Size: Approx. 20cm tall (depending on yarn weight)
“The character of a piece often lies in the imperfections we embrace, but the structure relies on the consistency we enforce.” — Patricia
Materials & Tools Needed
🧶 Yarn: Super Bulky (Size 6) Chenille/Velvet Yarn.
- Main Color: Rust/Copper (approx. 100g)
- Contrast A: Black (for hooves and mane)
- Contrast B: White (small amount for blaze)
- Contrast C: Purple (for bridle)
🪡 Hook: 5.0mm (H) or 4.5mm (7) – Note: Use a smaller hook than recommended on the band to prevent holes.
✨ Other Materials:
- 20mm Green Safety Eyes
- Polyfill stuffing (high density)
- Yarn needle (large metal eye)
- Stitch markers
Abbreviations & Stitches Used
ch: chain
sl st: slip stitch
sc: single crochet
inc: increase (2 sc in one st)
dec: decrease (sc 2 together – use invisible decrease)
blo: back loop only
The Complete Pippin Pattern
Component 1: The Head
Worked in continuous rounds using Rust yarn.
Round 1: 6 sc in a magic ring (6)
Round 2: inc in each st around (12)
Round 3: 🧶 sc 1, inc 🧶 repeat around (18)
Round 4: 🧶 sc 2, inc 🧶 repeat around (24)
Round 5–8: sc in each st around (24) – This forms the muzzle.
Round 9: 🧶 sc 3, inc 🧶 repeat around (30) – Beginning forehead expansion.
Round 10: 🧶 sc 4, inc 🧶 repeat around (36)
Round 11: 🧶 sc 5, inc 🧶 repeat around (42)
Round 12–19: sc in each st around (42) – Insert safety eyes between R10 and R11, roughly 8 stitches apart.
Round 20: 🧶 sc 5, dec 🧶 repeat around (36)
Round 21: 🧶 sc 4, dec 🧶 repeat around (30)
Round 22: 🧶 sc 3, dec 🧶 repeat around (24) – Stuff the muzzle firmly, then the rest of the head.
Round 23: 🧶 sc 2, dec 🧶 repeat around (18)
Round 24: 🧶 sc 1, dec 🧶 repeat around (12)
Round 25: dec around (6). Fasten off and weave in end.
Component 2: The Blaze (Forehead Patch)
Worked flat in White yarn.
Row 1: Ch 5, start in 2nd ch from hook.
Row 2: sc 4. Ch 1, turn.
Row 3: dec, sc 2. Ch 1, turn (3)
Row 4: sc 3. Ch 1, turn.
Row 5: dec, sc 1. Ch 1, turn (2)
Row 6: dec. Fasten off, leaving a long tail for sewing.
Component 3: The Body
Worked in continuous rounds using Rust yarn.
Round 1: 6 sc in a magic ring (6)
Round 2: inc in each st around (12)
Round 3: 🧶 sc 1, inc 🧶 repeat around (18)
Round 4: 🧶 sc 2, inc 🧶 repeat around (24)
Round 5: 🧶 sc 3, inc 🧶 repeat around (30)
Round 6: 🧶 sc 4, inc 🧶 repeat around (36)
Round 7–16: sc in each st around (36) – Create a sturdy cylinder.
Round 17: 🧶 sc 4, dec 🧶 repeat around (30)
Round 18: 🧶 sc 3, dec 🧶 repeat around (24)
Round 19: sc in each st around (24). Fasten off, leaving a long tail for sewing to the head. Stuff firmly.
Component 4: The Legs (Make 4)
Start with Black yarn (Hooves).
Round 1: 6 sc in a magic ring (6)
Round 2: inc in each st around (12)
Round 3: 🧶 sc 1, inc 🧶 repeat around (18)
Round 4: BLO sc in each st around (18) – Creates the flat bottom of the hoof.
Round 5: sc in each st around (18)
Change to Rust yarn.
Round 6–10: sc in each st around (18)
Round 11: 🧶 sc 1, dec 🧶 repeat around (12)
Round 12: sc in each st around (12). Fasten off. Stuff firmly.
Component 5: The Ears (Make 2)
Worked in Rust yarn.
Round 1: 4 sc in a magic ring (4)
Round 2: 🧶 sc 1, inc 🧶 repeat around (6)
Round 3: 🧶 sc 2, inc 🧶 repeat around (8)
Round 4–5: sc in each st around (8). Fasten off. Flatten the piece; do not stuff.
Component 6: The Mane & Tail (The Corkscrews)
Worked in Black yarn. You will make approximately 10-12 individual curls for the mane and 5 for the tail.
Row 1: Ch 15 (for shorter curls) or Ch 20 (for longer curls).
Row 2: Start in 2nd ch from hook. Work 2 sc in every chain stitch all the way back.
Artisan’s Note: As you work, the piece will naturally curl. Twist it with your fingers to tighten the spiral before sewing.
Component 7: The Bridle
Worked in Purple yarn.
Noseband: Ch 26 (measure around the muzzle), join with sl st to form a ring. sc around. Fasten off.
Headstall: Join yarn to the Noseband, Ch 30 (measure over the head behind ears), sl st to the opposite side of the Noseband.

Assembly & Final Touches
- Face: Sew the White Blaze onto the forehead, centered between the eyes.
- Body: Sew the Head to the Body. Ensure the head is facing forward and secure with multiple passes of yarn to prevent wobbling.
- Legs: Pin the four legs to the bottom of the body. Sew them securely so Pippin stands balanced on all four.
- Mane: Sew the black corkscrew curls in a line from the top of the forehead down the back of the head. Pack them densely for a “full” look.
- Tail: Sew the tail curls to the lower back of the body.
- Bridle: Slip the noseband over the muzzle and pull the headstall strap behind the ears. Tack it down with a small stitch if you wish it to be permanent.
Tips & FAQs
Q: My chenille yarn is “worming” (loops coming loose). Why?
A: This usually happens if your tension is too loose. Try going down a hook size. Also, ensure you are pulling your stitches snug, but not so tight that the yarn snaps.
Q: Can I use acrylic yarn instead?
A: Absolutely. If you use worsted weight acrylic, Pippin will be significantly smaller (around 10cm). You will need a 3.5mm hook.
A Final Word
Pippin is now ready to be a steadfast friend. There is something remarkably grounding about creating a creature that stands on its own four feet. I hope this project brought a moment of calm to your day. Until we meet again at the crafting table.