My dearest creator, welcome back to the worktable.
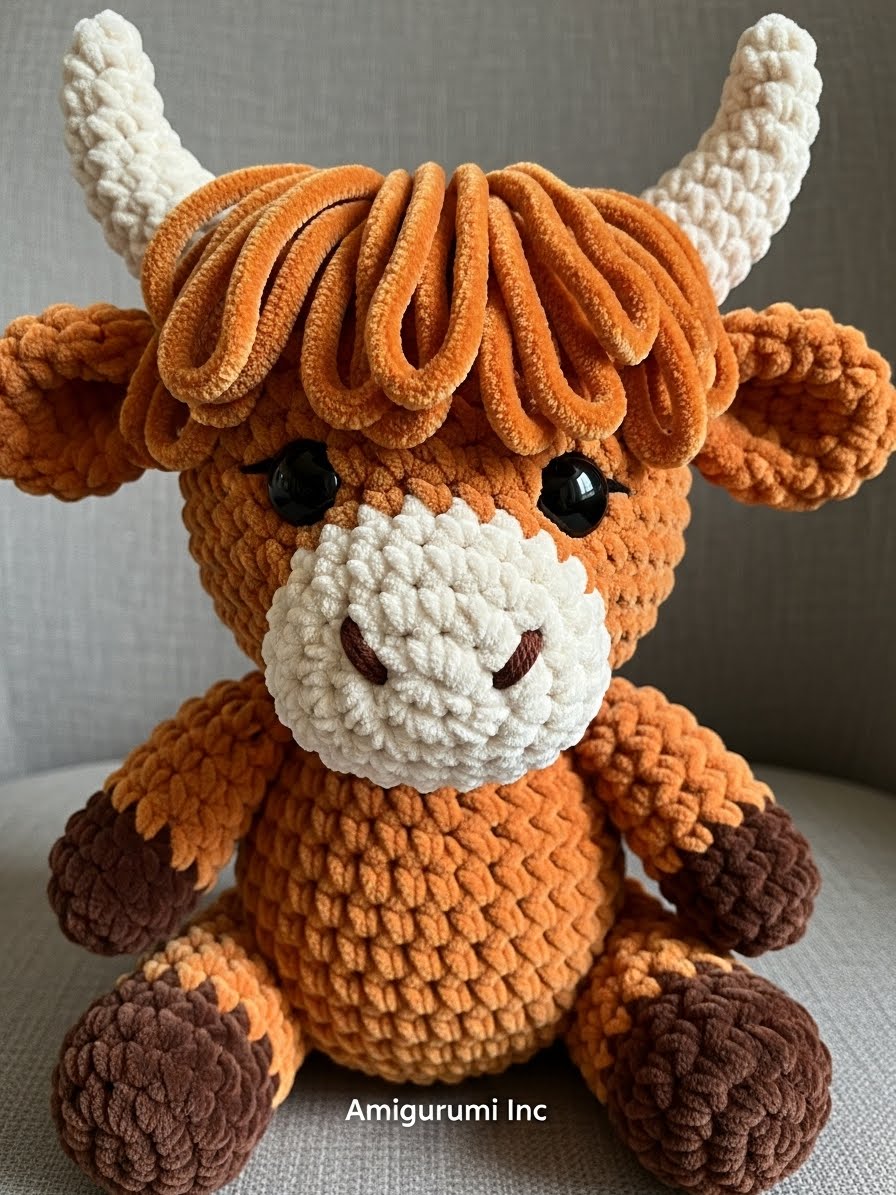
There is a distinct quiet joy in working with chenille yarn, isn’t there? It forgives our tension and rewards us with instant softness. After the roaring success of our Mammoth, I knew we needed a companion that carried the same rustic soul but told a different story. Hamish is that story. He is not just a toy; he is a piece of the Scottish Highlands brought to your living room. Let us craft him with patience and heart.
About This Creation & Angle
The “Farmhouse” aesthetic has taken the handmade world by storm, moving away from bright, synthetic colors toward warm earth tones—rusts, oatmeals, and creams. Hamish fits perfectly into this niche. He bridges the gap between a toy for a child and a piece of décor for a cozy home.
Commercially, this project is a powerhouse because it teaches the “Loop Stitch” in a manageable way. Many creators are intimidated by this stitch, but by using it only for Hamish’s “bangs,” we turn a scary technique into a fun, bite-sized lesson.
Project Snapshot:
📊 Difficulty: Intermediate (due to Loop Stitch)
⏰ Est. Time: 4–6 Hours
📏 Size: Approx. 20cm (8 inches) tall seated
“Texture is the language of comfort. Hamish speaks it fluently.” — Patricia
Materials & Tools Needed
🧶 Yarn: Super Bulky (Size 6) Chenille/Velvet yarn. Colors: Burnt Orange (approx. 100g), Cream (30g), Beige (for horns), Dark Brown (for hoof details).
🪡 Hook: 4.5mm or 5.0mm (depending on your tension)
✨ Other Materials: 14mm Safety Eyes Polyester fiberfill stuffing Yarn needle (large eye) Stitch markers Scissors
Abbreviations & Stitches Used
ch: chain
sl st: slip stitch
sc: single crochet
inc: increase (2 sc in one stitch)
dec: decrease (invisible decrease preferred)
BLO: back loop only
LS: Loop Stitch (Insert hook, wrap yarn around finger to create loop, finish as sc)
The Complete Hamish Pattern
The Muzzle (Make this first to help with eye placement later) Use Cream Yarn.
R1: Ch 6. Starting in 2nd ch from hook, sc 4, 3 sc in last ch. Turn to work on other side: sc 3, inc in last st (12)
R2: inc, sc 3, inc x 3, sc 3, inc x 2 (18)
R3: sc 1, inc, sc 3, (sc 1, inc) x 3, sc 3, (sc 1, inc) x 2 (24)
R4: sc 2, inc, sc 3, (sc 2, inc) x 3, sc 3, (sc 2, inc) x 2 (30)
R5-6: sc in each st around (30)
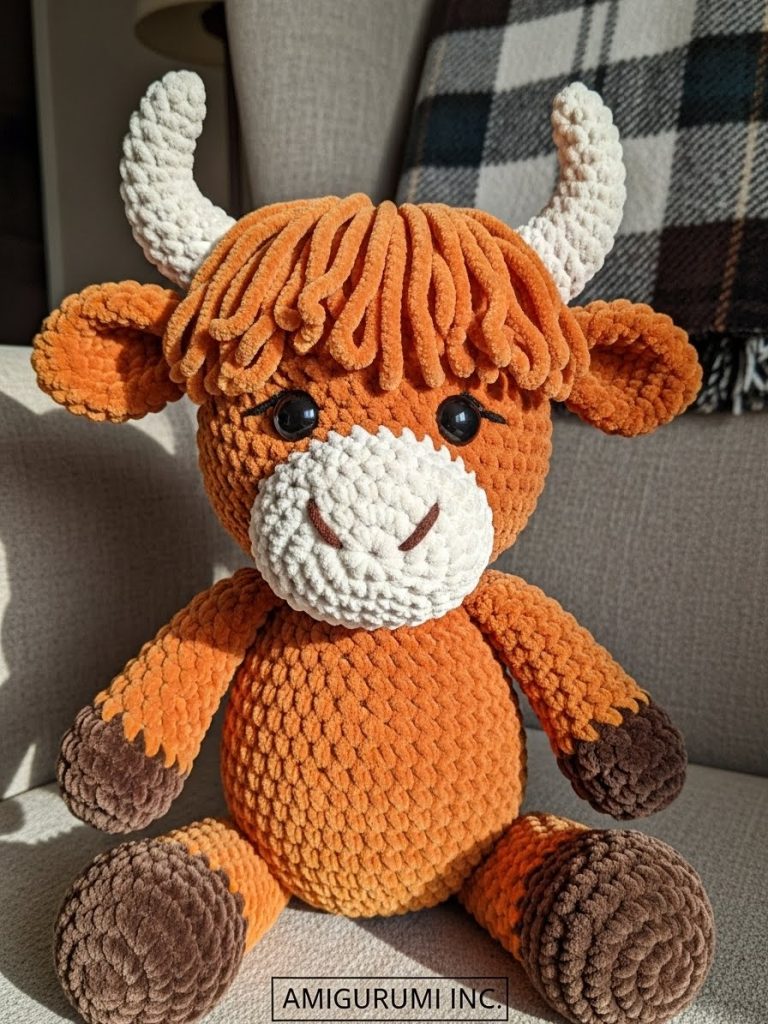
Fasten off, leaving a long tail for sewing. Embroider two nostrils using dark brown yarn.
The Head Use Burnt Orange Yarn.
R1: 6 sc in Magic Ring (6)
R2: inc in each st around (12)
R3: (sc 1, inc) x 6 (18)
R4: (sc 2, inc) x 6 (24)
R5: (sc 3, inc) x 6 (30)
R6: (sc 4, inc) x 6 (36)
R7: (sc 5, inc) x 6 (42)
R8: (sc 6, inc) x 6 (48)
R9-18: sc in each st around (48) – 10 rounds of height for a round, chubby face
R19: (sc 6, dec) x 6 (42)
R20: (sc 5, dec) x 6 (36) Note: Pause here. Position the Muzzle between Rounds 14-18. Insert Safety Eyes between Rounds 13-14, about 3 stitches away from the edge of the muzzle on either side. Secure eyes.
R21: (sc 4, dec) x 6 (30)
R22: (sc 3, dec) x 6 (24) Start stuffing firmly.
R23: (sc 2, dec) x 6 (18)
R24: (sc 1, dec) x 6 (12)
R25: dec x 6 (6)
Fasten off and close the hole.
The Crown (The Highland Hair) Use Burnt Orange Yarn. This is a wig cap worked entirely in Loop Stitches (LS). Keep loops approx. 3cm long.
R1: 6 sc in MR (6) – Standard sc for the very center
R2: LS inc in each st (12)
R3: (LS 1, LS inc) x 6 (18)
R4: (LS 2, LS inc) x 6 (24)
R5: (LS 3, LS inc) x 6 (30)
R6-8: LS in each st around (30)
Fasten off, leaving a long tail.
The Horns (Make 2) Use Beige Yarn.
R1: 4 sc in MR (4)
R2: (sc 1, inc) x 2 (6)
R3: sc around (6)
R4: (sc 2, inc) x 2 (8)
R5: sc around (8)
R6: (sc 3, inc) x 2 (10)
R7: sc around (10)
R8: (sc 4, inc) x 2 (12)
Fasten off. Stuff lightly.
The Ears (Make 2) Use Burnt Orange Yarn.
R1: 6 sc in MR (6)
R2: (sc 1, inc) x 3 (9)
R3: (sc 2, inc) x 3 (12)
R4-6: sc around (12)
R7: (sc 2, dec) x 3 (9)
Flatten and sc across the opening to close. Do not stuff.
The Body Use Burnt Orange Yarn.
R1: 6 sc in MR (6)
R2: inc in each st around (12)
R3: (sc 1, inc) x 6 (18)
R4: (sc 2, inc) x 6 (24)
R5: (sc 3, inc) x 6 (30)
R6: (sc 4, inc) x 6 (36)
R7: (sc 5, inc) x 6 (42)
R8: (sc 6, inc) x 6 (48)
R9-14: sc in each st around (48) – Building the tummy
R15: (sc 6, dec) x 6 (42)
R16: sc around (42)
R17: (sc 5, dec) x 6 (36)
R18: sc around (36)
R19: (sc 4, dec) x 6 (30)
R20: sc around (30)
R21: (sc 3, dec) x 6 (24)
R22: sc around (24) Start stuffing the body firmly.
R23: (sc 2, dec) x 6 (18)
R24: sc around (18)
Fasten off, leaving a long tail for sewing head to body.
The Arms (Make 2) Start with Dark Brown (Hoof).
R1: 6 sc in MR (6)
R2: inc around (12)
R3: BLO sc around (12) – Creates the hoof edge
Change to Burnt Orange.
R4-12: sc around (12)
R13: (sc 4, dec) x 2 (10)
Stuff the bottom half only. Flatten top and sc across to close.
The Legs (Make 2) Start with Dark Brown (Hoof).
R1: 6 sc in MR (6)
R2: inc around (12)
R3: (sc 1, inc) x 6 (18)
R4: BLO sc around (18)
Change to Burnt Orange.
R5-7: sc around (18)
R8: (sc 4, dec) x 3 (15)
R9-11: sc around (15)
R12: (sc 3, dec) x 3 (12)
Stuff firmly. Fasten off, leave tail.
The Tail Use Burnt Orange.
Ch 9. Starting in 2nd ch from hook, sl st 8. Cut 3 strands of yarn, loop them through the end of the chain, and brush them out to create a fluffy tip.
Assembly & Final Touches
🧵 The Face: Sew the Muzzle securely to the center of the face. Sew the Crown (hair) onto the top of the head so the loops hang down over the forehead, just brushing the tops of the eyes. You can trim a few loops if they block the vision too much!
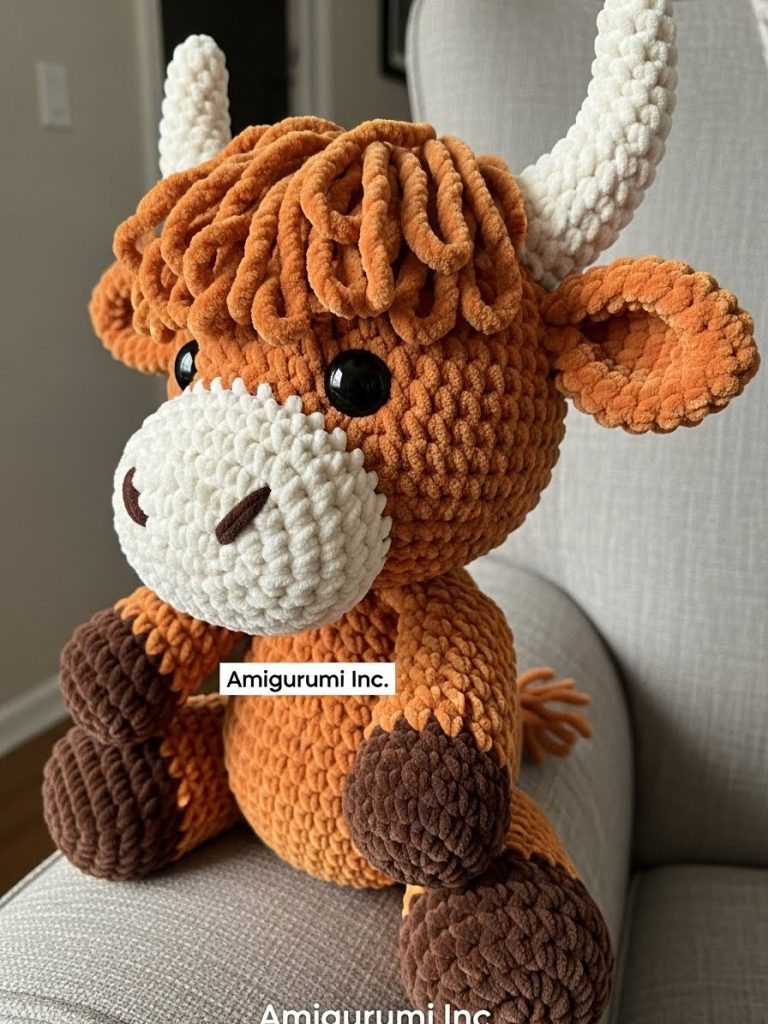
🧵 The Features: Sew the Horns on either side of the Crown. Sew the Ears directly below the Horns.
🧵 The Body: Sew the Head to the Body neck opening.
🧵 The Limbs: Sew the Arms at Round 22 of the body. Sew the Legs to the front bottom of the body (Rounds 6-9) so Hamish sits permanently. Sew the Tail to the back center.
Tips & FAQs
➡️ The loops are pulling inside! Ensure you are keeping the tension loose on your finger when creating the loop. If they slip inside, use your hook to tug them out before closing the stitch.
➡️ Can I brush the yarn? If you use acrylic yarn, yes! But for chenille/velvet, do not use a pet slicker brush as it will shred the fabric. Let the loops provide the texture.
A Final Word
Hamish is more than a project; he is a companion waiting to be realized. As you fasten that final tail and fluff his bangs, take a moment to appreciate the skill in your hands. You have turned a simple strand of fiber into a character with a soul.
Until our next creation, keep your hooks busy and your hearts full.
Patricia

