My dearest maker, welcome back to the studio. Today we are sculpting not just with yarn, but with imagination. Belle is more than a toy; she is a tribute to every quiet afternoon spent creating something beautiful. She wears her messy paint splatters like medals of honor. Let us pick up our hooks and paint with texture.
About This Creation & The Artist’s Soul
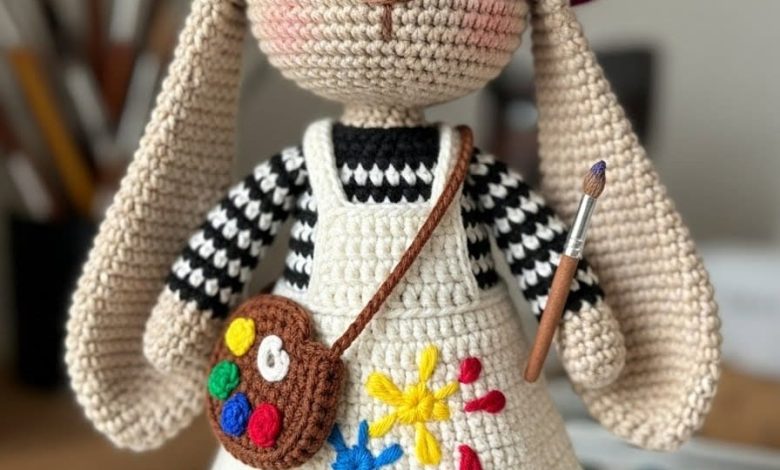
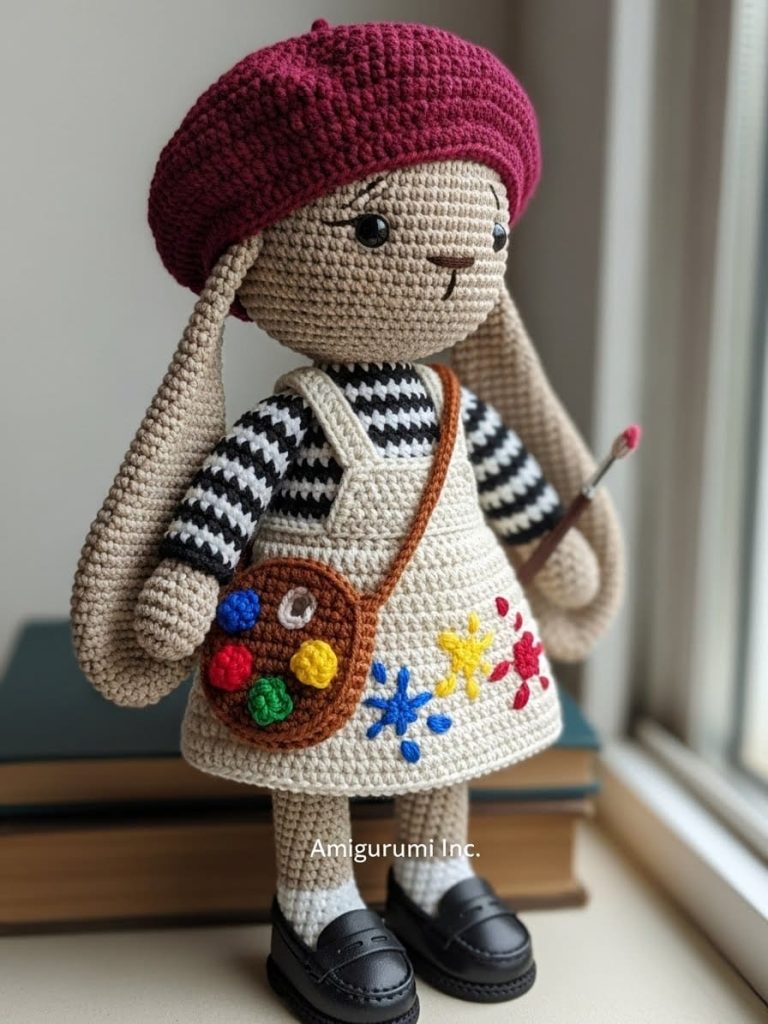
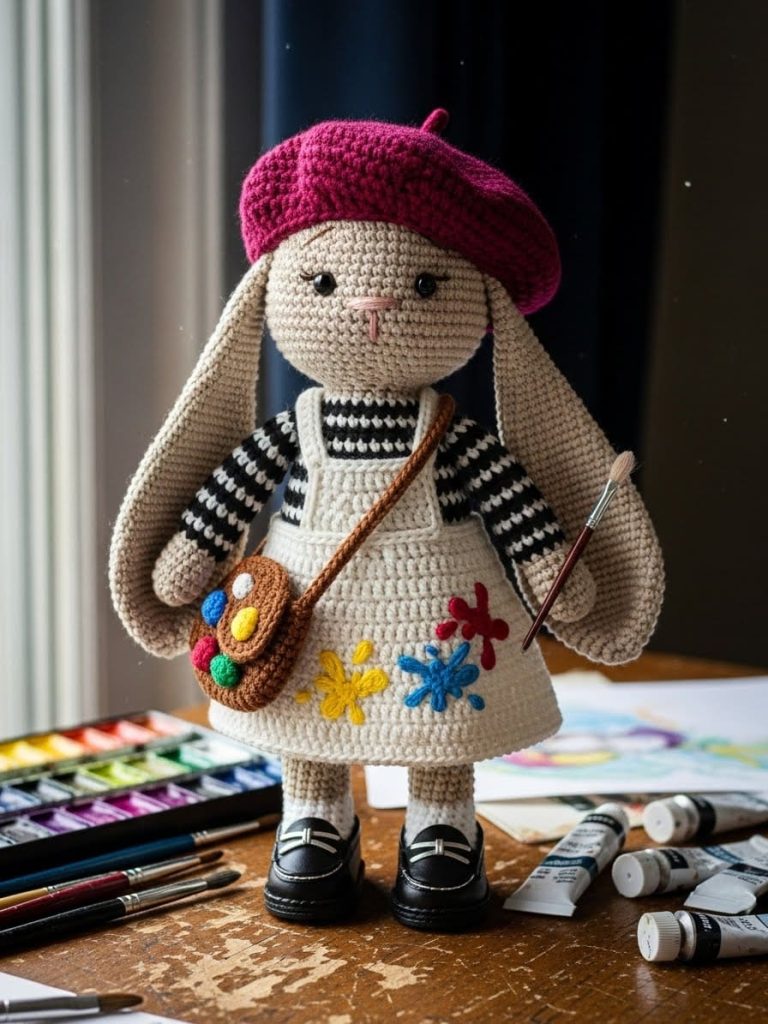
Belle captures the spirit of Montmartre in stitch form. While many patterns focus solely on the character, we are crafting a story here. The contrast between her structured, striped Breton shirt and the chaotic, colorful embroidery on her dress creates a stunning visual balance. This project is perfect for using up scrap yarn for the “paint,” allowing you to personalize her palette to match your own favorite colors. She sits perfectly on a shelf, reminding you to stay creative every single day.
Project Snapshot:
📊 Difficulty: Intermediate (Color changes and embroidery required)
⏰ Est. Time: 10–12 Hours
📏 Size: Approx. 30cm (12 inches) tall
“Creativity takes courage, and a little bit of yarn.” – Patricia
Materials & Tools Needed
🧶 Yarn: DK or Sport Weight Cotton. Colors: Biscuit Beige (Skin), Midnight Black, Snow White, Burgundy Wine, Cream (Dress), plus scraps of Blue, Yellow, and Red.
🪡 Hook: 2.5mm or 2.75mm (keep tension tight for no holes)
✨ Other Materials: Fiberfill stuffing, 10mm safety eyes, tapestry needle, stitch markers, embroidery needle.
Abbreviations & Stitches Used
ch: chain
sl st: slip stitch
sc: single crochet
inc: increase (2 sc in one stitch)
dec: decrease (invisible decrease preferred)
BLO: back loop only
The Complete Belle Pattern
The Artist’s Head (Biscuit Beige)
We begin with the seat of her imagination.
R1: Start with a Magic Ring, 6 sc into ring (6)
R2: Inc in each st around (12)
R3: (Sc 1, inc) repeat 6 times (18)
R4: (Sc 2, inc) repeat 6 times (24)
R5: (Sc 3, inc) repeat 6 times (30)
R6: (Sc 4, inc) repeat 6 times (36)
R7: (Sc 5, inc) repeat 6 times (42)
R8: (Sc 6, inc) repeat 6 times (48)
R9: (Sc 7, inc) repeat 6 times (54)
R10: Sc in each st around (54)
R11: Sc in each st around (54)
R12: Sc in each st around (54)
R13: Sc in each st around (54)
R14: Sc in each st around (54)
R15: Sc in each st around (54)
R16: Sc in each st around (54)
R17: Sc in each st around (54)
R18: Sc in each st around (54)
R19: (Sc 7, dec) repeat 6 times (48)
R20: (Sc 6, dec) repeat 6 times (42)
Insert safety eyes between R14 and R15, about 9 stitches apart.
R21: (Sc 5, dec) repeat 6 times (36)
R22: (Sc 4, dec) repeat 6 times (30)
R23: (Sc 3, dec) repeat 6 times (24)
Stuff the head firmly, shaping it to be round and sweet.
R24: (Sc 2, dec) repeat 6 times (18)
Fasten off, leaving a long tail for sewing.
Legs (Make 2) & Body
We start with her sensible loafers.
Start with Black Yarn
R1: Magic Ring, 6 sc (6)
R2: Inc in each st around (12)
R3: (Sc 1, inc) repeat 6 times (18)
R4: (Sc 2, inc) repeat 6 times (24)
R5: BLO Sc in each st around (creates shoe sole edge) (24)
R6: Sc in each st around (24)
R7: Sc 6, dec 6 times, sc 6 (18)
Switch to Biscuit Beige
R8: Sc in each st around (18)
R9–R20: Sc in each st around (18) – Stuff firmly as you go.
Fasten off the first leg. Make the second leg but DO NOT fasten off.
R21 (Joining): Chain 3, join to the first leg with a sc. Sc around the first leg (18), sc across the chain (3), sc around the second leg (18), sc across the other side of chain (3). (42)
Switch to Black Yarn (Begin Shirt Stripes)
R22: Sc in each st around (42)
Switch to White Yarn
R23: Sc in each st around (42)
Continue alternating Black and White every 2 rounds.
R24–R30: Sc in each st around (maintain stripe pattern) (42)
R31: (Sc 5, dec) repeat 6 times (36)
R32–R35: Sc in each st around (36)
R36: (Sc 4, dec) repeat 6 times (30)
R37–R39: Sc in each st around (30)
R40: (Sc 3, dec) repeat 6 times (24)
R41: (Sc 2, dec) repeat 6 times (18)
Fasten off. Leave a tail. Stuff the body.
The Creative Arms (Make 2)
Start with Biscuit Beige
R1: Magic Ring, 6 sc (6)
R2: (Sc 1, inc) repeat 3 times (9)
R3: (Sc 2, inc) repeat 3 times (12)
Switch to Black (Start Stripes)
R4–R15: Sc in each st around, alternating Black and White every 2 rounds (12)
R16: (Sc 2, dec) repeat 3 times (9)
Fasten off, leave tail for sewing.
Floppy Ears (Make 2, Biscuit Beige)
R1: Magic Ring, 6 sc (6)
R2: Inc in each st around (12)
R3: (Sc 1, inc) repeat 6 times (18)
R4–R14: Sc in each st around (18)
R15: (Sc 7, dec) repeat 2 times (16)
R16–R20: Sc in each st around (16)
R21: (Sc 6, dec) repeat 2 times (14)
R22–R25: Sc in each st around (14)
Fold the opening flat and sc across to close. Do not stuff.
The Artist’s Pinafore (Cream Yarn)
Worked flat in rows initially.
R1: Ch 31, turn.
R2: Sc in 2nd ch from hook and across (30)
R3: Ch 1, turn. (Sc 4, inc) repeat across (36)
R4: Ch 1, turn. Sc across (36)
R5: Ch 1, turn. (Sc 5, inc) repeat across (42)
Join with sl st to first st to work in rounds for the skirt.
R6: Ch 2 (counts as first dc), dc in same st, dc in next st, 2 dc in next repeat around. (This creates the flare).
R7–R12: Dc in each st around.
Fasten off. Reattach yarn to the front waistband to make the bib:
Row 1: Pick up 10 sts centered on the front. Sc 10.
Row 2–5: Sc across (10).
Make two straps: Ch 20 (measure against doll), attach to top corners of bib and cross in back to sew to waistband.
Artisan Note: Use scraps of Blue, Yellow, and Red to embroider messy stars and blobs on the skirt.
The Burgundy Beret
R1: Magic Ring, 6 sc (6)
R2: Inc around (12)
R3: (Sc 1, inc) around (18)
R4: (Sc 2, inc) around (24)
R5: (Sc 3, inc) around (30)
R6: (Sc 4, inc) around (36)
R7: (Sc 5, inc) around (42)
R8: (Sc 6, inc) around (48)
R9–R11: Sc around (48)
R12: (Sc 6, dec) around (42)
R13: (Sc 5, dec) around (36)
Fasten off. Add a tiny “stalk” on top by chaining 4 and sl st back down.
Accessories: Palette Bag & Brush
Bag: Make two flat circles of brown (6 sc MR -> up to 24 sts). Sew them together leaving a top opening. Crochet a long chain for the strap. Sew small French knots in different colors on the front.
Brush: Ch 4, join to ring. Sc around for 6 rounds (Brown). Change to Silver (1 round). Change to Blue (2 rounds). Decrease to close.
Assembly & Final Touches
- ➡️ Sew the head securely to the neck opening of the body.
- ➡️ Attach the ears low on the sides of the head (approx round 12) so they flop downwards.
- ➡️ Sew arms to the sides of the body just below the neck.
- ➡️ Dress Belle in her pinafore.
- ➡️ Place the beret on her head (tack it down with a stitch if you wish).
- ➡️ Cross the bag over her shoulder and tuck the brush into her hand or bag.
- ➡️ Embroider a small Y-shape nose in brown thread on the face.
Tips & FAQs
- My head is wobbling: Ensure the neck is stuffed very firmly before sewing. You can also insert a supportive foam roller or extra yarn inside the neck.
- Can I change the dress? Absolutely. The pinafore is removable, so you can crochet a wardrobe for her.
A Final Word
There she sits, your little artistic companion. I hope Belle brings a splash of color to your home and reminds you that making things by hand is the truest form of magic. Until we meet again in the yarn aisle.