It brings me immense joy to see you here, ready to transform a simple strand of yarn into a character with such history and personality. This project is dear to my heart because it captures the frantic elegance of our favorite storybook timekeeper. Let us pick up our hooks and begin this journey together.
About This Creation & Angle
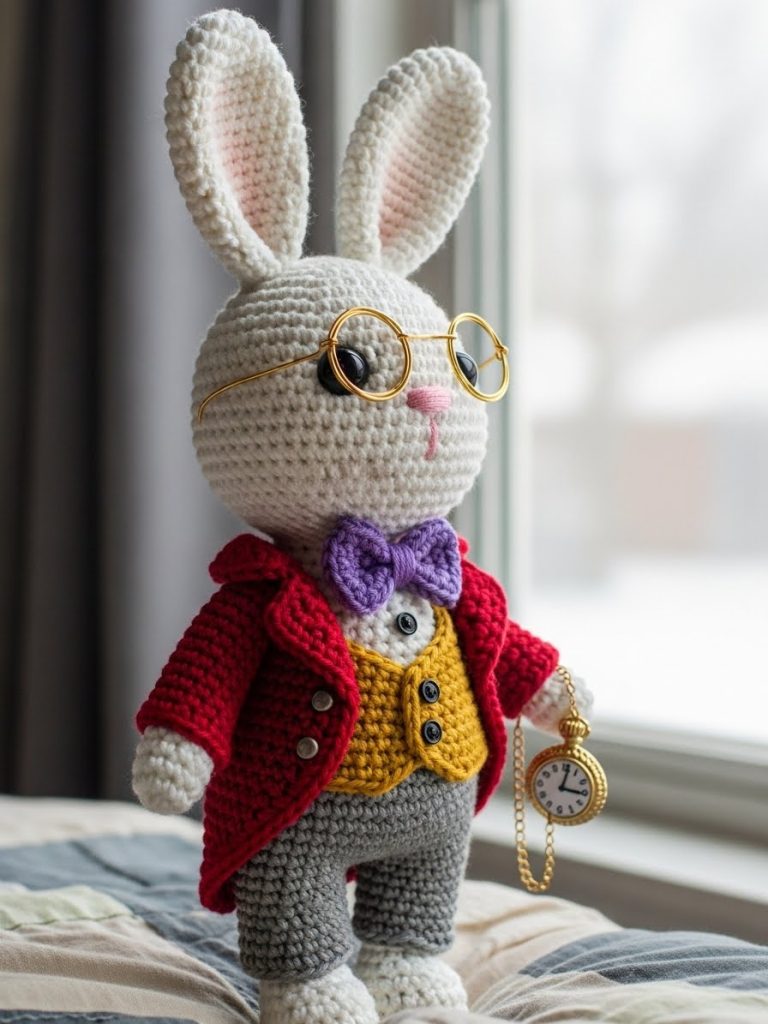
There is something undeniably magnetic about a character who is always running late, yet remains impeccably dressed. In a world of fast fashion and instant gratification, we are doing the opposite; we are slowing down to stitch a character defined by time itself. This project is not just a toy; it is a collectible art piece. By using high-quality cotton yarn and focusing on the “Embrace of Softness” aesthetic—rounded cheeks and a chubby tummy—we transform a classic literary figure into a comforting friend. The removable coat adds an interactive element, making this perfect for display or gentle storytelling.
Project Snapshot
📊 Difficulty: Intermediate (Requires color changes and small accessories)
⏰ Est. Time: 12–15 Hours
📏 Size: 15cm (approx. 6 inches) tall
“Punctuality is the politeness of kings, and the virtue of the crocheter.” — Patricia
Materials & Tools Needed
🧶 Yarn: Sport or DK weight cotton yarn (matte finish is best). Colors: Snow White (approx. 50g), Royal Red (20g), Slate Grey (15g), Mustard Gold (10g), Royal Purple (scrap), Orange/Bronze (scrap).
🪡 Hook: 2.25mm or 2.50mm (to ensure tight tension).
✨ Other Materials: Fiberfill stuffing (high quality, clump-free). 10mm Safety Eyes (Black). Pink embroidery thread (for nose). Black embroidery thread (eyebrows). Thin craft wire (gold or silver) for the spectacles. Tapestry needle and stitch markers.
Abbreviations & Stitches Used
ch: chain
sl st: slip stitch
sc: single crochet
inc: increase (2 sc in one stitch)
dec: decrease (invisible decrease preferred)
BLO: back loop only
FLO: front loop only
hdc: half double crochet
The Complete Punctual Rabbit Pattern
The Head (The Echo of Youth)
Make in White Yarn.
R1: Start 6 sc in a magic ring. (6)
R2: Inc in every st around. (12)
R3: (1 sc, inc) x 6. (18)
R4: (2 sc, inc) x 6. (24)
R5: (3 sc, inc) x 6. (30)
R6: (4 sc, inc) x 6. (36)
R7: (5 sc, inc) x 6. (42)
R8: (6 sc, inc) x 6. (48)
R9: (7 sc, inc) x 6. (54)
R10–R22: Sc in each st around (13 rounds). Note: This creates the large forehead needed for the baby schema.
R23: (7 sc, dec) x 6. (48)
R24: (6 sc, dec) x 6. (42)
R25: (5 sc, dec) x 6. (36)
R26: (4 sc, dec) x 6. (30)
R27: (3 sc, dec) x 6. (24)
Artisan’s Note: Insert safety eyes between R18 and R19, roughly 10 stitches apart. Ensure they are wide-set for the “Gaze of Innocence.” Stuff the head firmly, focusing on the cheeks.
R28: (2 sc, dec) x 6. (18)
Fasten off, leaving a long tail for sewing.
The Ears (Make 2)
Start with White Yarn.
R1: Start 6 sc in a magic ring. (6)
R2: (1 sc, inc) x 3. (9)
R3: (2 sc, inc) x 3. (12)
R4: (3 sc, inc) x 3. (15)
R5–R12: Sc in each st around (8 rounds).
R13: (3 sc, dec) x 3. (12)
R14: (2 sc, dec) x 3. (9)
Fasten off, leaving a tail. Flatten the ear. Do not stuff. Inner Ear Detail: Using Pink yarn, ch 8, sc in second ch from hook and next 5 chs, 3 sc in last ch, work down other side. Sew this pink strip to the center of the white ear.
Legs & Body (The Embrace of Softness)
Begin with White Yarn for the feet.
Make Leg 1:
R1: 6 sc in MR. (6)
R2: Inc in every st. (12)
R3: (3 sc, inc) x 3. (15)
R4–R6: Sc around. (15)
R7: Change to Slate Grey. Sc around. (15)
Fasten off Leg 1. Make Leg 2, but do not fasten off.
Joining:
R8: From Leg 2, ch 3. Join to Leg 1 with a sc. Sc around Leg 1 (15), sc across one side of ch-3 (3), sc around Leg 2 (15), sc across other side of ch-3 (3). Total stitches: 36.
R9–R13: Sc around in Slate Grey. (36) This forms the trousers.
R14: Change to Mustard Gold (The Waistcoat). Sc in BLO around. (36)
R15–R17: Sc around in Mustard Gold. (36)
R18: (4 sc, dec) x 6. (30)
R19–R20: Sc around. (30)
R21: Change to White (The Shirt/Neck). (3 sc, dec) x 6. (24)
R22: (2 sc, dec) x 6. (18)
R23: Sc around. (18)
Fasten off. Stuff the body firmly, especially the tummy area.

The Arms (Make 2)
Start with White Yarn.
R1: 5 sc in MR. (5)
R2: Inc in every st. (10)
R3–R4: Sc around. (10)
R5: Dec, 8 sc. (9)
R6–R11: Sc around. (9)
Fasten off. Lightly stuff the lower hand only.
The Red Coat (Removable)
Use Royal Red Yarn. Worked in rows.
Row 1: Ch 25. Sc in 2nd ch from hook and across. (24)
Row 2: Ch 1, turn. (2 sc, inc) across. (32)
Row 3: Ch 1, turn. 5 sc (front), ch 4, skip 6 (armhole), 10 sc (back), ch 4, skip 6 (armhole), 5 sc (front).
Row 4: Ch 1, turn. Sc across all sts and chains. (28)
Row 5–8: Sc across. (28)
Row 9 (The Tailcoat): Sl st in first 8 sts. Sc in next 12 sts. Leave remaining sts unworked. Turn.
Row 10–12: Ch 1, turn. Sc across these 12 center stitches to form the back flap.
Fasten off. Weave in ends. Add a small fold to the collar if desired.
The Pocket Watch & Bowtie
Watch: With Orange/Bronze yarn, 6 sc in MR. R2: Inc x 6 (12). Fasten off. Embroider a white circle in the center and small black ticks for numbers. Chain 20 for the chain and attach to the coat pocket area.
Bowtie: With Purple yarn, ch 3. In the first ch, work: (2 dc, ch 2, sl st, ch 2, 2 dc, ch 2, sl st). Tighten center. Wrap yarn around the middle to cinch.
Assembly & Final Touches
➡️ Head to Body: Sew the head to the neck opening of the body. Ensure the head is straight.
➡️ Limbs: Sew arms to the sides of the body at the shoulder line (R21 of body).
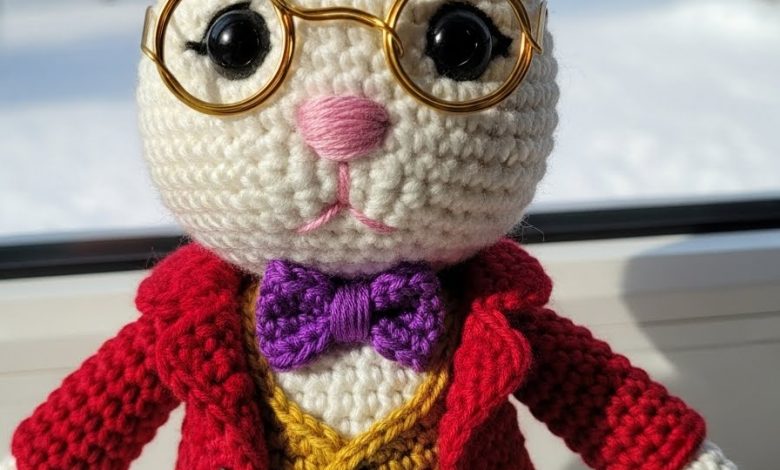
➡️ Face: Embroider a small triangular pink nose between the eyes. Use black thread to stitch eyebrows high on the forehead for a worried expression.
➡️ Spectacles: Bend your thin craft wire into two small circles connected by a bridge. Carefully insert the ends into the head near the eyes. Secure with a dab of glue if this is not for a small child.
➡️ Dressing: Put the Red Coat on the rabbit. Stitch the Bowtie securely to the neck (or to the shirt collar). Tuck the watch into the coat.
Tips & FAQs
Q: My rabbit’s head is wobbling. What should I do? A: This is common with the “Echo of Youth” large head style. Ensure the neck is stuffed extremely firmly. You can also insert a supportive foam roller or extra yarn tail inside the neck for stability.
Q: Can I brush the tail? A: Absolutely! For the tail (a simple white pom-pom or crochet ball), use a pet slicker brush to fluff up the yarn fibers for a realistic bunny texture.
A Final Word
And just like that, you have frozen time. Your Punctual Rabbit is ready to sit upon a shelf, a reminder that while time marches on, the beauty of handmade craft lasts forever. I cannot wait to see your version of this distinguished gentleman.