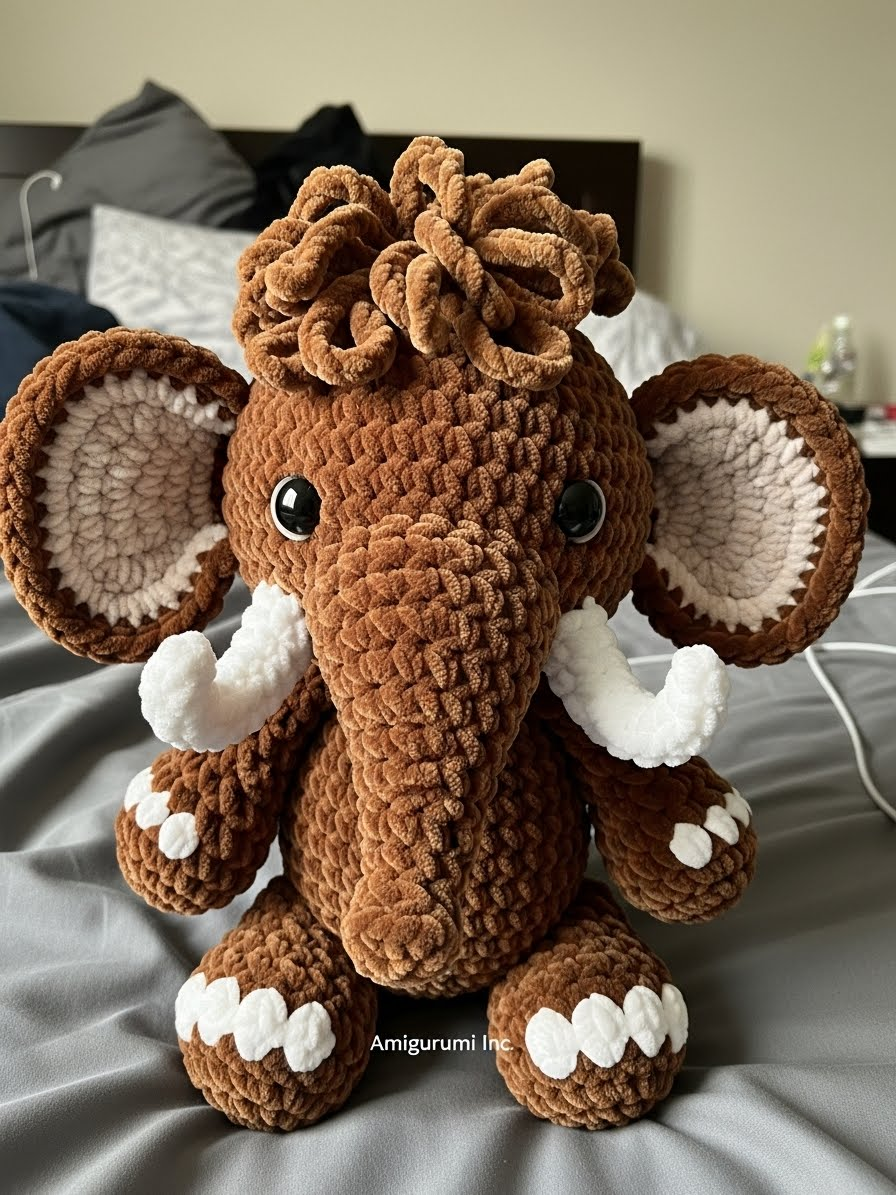
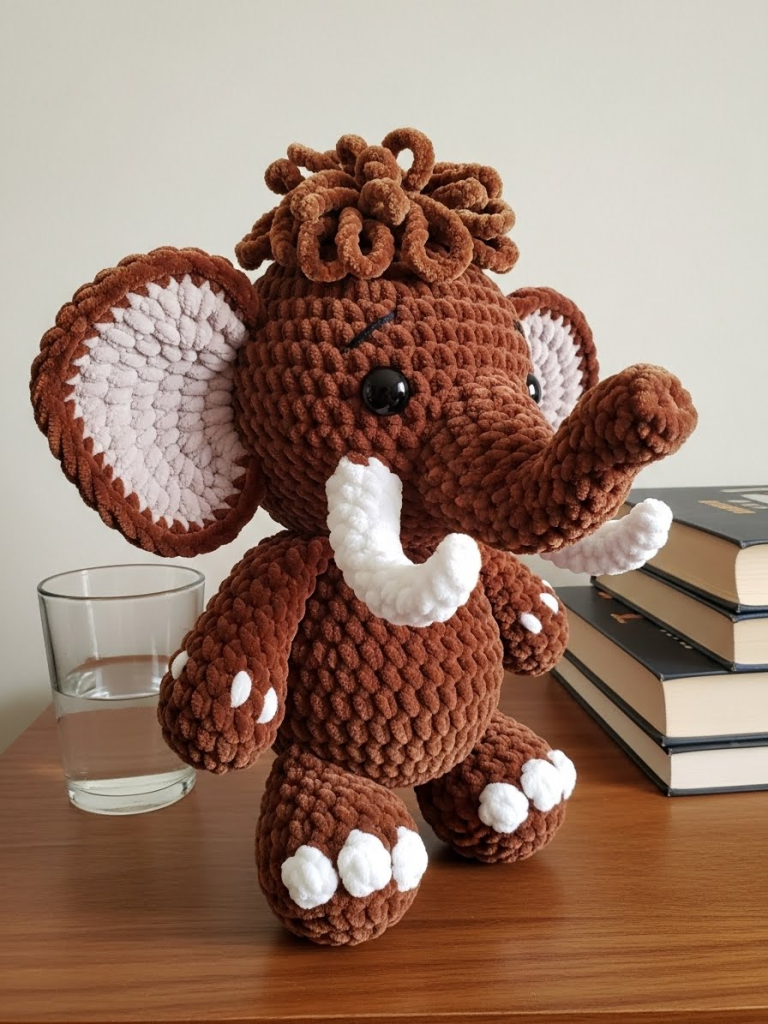
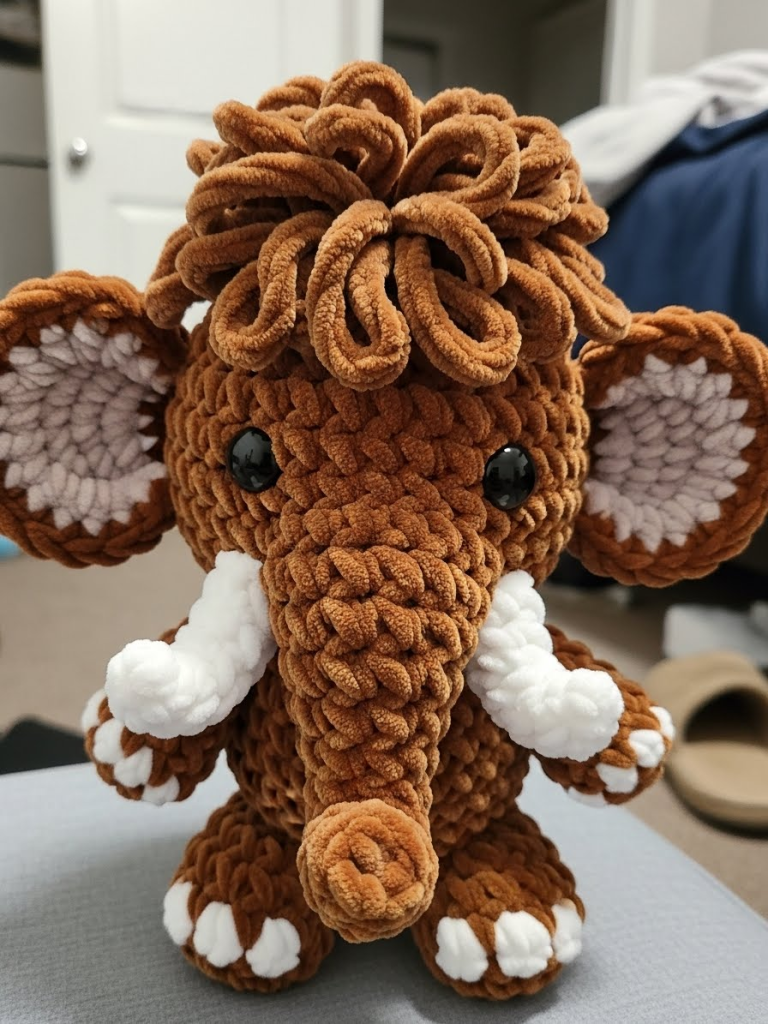
The studio feels warmer already with the thought of this project. Barnaby is not just a toy; he is a lesson in texture and patience, a soft companion from a forgotten age brought to life by your hands. Gather your softest skeins, for we are about to make magic.
About This Creation & The Velvet Angle
Barnaby was born from a desire to embrace the “squish factor.” While many amigurumi projects rely on tight cotton for definition, this project celebrates the chaotic softness of chenille and velvet yarns. The challenge here—and the joy—lies in working with these plush fibers without losing your stitch count.
This pattern is designed specifically to anchor that fluffiness. We use a slightly smaller hook than the yarn label suggests to ensure the fabric remains dense, keeping the stuffing safely inside while maximizing the tactile experience. He is the perfect project for gifting to little ones or keeping as a comforting desk companion.
Project Snapshot:
📊 Difficulty: Intermediate (Working with velvet requires feeling stitches rather than seeing them)
⏰ Est. Time: 6 – 8 Hours
📏 Size: Approx. 22cm tall (using Super Bulky yarn)
“Texture is the language of touch; let Barnaby speak softly.” — Patricia
Materials & Tools Needed
🧶 Yarn: Super Bulky (Size 6) Chenille/Velvet Yarn. ➡️ Color A: Cocoa Brown (approx. 150g) ➡️ Color B: Cream/Off-White (approx. 50g for tusks and toes) ➡️ Color C: Sand/Beige (small amount for inner ears)
🪡 Hook: 5.0mm or 5.5mm (depending on your tension)
✨ Other Materials: ➡️ 16mm Safety Eyes (Black) ➡️ Polyester fiberfill stuffing ➡️ Tapestry needle (large eye for bulky yarn) ➡️ Stitch markers (essential for velvet yarn!)
Abbreviations & Stitches Used
ch: chain
sl st: slip stitch
sc: single crochet
inc: increase (2 sc in one st)
dec: decrease (sc 2 together)
BLO: back loop only
Bobble: 4-dc bobble stitch (for toes)
Loop St: Loop stitch (for the hair)
The Complete Barnaby Mammoth Pattern
The Head (Color A)
Worked in continuous rounds. Stuff firmly as you go.
Rnd 1: 6 sc in a magic ring (6)
Rnd 2: inc in each st around (12)
Rnd 3: (sc 1, inc) x 6 (18)
Rnd 4: (sc 2, inc) x 6 (24)
Rnd 5: (sc 3, inc) x 6 (30)
Rnd 6: (sc 4, inc) x 6 (36)
Rnd 7: (sc 5, inc) x 6 (42)
Rnd 8 – 16: sc in each st around (42)
Rnd 17: (sc 6, inc) x 6 (48) Cheek shaping
Rnd 18 – 20: sc in each st around (48)
Insert safety eyes between Rnds 14 and 15, roughly 7 stitches apart.
Rnd 21: (sc 6, dec) x 6 (42)
Rnd 22: (sc 5, dec) x 6 (36)
Rnd 23: (sc 4, dec) x 6 (30)
Rnd 24: (sc 3, dec) x 6 (24)
Rnd 25: (sc 2, dec) x 6 (18)
Rnd 26: (sc 1, dec) x 6 (12)
Rnd 27: dec around (6)
Fasten off and weave in end.
The Crown / Hair Cap (Color A)
This piece is made separately and sewn on top to create the messy curls.
Rnd 1: 6 sc in a magic ring (6)
Rnd 2: (Loop St inc) in each st around (12)
Rnd 3: (Loop St 1, Loop St inc) x 6 (18)
Rnd 4: (Loop St 2, Loop St inc) x 6 (24)
Rnd 5: Loop St in each st around (24)
Fasten off, leaving a long tail for sewing.
The Trunk (Color A)
Rnd 1: 6 sc in a magic ring (6)
Rnd 2: inc in each st around (12)
Rnd 3 – 6: sc in each st around (12)
Rnd 7: (sc 2, dec) x 3 (9)
Rnd 8 – 12: sc in each st around (9)
Rnd 13: inc, sc 8 (10)
Rnd 14: sc in each st around (10)
Stuff lightly. Fasten off, leaving a tail for sewing.
The Ears (Make 2)
Inner Ear (Color C)
Rnd 1: 6 sc in magic ring (6)
Rnd 2: inc in each st (12)
Rnd 3: (sc 1, inc) x 6 (18)
Rnd 4: (sc 2, inc) x 6 (24)
Fasten off.
Outer Ear (Color A)
Repeat Rnds 1-4 of Inner Ear. Do not fasten off.
Place Inner Ear against Outer Ear (wrong sides facing).
Rnd 5: Working through both layers using Color A, (sc 3, inc) around (30).
Fasten off, leave tail for sewing.
The Tusks (Make 2 – Color B)
Rnd 1: 4 sc in a magic ring (4)
Rnd 2 – 6: sc in each st around (4)
Rnd 7: inc, sc 3 (5)
Rnd 8: sc in each st around (5)
Stuff very lightly or use pipe cleaners for shape. Fasten off.
The Body (Color A)
Rnd 1: 6 sc in a magic ring (6)
Rnd 2: inc in each st around (12)
Rnd 3: (sc 1, inc) x 6 (18)
Rnd 4: (sc 2, inc) x 6 (24)
Rnd 5: (sc 3, inc) x 6 (30)
Rnd 6: (sc 4, inc) x 6 (36)
Rnd 7: (sc 5, inc) x 6 (42)
Rnd 8 – 14: sc in each st around (42)
Rnd 15: (sc 5, dec) x 6 (36)
Rnd 16 – 17: sc in each st around (36)
Rnd 18: (sc 4, dec) x 6 (30)
Rnd 19: sc in each st around (30)
Rnd 20: (sc 3, dec) x 6 (24)
Fasten off, leave long tail for sewing head to body.
The Legs (Make 4 – Colors B & A)
Start with Color B (Cream)
Rnd 1: 6 sc in a magic ring (6)
Rnd 2: inc in each st around (12)
Rnd 3: Make Toes (Bobble, sc 2) x 4 (12)
Change to Color A (Cocoa)
Rnd 4: BLO sc in each st around (12)
Rnd 5 – 8: sc in each st around (12)
Stuff firmly. Fasten off, leave tail.
Artisan’s Notes: When working the toes in Round 3, ensure you push the Bobble stitch to the outside (right side) of the work so they “pop” out visibly.
Assembly & Final Touches
- Attach Head: Sew the head securely to the neck opening of the body. Add extra stuffing in the neck area to prevent wobbling.
- Position Legs: Pin the four legs to the bottom of the body in a square formation. Ensure Barnaby sits flat before sewing.
- Face Features: Sew the trunk centered below the eyes. Sew the tusks on either side of the trunk, curving slightly upward.
- Ears & Hair: Sew the ears to the sides of the head (approx Rnd 12). Finally, place the “Hair Cap” on the very top of the head and stitch down along the rim.
Tips & FAQs
My velvet yarn is “worming” (loops coming loose). Velvet yarn requires a tighter tension. If this happens, try sizing down your hook by 0.5mm.
Can I brush the hair? I do not recommend using a wire brush on velvet yarn as it can strip the fabric cord. The loop stitches provide enough texture on their own!
A Final Word
There is a quiet satisfaction in completing a project like Barnaby. He represents patience and the joy of tactile creation. I hope his chubby presence brings a smile to your space. Until we meet again at the drafting table, keep your stitches even and your heart open.

