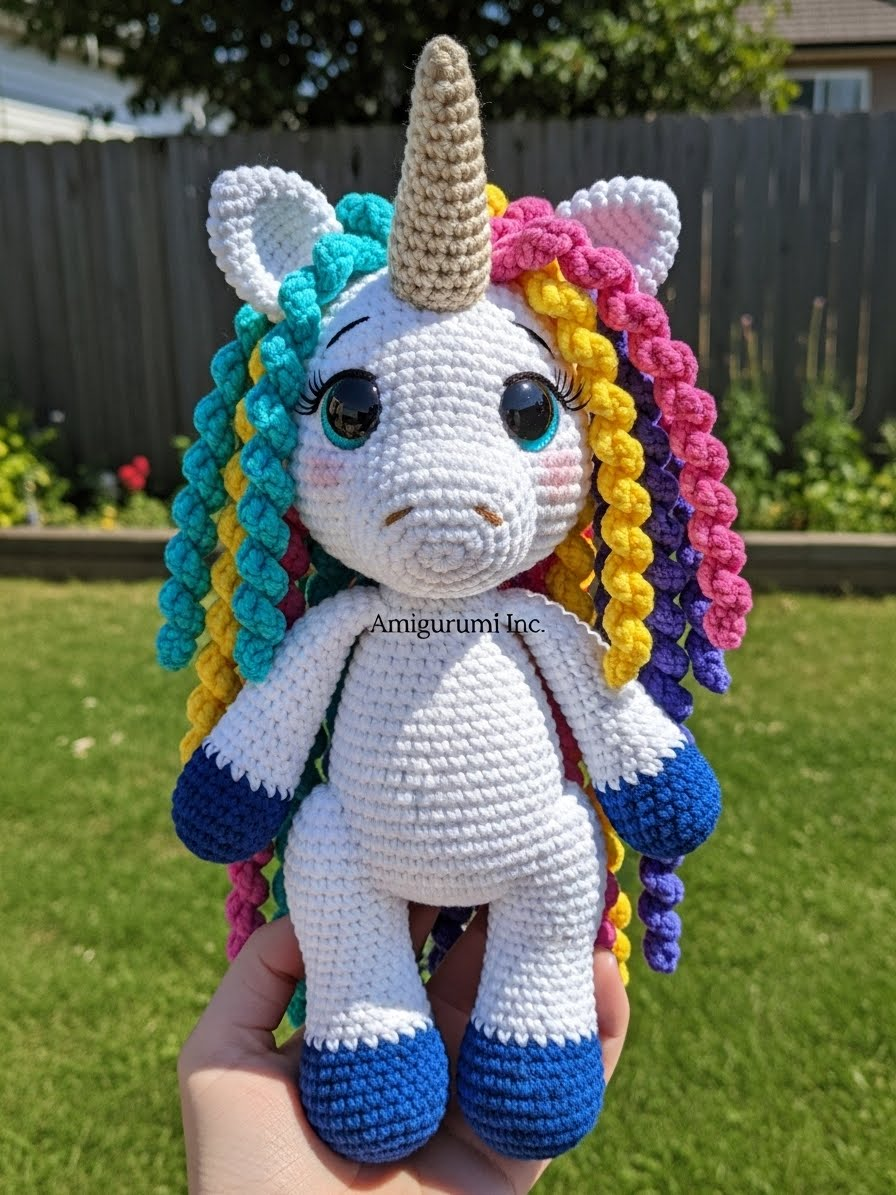
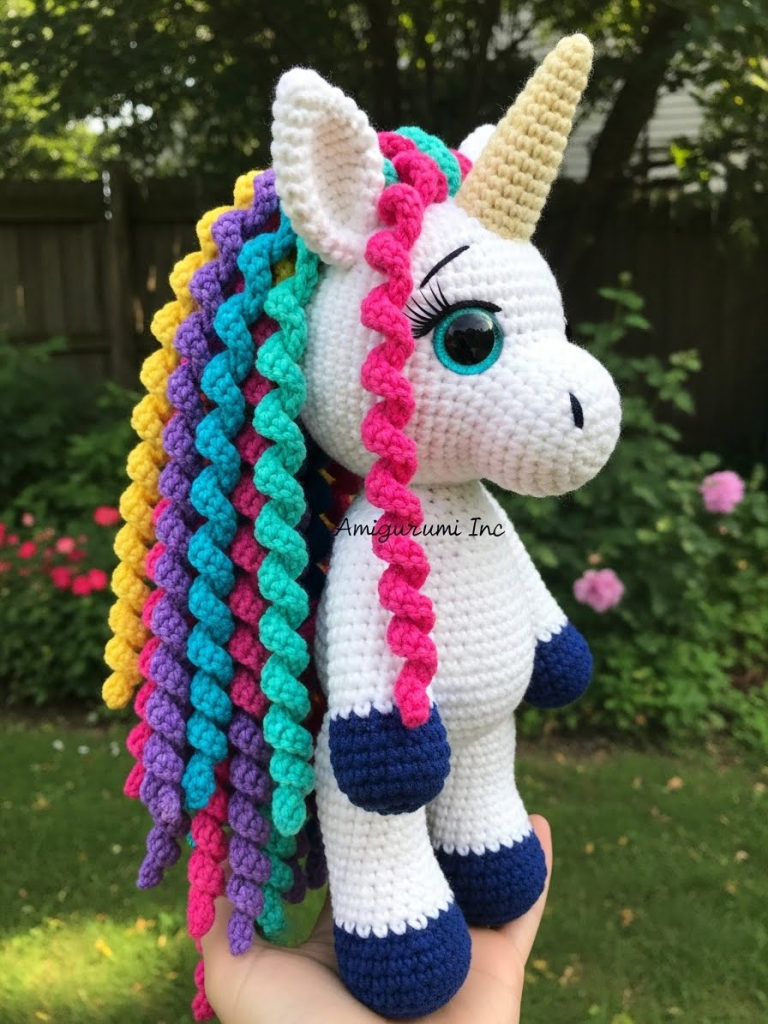
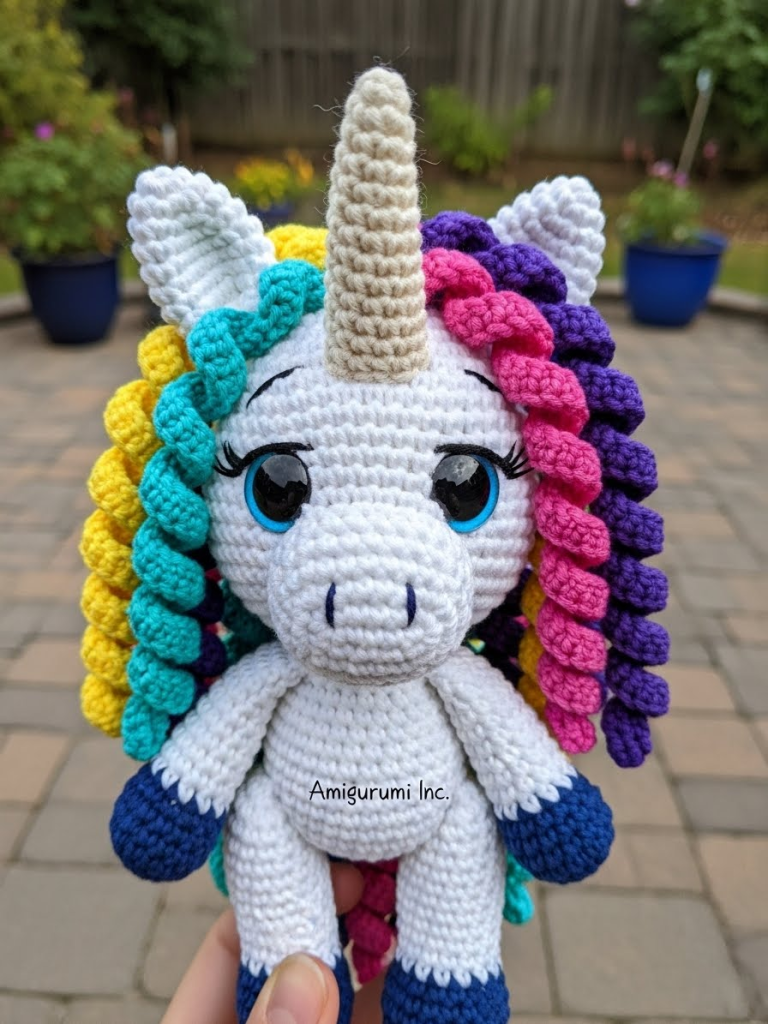
My dearest creator, welcome back to the atelier. Today we embark on a journey of color and texture. Lumina is not merely a toy; she is a beacon of joy, designed to sit faithfully on a shelf or be carried on adventures by small hands. Her mane is a labor of love, a cascade of spirals that requires patience but rewards you with spectacular tactility. Let us begin this work with open hearts and steady hands.
About This Creation & The Joy of Texture
There is a profound satisfaction in working with corkscrew spirals. While many patterns rely on simple brushed yarn for manes, Lumina uses structured crochet curls. This approach ensures the mane holds its bounce and volume over time, preventing that matted look that often plagues well-loved toys.
Commercially, this pattern appeals to those seeking a “heirloom quality” gift. The distinct color change at the hooves and the generous, voluminous mane set this project apart from quick-stitch market fills. It is a premium design meant to be treasured.
Project Snapshot:
📊 Difficulty: Intermediate (Requires patience for repetitive curls and precise assembly)
⏰ Est. Time: 8 – 10 Hours
📏 Size: Approx. 22cm Tall (Standing)
“The soul of the unicorn lives in the mane; do not rush the curls, for they are her crown.” — Patricia
Materials & Tools Needed
🧶 Yarn: DK or Worsted Weight Cotton/Acrylic blend. Colors: Pristine White (Main), Deep Royal Blue (Hooves), Cream/Gold (Horn). Rainbow Accents: Pastel Pink, Teal, Lemon Yellow, Lavender.
🪡 Hook: 2.5mm or 2.75mm (aim for a tight gauge)
✨ Other Materials: 14mm Safety Eyes (Black or colored iris), Fiberfill stuffing, Tapestry needle, Stitch markers, Black embroidery thread.
Abbreviations & Stitches Used
ch: chain
sl st: slip stitch
sc: single crochet
inc: increase (2 sc in one stitch)
dec: decrease (invisible decrease preferred)
blo: back loop only
The Complete Lumina Pattern
Component 1: The Head
We begin at the muzzle, working towards the back of the head to create a classic equine profile.
Rnd 1: Start with White yarn. 6 sc in a magic ring (6)
Rnd 2: inc in each st around (12)
Rnd 3: ➡️ sc 1, inc ⬅️ repeat 6 times (18)
Rnd 4: ➡️ sc 2, inc ⬅️ repeat 6 times (24)
Rnd 5: ➡️ sc 3, inc ⬅️ repeat 6 times (30)
Rnd 6 – 8: sc in each st around (30)
Rnd 9: ➡️ sc 4, inc ⬅️ repeat 6 times (36)
Rnd 10: ➡️ sc 5, inc ⬅️ repeat 6 times (42) (This begins the forehead expansion)
Rnd 11: ➡️ sc 6, inc ⬅️ repeat 6 times (48)
Rnd 12: ➡️ sc 7, inc ⬅️ repeat 6 times (54)
Rnd 13 – 20: sc in each st around (54)
Rnd 21: ➡️ sc 7, dec ⬅️ repeat 6 times (48)
Rnd 22: ➡️ sc 6, dec ⬅️ repeat 6 times (42)
Artisan’s Note: Insert safety eyes between Rounds 10 and 11, spacing them approximately 10 stitches apart. Ensure they sit just above the muzzle expansion.
Rnd 23: ➡️ sc 5, dec ⬅️ repeat 6 times (36)
Rnd 24: ➡️ sc 4, dec ⬅️ repeat 6 times (30)
Rnd 25: ➡️ sc 3, dec ⬅️ repeat 6 times (24)
Stuff the head firmly, paying attention to the cheeks.
Rnd 26: ➡️ sc 2, dec ⬅️ repeat 6 times (18)
Rnd 27: ➡️ sc 1, dec ⬅️ repeat 6 times (12)
Rnd 28: dec around (6). Fasten off and weave in end.
Component 2: The Body
Worked from the neck down.
Rnd 1: With White yarn, 6 sc in magic ring (6)
Rnd 2: inc in each st around (12)
Rnd 3: ➡️ sc 1, inc ⬅️ repeat 6 times (18)
Rnd 4: ➡️ sc 2, inc ⬅️ repeat 6 times (24)
Rnd 5: ➡️ sc 3, inc ⬅️ repeat 6 times (30)
Rnd 6: ➡️ sc 4, inc ⬅️ repeat 6 times (36)
Rnd 7: ➡️ sc 5, inc ⬅️ repeat 6 times (42)
Rnd 8 – 18: sc in each st around (42)
Rnd 19: ➡️ sc 5, dec ⬅️ repeat 6 times (36)
Rnd 20: ➡️ sc 4, dec ⬅️ repeat 6 times (30)
Rnd 21: ➡️ sc 3, dec ⬅️ repeat 6 times (24)
Begin stuffing the body. Do not overstuff the bottom if you want it to sit flat, but Lumina is designed to stand, so stuff firmly.
Rnd 22: ➡️ sc 2, dec ⬅️ repeat 6 times (18)
Rnd 23: ➡️ sc 1, dec ⬅️ repeat 6 times (12)
Rnd 24: dec around (6). Fasten off, leaving a long tail for closing.
Component 3: The Hooves & Legs (Make 4)
We create four identical legs, but the placement will define front vs. back.
Rnd 1: With Royal Blue yarn, 6 sc in magic ring (6)
Rnd 2: inc in each st around (12)
Rnd 3: ➡️ sc 1, inc ⬅️ repeat 6 times (18)
Rnd 4: BLO sc in each st around (18) (Creates the flat hoof bottom)
Rnd 5 – 6: sc in each st around (18)
Rnd 7: Change to White yarn. sc in each st around (18)
Rnd 8 – 16: sc in each st around (18)
Stuff the leg firmly at the bottom, lighter at the top.
Rnd 17: ➡️ sc 1, dec ⬅️ repeat 6 times (12)
Rnd 18: dec around (6). Fasten off, leaving a long tail for sewing.
Component 4: The Mane & Tail Curls
This is the centerpiece. You will make approximately 12-15 curls for the mane and 5-6 for the tail. Mix your colors (Pink, Teal, Yellow, Lavender).
Short Curl (For bangs/front):
Row 1: Chain 25.
Row 2: Starting from 2nd ch from hook, 2 sc in each ch across. Fasten off.
Long Curl (For neck and tail):
Row 1: Chain 40.
Row 2: Starting from 2nd ch from hook, 2 sc in each ch across. Fasten off.
Artisan’s Note: As you work, the crochet will naturally spiral. Assist it by twisting it with your fingers to tighten the coil.
Component 5: Ears (Make 2)
Rnd 1: With White yarn, 4 sc in magic ring (4)
Rnd 2: ➡️ sc 1, inc ⬅️ repeat 2 times (6)
Rnd 3: ➡️ sc 2, inc ⬅️ repeat 2 times (8)
Rnd 4: ➡️ sc 3, inc ⬅️ repeat 2 times (10)
Rnd 5 – 7: sc in each st around (10)
Rnd 8: dec around (5). Fasten off. Flatten the ear; do not stuff.
Component 6: The Horn
Rnd 1: With Cream/Gold yarn, 4 sc in magic ring (4)
Rnd 2: ➡️ sc 1, inc ⬅️ repeat 2 times (6)
Rnd 3: sc in each st around (6)
Rnd 4: ➡️ sc 2, inc ⬅️ repeat 2 times (8)
Rnd 5 – 8: sc in each st around (8)
Fasten off. Lightly stuff.
Assembly & Final Touches
- Body & Head: Sew the head to the body. Ensure the chin is lifted slightly for a proud posture.
- Legs: Pin the four legs to the bottom of the body in a rectangular formation. Sew firmly. If the legs splay, you can tack the top inner thighs together for stability.
- Facial Features: Embroider thick black eyelashes at the outer corners of the eyes. Embroider two small nostrils on the muzzle.
- The Crown: Sew the horn exactly in the center of the forehead, between the eyes but slightly higher (Rounds 13-15). Sew ears on either side of the horn.
- The Mane: This requires an artistic eye. Sew the shorter curls in front of the ears (the bangs) and the longer curls cascading down the back of the head and neck. Alternate colors for a vibrant effect.
- The Tail: Bundle 5-6 long curls together at one end and sew the cluster to the lower back of the body.
Tips & FAQs
Q: My curls are straight, not spiraling.
A: Ensure you are putting at least 2 single crochets in every chain stitch. If they are still loose, try 3 single crochets per chain. Twist them manually after finishing to “set” the shape.
Q: Can I brush the yarn?
A: For this specific design, I advise against brushing. The definition of the corkscrew curls is what gives Lumina her signature look.
A Final Word
When you fasten that final thread, take a moment to admire the vibrancy you have brought into the world. Lumina is a celebration of color and patience. May she bring light to whoever holds her.
Yours in creation,
Patricia Poltera

