My Dearest Maker,
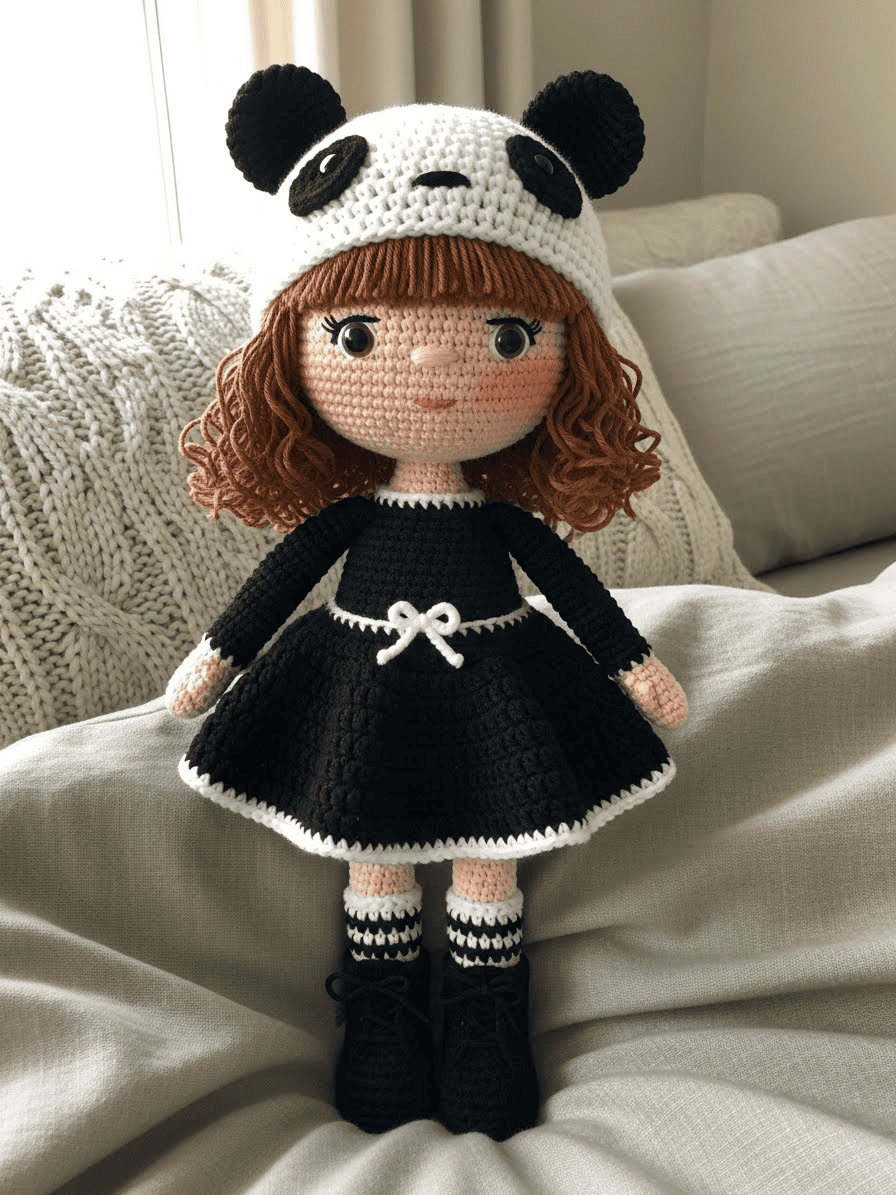
There is a quiet magic in watching a personality emerge from a simple strand of yarn. Pippa is not just a doll; she is a character waiting for her story to be told. I have designed this pattern to challenge you gently, guiding you through the nuanced shaping of her face and the detailed construction of her wardrobe. Let us begin this journey of creation together.
About This Creation
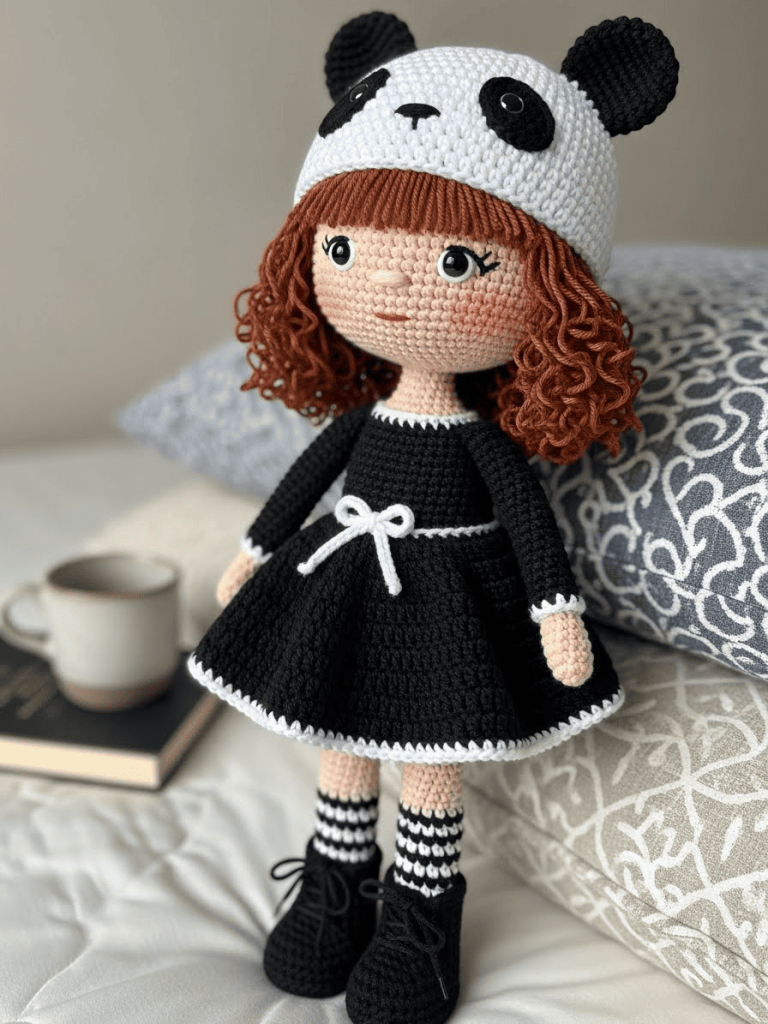
In the world of amigurumi, the difference between a toy and a keepsake often lies in the wardrobe. Pippa was born from the idea that accessories define the character. By designing a removable “Panda” hat and a detailed dress, we transform a classic doll base into a storytelling piece. This project focuses on “The Layered Look,” teaching you how to build dimension not just through stitch texture, but through independent clothing pieces that fit the doll perfectly. It is an exercise in precision and patience, but the result is a professional-grade creation you will be proud to display.
Project Snapshot
📊 Difficulty: Intermediate to Advanced (requires shaping and color changes)
⏰ Est. Time: 12–15 Hours
📏 Size: Approx. 25cm (10 inches) tall
“True artistry is found in the patience of the stitch and the joy of the finish.” — Patricia
Materials & Tools Needed
🧶 Yarn:
- Skin Tone: Sport weight or DK cotton (Beige/Fair)
- Hair: DK weight acrylic or wool blend (Auburn/Rusty Brown)
- Clothing: DK cotton in Black and White
🪡 Hook: 2.25mm or 2.5mm (depending on your tension)
✨ Other Materials:
- Safety Eyes (10mm or 12mm)
- Fiberfill stuffing
- Tapestry needle
- Small white ribbon for the waist
- Stitch markers
- Black embroidery thread for lashes/mouth
- Blush (powder or fabric paint)
Abbreviations & Stitches Used
ch: chain
sl st: slip stitch
sc: single crochet
inc: increase (2 sc in one st)
dec: decrease (invisible decrease preferred)
hdc: half double crochet
dc: double crochet
BLO: back loop only
FLO: front loop only
The Complete Pippa the Panda Girl Pattern
Component 1: The Legs (Make 2)
Start with Black yarn (The Boots).
➡️ Round 1: 6 sc in magic ring (6)
➡️ Round 2: inc in every st (12)
➡️ Round 3: (1 sc, inc) x 6 (18)
➡️ Round 4: BLO sc in each st around (18)
➡️ Rounds 5–7: sc in each st around (18)
➡️ Round 8: 6 sc, 3 dec, 6 sc (15) – Shaping the front of the boot
➡️ Round 9: 6 sc, 1 dec, 1 sc, 1 dec, 4 sc (13)
➡️ Round 10: sc in each st around (13)
Change to Black and White (Striped Socks). Tip: Carry the yarn up the inside to avoid many ends. Alternate colors every 2 rounds.
➡️ Rounds 11–12: (White) sc in each st around (13)
➡️ Rounds 13–14: (Black) sc in each st around (13)
➡️ Rounds 15–16: (White) sc in each st around (13)
➡️ Rounds 17–18: (Black) sc in each st around (13)
➡️ Rounds 19–20: (White) sc in each st around (13)
Change to Skin Tone.
➡️ Rounds 21–28: sc in each st around (13)
➡️ Fasten off the first leg. Do not fasten off the second leg.
Component 2: The Body
Continue from the second leg.
➡️ Round 29: ch 3, join to the first leg with a sc. Sc in remaining 12 st of first leg, sc in 3 ch, sc in 13 st of second leg, sc in other side of 3 ch (32)
➡️ Rounds 30–38: sc in each st around (32) – The hips and torso
➡️ Round 39: (6 sc, dec) x 4 (28)
➡️ Rounds 40–44: sc in each st around (28)
➡️ Round 45: (5 sc, dec) x 4 (24)
➡️ Round 46: sc in each st around (24)
➡️ Round 47: (2 sc, dec) x 6 (18)
➡️ Round 48: (1 sc, dec) x 6 (12) – Neck
➡️ Rounds 49–50: sc in each st around (12)
➡️ Do not fasten off. Continue directly to the head.
Component 3: The Head
Continue with Skin Tone.
➡️ Round 51: inc in every st (24)
➡️ Round 52: (3 sc, inc) x 6 (30)
➡️ Round 53: (4 sc, inc) x 6 (36)
➡️ Round 54: (5 sc, inc) x 6 (42)
➡️ Round 55: (6 sc, inc) x 6 (48)
➡️ Round 56: (7 sc, inc) x 6 (54)
➡️ Round 57: (8 sc, inc) x 6 (60)
➡️ Rounds 58–70: sc in each st around (60) – 13 rounds for a lovely high forehead
Insert safety eyes between Rounds 62 and 63, approximately 10 stitches apart. Ensure they are low on the face for that “innocent” look.
➡️ Round 71: (8 sc, dec) x 6 (54)
➡️ Round 72: (7 sc, dec) x 6 (48)
➡️ Round 73: (6 sc, dec) x 6 (42)
➡️ Round 74: (5 sc, dec) x 6 (36)
➡️ Round 75: (4 sc, dec) x 6 (30)
➡️ Round 76: (3 sc, dec) x 6 (24)
➡️ Round 77: (2 sc, dec) x 6 (18)
➡️ Round 78: (1 sc, dec) x 6 (12)
➡️ Round 79: dec x 6 (6)
➡️ Fasten off and weave in end.
Component 4: The Arms (Make 2)
Use Skin Tone.
➡️ Round 1: 6 sc in magic ring (6)
➡️ Round 2: (2 sc, inc) x 2 (8)
➡️ Rounds 3–18: sc in each st around (8)
➡️ Fold flat and crochet through both sides to close. Leave a long tail for sewing to Round 47 of the body.
Component 5: The Hair (Wig Cap)
Use Auburn/Rusty Brown yarn.
➡️ Round 1: 6 sc in magic ring (6)
➡️ Round 2: inc in every st (12)
➡️ Round 3: (1 sc, inc) x 6 (18)
➡️ Round 4: (2 sc, inc) x 6 (24)
➡️ Round 5: (3 sc, inc) x 6 (30)
➡️ Round 6: (4 sc, inc) x 6 (36)
➡️ Round 7: (5 sc, inc) x 6 (42)
➡️ Round 8: (6 sc, inc) x 6 (48)
➡️ Rounds 9–14: sc in each st around (48)
The Strands (Worked directly off the cap):
➡️ Bangs: ch 6, start in 2nd ch from hook, sl st 5, sl st into next st on cap. Repeat 5 times for the fringe.
➡️ Long Locks: ch 25, start in 3rd ch from hook, hdc in each ch back (this creates the curl). Sl st into next st on cap. Repeat around the remaining circumference of the cap.
➡️ Sew the wig cap onto the head securely.
Component 6: The Dress
Use Black yarn. Worked in rows first, then rounds.
➡️ Row 1: ch 25. sc in 2nd ch from hook and across (24)
➡️ Row 2: (3 sc, inc) x 6 (30)
➡️ Row 3: (4 sc, inc) x 6 (36)
➡️ Row 4: 5 sc, ch 6 (skip 8 st for armhole), 10 sc, ch 6 (skip 8 st for armhole), 5 sc.
➡️ Row 5: sc across all st and chains (32)
➡️ Rounds 6–10: sc in each st around. Join to work in rounds now.
➡️ Round 11: (BLO) inc in every st (64) – Creating the flare
➡️ Rounds 12–20: dc in each st around (64)
Change to White for trim.
➡️ Round 21: (sc, ch 1, skip 1) around for a picot-style edge.
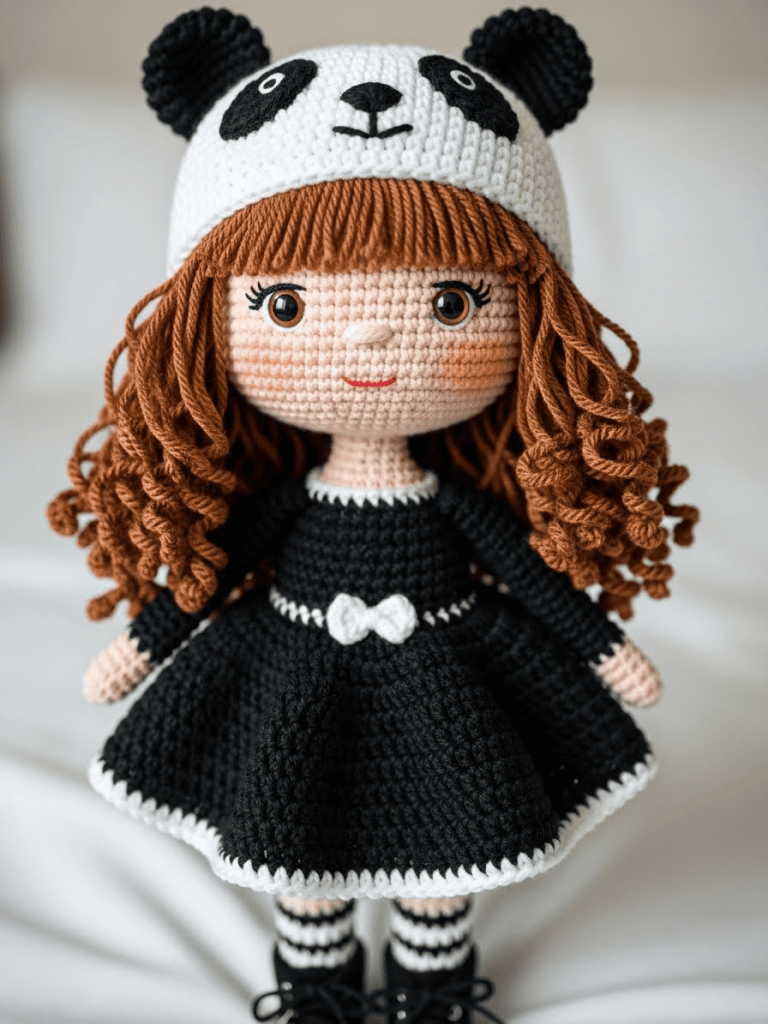
Component 7: The Panda Hat
Use White yarn.
➡️ Rounds 1–8: Follow the same expansion pattern as the Head (up to 60 sc).
➡️ Rounds 9–16: sc in each st around.
➡️ Round 17: sc in next 40 st, ch 1, turn. (Leave the front face open).
➡️ Ears (Make 2 in Black): 6 sc in MR, inc to 12, sc 2 rounds. Sew to top.
➡️ Eye Patches (Make 2 in Black): 6 sc in MR, (1 sc, inc) x 3 (9). Sew to front of hat.
Assembly & Final Touches
- Face: Embroider a small nose using skin tone yarn between the eyes. Add small eyebrows with brown thread (gives her a worried/shy expression). Apply blush to cheeks.
- Dress: Put the dress on the doll. Sew the back gap closed or add a small button.
- Details: Tie the small white ribbon around the waist of the dress and secure with a stitch.
- Hat: Place the Panda Hat over the hair. It should be snug. You can tack it down with a few stitches if you want it permanent, or leave it removable.
Tips & FAQs
- Q: My head is wobbling.
- A: Ensure the neck is stuffed very firmly. You can also insert a supportive wire or a rolled tube of felt into the neck column.
- Q: The hair curls are too tight.
- A: Gently steam the acrylic yarn to relax the curls slightly, pulling them to your desired length.
A Final Word
Holding Pippa in your hands, you feel the weight of the care you put into her. She is not mass-produced; she is a labor of love, a unique character crafted by your own hands. May she bring a smile to whoever meets her gaze.
Yours in creativity,
Patricia


Je souhaiterais les explications en français merci